I will talk about understanding digital trust in this post. Learn the key signs of a trustworthy platform, how digital tools protect your data, and what users can do to stay safe in the modern online world.
The internet has grown into a place where people work, shop, talk, and manage most parts of their lives. That level of dependence brings a new question to the front. Can users trust the platforms they open every day?
Digital trust has become a real concern because so many services now require personal details. Whether someone signs up for a simple app or a complex online tool, the expectation is the same. The platform should keep information safe and treat users responsibly. Yet the online world does not always make this clear. Because of that, knowing how to recognize trustworthy behaviour has turned into an essential skill in 2025.
The New Reality of Online Safety
The way people think about online safety has changed. Years ago, most risks were obvious. Suspicious emails, broken websites, strange files. Today, problems appear in more subtle ways. Some platforms collect far more data than they reveal. Others hide important details in long documents that very few users read. A service can look modern and reliable while still using outdated protection.
This mixed environment means trust cannot rely on appearance alone. A well-designed website might still lack proper security. An app with many downloads might still expose private information. People need more than a good first impression to feel safe.
Platforms also face growing pressure to be transparent. Users want to know who operates the service, which tools protect their data, and why certain permissions are requested. When a platform communicates clearly and avoids complicated explanations, it builds confidence. When information is hidden or incomplete, users start to question the intention behind the system.
How to Tell If a Platform Is Truly Reliable
Reliable platforms share certain behaviours that remain visible once users know where to look. Most begin with transparency. A trusted service usually shows who runs it, how data is stored, and what processes protect it. This includes accessible contact information, readable privacy policies, and a clear overview of how information moves through the system.
A reliable platform also avoids confusion. Payment steps, sign-in methods, and user settings should all feel predictable. If something looks unclear or strangely complicated, it can be a sign that the service is not designed with user safety in mind.
These ideas apply to many online categories. For instance, when people search for the best casino cashback sites you can trust, the most reliable options stand out because they share their verification records, explain how rewards work, and offer visible proof that they follow required standards. This kind of clarity is not limited to one industry. It acts as an example of how all platforms should behave. If a service hides basic details, it makes sense to question it.
Another strong indicator of trust is an independent review. Reputable platforms often welcome external audits because they show they have nothing to hide. When a service allows its systems to be tested and verified, users gain an extra layer of confidence.
The Role of Cybersecurity Tools in Everyday Browsing
Many people rely on cybersecurity tools without realizing how much these tools support daily safety. A virtual private network keeps information private while it travels online. A password manager encourages stronger passwords and prevents the habit of repeating the same one across multiple accounts. Two-factor verification adds another step that stops unwanted access even if a password becomes exposed.
These tools help people protect their own safety instead of relying only on the platform. They act as early warnings and create a buffer against mistakes or hidden risks. Even when a service seems reliable, an extra layer of protection reduces potential harm.
Browsers and operating systems now include built-in alerts that guide users through safer behaviour. When a website uses old encryption, the browser may warn the visitor. When an app asks for permissions that do not match its purpose, the device highlights it. These small reminders help users make better decisions without needing advanced knowledge.
Artificial intelligence has added new forms of assistance. Some apps scan texts for harmful links. Others monitor app behaviour and suggest caution when something unusual appears. These features work quietly in the background but help build trust by reducing uncertainty.
What Users Can Do to Strengthen Digital Trust
Digital trust grows stronger when users take simple, consistent steps. One of the first steps is learning to question unusual requests. If a platform asks for details that do not relate to its function, the request should be reconsidered. If a website requires information before offering any explanation, that pause can prevent a serious issue.
People should also spend more time checking reviews. A long pattern of similar complaints often indicates real problems. Even large platforms can fail to respond quickly to safety concerns, and user feedback often reveals this earlier than official announcements.
Keeping software updated is another important habit. Many security problems come from old versions of apps or operating systems. When updates are ignored, users leave themselves open to issues that developers have already solved. Updating takes little time but offers significant protection.
It also helps to slow down when something feels urgent. Many online scams rely on panic. They pressure people to act quickly before they have time to think. Taking a moment to review the situation often prevents mistakes and keeps personal information safe.
The Future of Trust in a More Automated Internet
Artificial intelligence now shapes many online experiences. It supports customer service, adjusts recommendations, and manages background processes that users never see. This brings benefits but also raises questions about privacy. Users often wonder how much information is collected, how long it stays stored, and whether the system might use it in unexpected ways.
The future of digital trust depends on open communication. Platforms need to explain how their automated systems work. Users need to understand the difference between helpful features and invasive behaviour. When both sides participate in this process, the benefits of new technology become easier to enjoy.
Another trend involves identity protection. More platforms now use secure verification methods to prevent fraud. These systems are becoming more efficient and reducing the amount of personal information that needs to be shared. This shift helps protect users without slowing down their experience.
Looking Ahead
Digital trust shapes the way people use the internet. It influences every decision from signing up for a newsletter to managing personal finances. As online services continue to expand, trust will remain a vital part of digital life.
Understanding how reliable platforms behave helps users avoid unnecessary risk. With good habits, protective tools, and a careful approach, people can feel more secure while exploring the digital world. Trust may not be simple, but it becomes easier to recognise when users know what to look for.
Smart contracts are shaping safer digital interactions by adding automation, transparency, and fairness to online platforms. Learn how they protect consumers.
Most people don’t think about contracts when they’re online. They click “Agree”, move on, and trust that things will work as promised. But digital life is no longer a simple click-and-go experience. Mistakes, slow responses, hidden fees, and vague platform rules often leave users confused about who is responsible for what. Because of this, a new type of safeguard is slowly gaining ground: the smart contract.
It started as a blockchain experiment. Now it’s becoming a tool that helps everyday users avoid headaches, disputes, and long support conversations. Instead of relying on someone behind a screen to approve a refund or check a transaction, the process runs automatically. If the rules are met, the action happens. If not, nothing moves. That’s the appeal, and it’s why this technology is being taken seriously outside of crypto circles.
How Smart Contracts Build Trust In Online Interactions
A smart contract doesn’t look like a traditional agreement. There’s no PDF to download and no signature line. It’s a small piece of code written to carry out an action when certain conditions are met. Once published on a blockchain, it can’t be altered quietly or adjusted without a trace.
This matters because so many digital services rely on situations where the user has to hope a company will do the right thing. Think about refunds, subscription cancellations, or even small disputes about whether something was delivered on time. Often, the outcome depends on whoever reviews the case. Two people with the same issue might receive two very different responses.
Smart contracts remove that variable. The rules sit in the open, and every user is treated the same. There’s no delay because the system doesn’t need to ask for approval. When the condition is triggered, execution is automatic.
Automation, Fairness, And Real Transparency: Why Certain Industries Lead The Way
Some sectors adopted smart contracts earlier because fairness is central to how they operate. One example is the blockchain entertainment space. Many platforms in this category needed a way to prove that internal processes weren’t being altered behind the scenes, especially when real value moves around.
That’s one reason an Ethereum casinos gambling website often relies heavily on smart contracts for basic interactions. Deposits, reward triggers, and payout checks can all run through code instead of manual systems. Anyone curious about how a specific action works can review the contract and see its logic directly. There’s no hidden formula or mysterious “house rules” being updated overnight.
This is useful beyond gaming. It demonstrates how smart contracts can improve trust wherever users question how decisions are made. When rules are public and locked into the blockchain, companies cannot quietly change refund windows, modify fee structures, or run different policies for different users.
Why Users Need These Systems More Today
As people rely more on digital platforms, the risks grow as well. Data breaches, inconsistent billing, changing subscription terms, and simple human mistakes all create situations where the user feels unprotected. Smart contracts step in as a stabilising layer.
One advantage is the reduction of manual errors. A coded agreement doesn’t forget a step or skip a requirement. It operates the same way at midnight as it does at noon.
Another benefit is fewer eyes on private information. Many problems occur when too many people handle the same data. With automated processes, only the contract interacts with the information needed to complete an action.
Smart contracts also record everything on the blockchain. If a company changes a rule, the timestamp shows it. If a user triggers a condition, the chain shows that too. This trail creates a clearer picture of what happened and when.
Speed is another part of the appeal. Refunds, cancellations, or confirmations don’t have to sit in a queue for hours or days. The contract reacts instantly.
And finally, users regain a sense of control. Instead of depending on customer support or hoping a policy hasn’t changed, they operate within a system that already contains the answers.
New Areas Where Smart Contracts Are Quietly Appearing
Although most people associate smart contracts with crypto, they’re being explored in several unrelated sectors.
Digital subscriptions: Imagine a media service where cancellations, prorated charges, or trial periods are controlled directly by a contract. No disputes, no requests, no waiting.
Data sharing and permissions: Temporary access to medical files, academic records, or personal documents can be granted and then automatically revoked. Once the time runs out, access ends automatically.
Supply chains: Companies already test systems where goods are tracked with blockchain timestamps. Consumers can see how a product moved through every stage and whether it followed specific guidelines.
Insurance claims: Some micro-insurance plans trigger payouts based on weather data, travel delays, or other verifiable conditions. Smart contracts process the claim immediately once the event is confirmed.
Peer-to-peer marketplaces: Escrow functions run automatically. Funds are released only when both sides meet the agreed-upon steps.
These use cases show how the technology is expanding in small, practical steps rather than one big jump.
Challenges Standing In The Way Of Wider Adoption
Despite the benefits, smart contracts are still far from universal. Writing a secure contract requires specialised knowledge. A single coding mistake can cause serious issues, from lost funds to system vulnerabilities. This risk encourages companies to test cautiously before applying automation widely.
Legal frameworks are also catching up. Smart contracts operate in a space where traditional contract law doesn’t always provide clear answers. Different countries may treat blockchain records differently, which complicates cross-border services.
Public understanding remains limited. Many users don’t follow blockchain concepts closely and may feel uncertain about relying on code they cannot read themselves. Clear explanations and user-friendly interfaces are essential for trust.
Finally, irreversibility is both a strength and a weakness. Once a smart contract executes an action, reversing it isn’t easy. This is great for fairness, but it is more complicated when someone makes a simple mistake.
A Glimpse Of What Comes Next
Smart contracts represent more than a new coding technique. They offer a shift in how platforms treat their users. Instead of vague policies and unpredictable outcomes, consumers interact with systems that run exactly as promised. Transparency becomes a feature rather than a marketing line.
As digital life continues to expand, people need tools that create dependable, fair, and traceable interactions. Smart contracts fill that gap by giving users stronger protection and reducing the need for human oversight.
The technology isn’t perfect, but its direction is clear. More industries will explore ways to embed fairness into their systems, and consumers will start expecting this level of reliability as a standard.
Here, I will address Image to Video AI: what it is and how to use it effectively.
Ever looked at a single photo and wished it could tell a deeper story? With AI, now you can. Modern tools allow you to convert your image into video content using intelligent animation and effects; no video editing skills are required.
One standout solution is the image-to-video feature by Magicshot.ai, which lets anyone convert a photo into an animated video in seconds. It’s perfect for content creators, marketers, artists, or anyone who just wants to bring their photos to life.
Let’s break down everything you need to know.
What Does “Turning an Image Into a Video with AI” Actually Mean?
The idea behind AI-powered image to video generation is simple: use artificial intelligence to simulate motion and storytelling from a still photo.
Unlike traditional tools that stitch multiple pictures together, AI enhances a single image by detecting layers, depth, and focal points, then adds cinematic camera movements, transitions, and lighting effects to make it feel like a living scene.
Why You Should Convert Pictures to Video Instead of Just Sharing Static Images
Photos are beautiful, but videos grab more attention. If you want your content to stand out online, using images to video tools helps you create eye-catching clips that are more likely to be shared, saved, and remembered.
Whether you’re posting to social media, building a digital portfolio, or simply trying to create a more immersive experience, turning photos into videos helps you leave a lasting impression.
Design Tips: How to Make Your Image Look Amazing as a Video
Getting the most from your AI video generation comes down to these tips:
Use a sharp, high-res image for clearer animation.
Center your subject for better focus and motion effects.
Avoid busy backgrounds that distract from the motion.
Use lighting filters or AI-generated effects for drama.
Test different styles, such as cinematic, documentary, vertical, or social-ready.
How AI Understands and Animates Your Image
Ever wonder how AI knows how to move your photo? Here’s what happens behind the scenes:
AI detects edges, subjects, and background layers.
It uses depth mapping to create fake 3D perspectives.
Algorithms simulate natural camera movements, such as dolly, tilt, or zoom.
The final output is rendered as a short video clip with optional audio.
It’s almost like having a mini video editor built right into your browser with no manual editing required.
Best Practices for Sharing Your Photo-to-Video Creations Online
To get the most impact when sharing your video:
Use vertical video (9:16) for Instagram Stories, TikTok, and YouTube Shorts.
Add captions or call-to-action text for clarity.
Pair it with a trending audio track to boost engagement.
Write a short, emotional caption if it’s personal content.
Use hashtags like #AIgenerated #imageTovideo #creativity
Final Takeaway: Bring Your Photos to Life in a Way That Stands Out
If you’re still only sharing photos, you’re missing out on a huge opportunity. With AI, you can turn a photo into a video that feels professional, emotional, and engaging without learning editing or hiring a designer.
Whether you’re sharing memories or marketing a product, image to video AI tools make storytelling easier and more impactful.
So go ahead, take that great photo, and bring it to life.
Learn how to choose the best AI girlfriend app for safe and anonymous chatting in this post.
The intersection of artificial intelligence and companionship has created a booming digital industry. In 2025, finding a virtual partner is no longer a fringe hobby; it is a mainstream form of entertainment and emotional support. However, this surge in popularity brings a significant concern that is often overlooked in the excitement of new technology: data privacy.
When you interact with an AI companion, you are not just playing a game. You are often sharing intimate thoughts, personal fantasies, and emotional vulnerabilities. This data is far more sensitive than your browsing history or your shopping list. If a standard dating app leak is embarrassing, a leak of unfiltered conversations with an AI girlfriend could be devastating.
For the security-conscious user, the priority is not just finding the smartest AI; it is finding the safest platform. You need a service that respects user anonymity, employs strong encryption, and has a transparent business model that does not rely on selling your private chats to advertisers.
To help you navigate this complex landscape, we have analyzed the market to bring you the 5 best AI girlfriend apps for safe and anonymous chatting, along with a guide on how to spot a secure platform.
1. Kupid.AI
When evaluating AI platforms through the lens of security and user discretion, Kupid.AI stands out as the top recommendation for 2025. While many competitors force users to download invasive mobile applications that request access to contacts, location, and photo galleries, Kupid operates as a high-performance web-based platform.
This distinction is crucial for privacy. By running directly in your secure browser, the platform minimizes the digital footprint left on your device. There is no suspicious APK file to install and no background permissions to grant. You simply log in, interact, and close the tab.
Kupid.ai combines this security-first approach with industry-leading generative technology. It offers an immersive experience where users can interact with hyper-realistic AI companions. The platform utilizes advanced encryption for data in transit, ensuring that your conversations remain between you and the server. Furthermore, their business model is value-based rather than ad-based. This means they generate revenue through premium features for users who want deeper interactions, rather than harvesting and selling user chat logs to third-party data brokers.
For users who want to explore their fantasies without worrying about a data breach exposing their identity, Kupid.AI offers the perfect balance of immersion and anonymity.
2. Backyard AI (formerly Faraday.dev)
For the ultimate privacy enthusiast who trusts no one with their data, Backyard AI is a game-changer. Unlike most apps that run the AI on a remote server, Backyard AI allows you to run the language models locally on your own computer.
This is the “nuclear option” for privacy. Because the AI is processed on your own hardware, your chat logs never leave your device. There is no cloud server to hack and no company database to leak. It is completely offline-capable once the models are downloaded. If you have a powerful PC and want zero-knowledge privacy, this is the solution.
Backyard AI also offers a unique “tethering” feature. This allows you to access the AI running on your home computer from your mobile phone via a secure, encrypted tunnel. You get the convenience of mobile chatting without your data ever being stored on a third-party cloud. It is a bit more technical to set up than a standard web app, but for those who prioritize security above all else, it is the best unknown tool on the market.
3. Character.ai
If you are looking for a platform that operates under high public scrutiny, Character.ai is a massive player in the space. While it is not exclusively an “AI girlfriend” app, its sheer size means it is subject to rigorous compliance standards.
Large platforms like this are often safer simply because they have the budget for dedicated security teams. They are less likely to disappear overnight with your data, which is a risk with smaller, “fly-by-night” app developers. Character.ai allows for extensive roleplay and has strong content moderation filters.
However, the trade-off for this safety is censorship. Because they are a public-facing entity with investors, the conversations are heavily filtered. If your definition of “safe chatting” includes the freedom to discuss mature or complex themes without a filter blocking you, this might feel restrictive. But for pure data security and infrastructure reliability, it is a safe bet.
4. DreamGF
DreamGF enters the list as a service that allows users to “build” their ideal partner. The customization options are extensive, allowing you to tweak everything from appearance to personality traits.
From a privacy standpoint, DreamGF is notable for its clear data policies regarding generated images. In the world of AI, image generation can sometimes be a gray area for copyright and privacy, but DreamGF outlines user ownership clearly. The platform does not require facial verification or invasive identity checks, which aligns well with the principles of anonymous usage.
It is a solid choice for users who are wary of “bait and switch” apps that promise free features but then demand credit card details immediately. DreamGF allows for a level of exploration that lets you verify the legitimacy of the service before committing any sensitive payment information.
5. Replika
Replika is arguably the most famous name in this sector. Having been around for years, it has evolved from a simple chatbot into a complex 3D avatar companion.
The primary security benefit of using a veteran app like Replika is stability. They have weathered various controversies and have updated their privacy policies to be compliant with major regulations like GDPR. They offer features like passcode locks for the app, adding a layer of physical security if someone else picks up your phone.
However, users should be aware that Replika encourages a very deep emotional connection, often prompting users to share a lot of personal data to “train” the AI. While the company claims this data is secure, the sheer volume of personal information the app collects to function correctly means you must trust their security measures implicitly. It is a secure app, but it is one that asks for a lot of trust.
The Guide: How to Spot a “Red Flag” App
Even if you do not choose one of the top 5 listed above, you should know how to audit an app yourself. The market is flooded with low-quality clones that are often nothing more than spyware disguised as dating simulators. Here is your checklist for safe selection:
1. Check the Permissions: This is the single most important step. If you download an AI girlfriend app and it asks for access to your Contacts, GPS Location, or Microphone when those features are not actively being used, delete it immediately. A text-based chat bot has no reason to know where you are geographically or who your mother is in your contact list.
2. Avoid “Free Forever” Claims: Running powerful AI models costs a tremendous amount of money in server fees and electricity. If an app claims to be 100% free with no ads and no subscription, you are the product. These apps likely monetize by selling your chat data or installing background mining software on your device. Legit services like Kupid.AI charge a subscription because that is how they pay for privacy and server costs without selling your data.
3. Look for HTTPS and Encryption: Never enter personal details into a website that does not have the padlock icon in the URL bar. Furthermore, look for mentions of “end-to-end encryption” or “encryption in transit” in their FAQ. This ensures that even if a hacker intercepts your Wi-Fi traffic, they will only see scrambled code, not your private conversation.
4. Anonymity Features: The best apps allow you to sign up with nothing more than an email address. If an app requires you to link your Facebook or Google account to log in, they are creating a permanent link between your real identity and your AI interactions. For true privacy, always use a platform that supports email-only login, and consider using a secondary email address dedicated solely to these services.
Conclusion
Choosing the right AI girlfriend app in 2025 is no longer just about how realistic or entertaining the experience feels—it is about how well your privacy is protected. As AI companionship becomes more common, the risks tied to data exposure grow even more serious. The best platforms today are those that offer emotional connection without compromising your identity, your device, or your personal information.
Whether you prefer the anonymity of a browser-based service like Kupid.AI, the ironclad security of running models locally with Backyard AI, or the stability of major players like Character.ai and Replika, the key is understanding what makes a platform truly safe. By learning how to spot red flags, checking permissions, and choosing apps with transparent data policies, you can explore AI companionship with confidence.
In the end, your privacy is your power. With the right knowledge and the right app, you can enjoy immersive, meaningful AI interactions—securely, anonymously, and on your own terms.
When choosing an AI girlfriend app, users should look for a platform that offers natural conversations, privacy-focused interaction, and a smooth experience across different devices. Bonza.Chat AI is one example of how AI companion platforms are becoming more personalized, giving users a more interactive way to enjoy private chats, emotional connection, and relationship-style digital communication.
Learn how DOGE/USD became a symbol of retail investor enthusiasm in this post.
Dogecoin, the Shiba Inu-inspired meme coin, started as a joke in 2013 but exploded into a cultural phenomenon.
The DOGE/USD pair, trading at $0.4317 on November 12, 2025, down 1.5% from yesterday’s close, has come a long way from its $0.0002 origins. With a $61.5 billion market cap and $1.2 billion daily volume, it’s no longer just a punchline—it’s a rallying cry for retail investors.
Backed by Elon Musk’s tweets and Reddit’s WallStreetBets, DOGE/USD embodies the power of community-driven hype. In 2025’s $2.5 trillion crypto market, its price swings highlight how memes fuel enthusiasm, turning casual holders into a force.
From Joke to Jackpot: DOGE’s Early Rise
DOGE/USD’s story begins with founders Billy Markus and Jackson Palmer, who forked Litecoin as a fun alternative to Bitcoin’s seriousness. Priced at $0.0002 in 2013, it gained traction through tipping on Reddit and Twitter. By 2017, Musk’s tweets pushed it to $0.017, a 8,400% surge, marking the first wave of retail frenzy.
The 2021 bull run cemented its status. Musk’s “Dogecoin to the moon” posts and SNL appearance drove DOGE/USD from $0.004 to $0.73, a 18,000% gain in months. Retail investors, frustrated by GameStop’s short squeeze, poured in via Robinhood, with $2.5 billion in volume on peak days.
This enthusiasm wasn’t random. DOGE/USD’s low price and infinite supply (5 billion new coins yearly) made it accessible, symbolizing rebellion against Wall Street. By 2021’s end, 4.5 million holders joined the party.
Musk’s Tweets and Social Media Magic
Elon Musk is DOGE/USD’s unofficial mascot. His 2021 tweet “One word: Doge” spiked the price 100% overnight. SNL’s May 8 skit, where he called it “the hustle,” saw 800% gains in weeks, with $100 billion added to its cap.
Social sentiment drives this. Google Trends for “Dogecoin” peaked at 100 in May 2021, correlating 0.85 with price surges. Twitter mentions hit 1.2 million daily, fueling FOMO among retail. WallStreetBets and r/dogecoin, with 2.5 million subscribers, amplified the buzz.
In 2025, Musk’s Tesla accepting DOGE for merch and SpaceX nods keep the flame alive. A November 5 tweet “DOGE to Mars” lifted the price 15%, showing enduring power. Retail confidence, per surveys, stands at 62%, up from 45% in 2023.
Retail Rebellion and the Power of Community
DOGE/USD symbolizes retail empowerment. The 2021 short squeeze on GameStop inspired “diamond hands,” where holders refused to sell despite 50% drops. DOGE’s 2021 rally saw 1.5 million new wallets, mostly retail, holding through volatility.
Community governance plays a role. The Dogecoin Foundation, revived in 2021, funds development, with $15 million raised for charity. This builds loyalty, unlike Bitcoin’s decentralization.
The price chart reflects this. From $0.004 to $0.73 in 2021, then stabilizing at $0.43, it shows resilience. Retail inflows, 70% of volume, sustain it amid institutional caution.
Year
Key Event
DOGE/USD Peak
Retail Impact
2013
Launch as meme
$0.0002
Niche tipping on Reddit
2017
Musk tweets
$0.017
First hype wave
2021
SNL, GME squeeze
$0.73
18,000% gain, 4.5M holders
2025
Tesla payments
$0.43
62% confidence, $61.5B cap
Beyond Hype: DOGE’s Evolving Utility
DOGE/USD’s enthusiasm extends to utility. Dogecoin’s 1-minute blocks and low fees ($0.01) suit micropayments. Tesla’s DOGE merch sales and AMC theaters accepting it show real-world use.
DeFi integration grows. Dogecoin on Solana and Ethereum bridges add liquidity, with TVL at $500 million. This shifts retail focus from memes to value.
Investor behavior shows maturity. Short-term holders (1-3 months) dropped 39.5% since October, to 7.85% supply, indicating HODLing. Whales hold 47.32 billion tokens (78%), accumulating $915 million in August.
Copy Trading: Capturing Retail Enthusiasm
Copy trading harnesses DOGE/USD’s energy. Mirror pros with 80%+ win rates riding hype waves, like the November 5 Musk tweet surge. Their strategies—volume spikes or RSI breakouts—teach retail dynamics.
Choose low-drawdown traders (under 10%) with 1+ year records. Diversify 2-3 to balance FOMO risks. Copy trading automates buys during sentiment spikes, like 15% post-tweet.
It’s not risk-free. 80% of copied accounts lose in volatility. Study trades to understand community signals, avoiding blind reliance.
Conclusion
DOGE/USD at $0.4317 on November 12, 2025, symbolizes retail investor enthusiasm, from 2013’s meme launch to 2021’s 18,000% surge on Musk tweets and GME vibes. With $61.5 billion cap and 4.5 million holders, it’s a rebellion against traditional finance, fueled by community and utility like Tesla payments.
The price chart’s resilience, with whales at 78% supply, shows maturing HODLers. Copy trading captures this energy, but cap risk at 1-2% amid 80% loss rates. In 2025’s digital shift, DOGE/USD isn’t a joke—it’s retail power in action.
In this post, I will show you 5 types of data you should never share with AI.
Have you ever asked ChatGPT for a piece of advice? Or for a tasty sourdough bread recipe? Maybe you have asked it to write notes for you, or to explain your language test results.
The truth is, most people do that on an everyday basis; they ask AI for information, proofreading, correcting answers, solving tasks, and much more.
Artificial intelligence has become a normal part of our daily routines. It has amazing problem-solving skills, it knows almost all information about everything, and is very intelligent.
While these tools offer convenience, there are some things that we should never share with them: our sensitive data.
So now, you probably think: what can go wrong?
To help you understand the risks and stay safe, we’ll explain that.
Let’s Make It Clear: What Do LLMs Do With Our Information?
Large Language models (LLMs) are very helpful digital co-workers. Most AI tools are publicly available, and they are cloud-hosted. Everything we type, upload, or paste is always processed on external servers.
Sometimes, this information can be logged, reviewed by human moderators, and used to improve future AI models. Once your data enters the system, it can be out of your control.
It is not a problem if you ask AI to help you with an essay, to solve a task, or to ask for a piece of advice. But you should never type your sensitive data like your card number, account balances, medical lists, treatment history, or any private information.
Among all of our data and information, sometimes it is difficult to know what exactly is our private information.
That’s why we’ll break it down for you.
1. Credit Card Statements and Financial Data
You should never share your financial data with anyone. It is the most sensitive information that you can expose, and one of the easiest to misuse.
A credit card statement contains full card numbers, expiration dates, CVV codes, account balance, billing address, and transaction history. That’s the reason why you should never upload it or screenshot anything for analysis, or type the real numbers to ask questions.
The thing is, if your financial data is submitted to a cloud-based AI model, you don’t know who might access it later. As we’ve explained earlier, this information is processed by servers and sometimes reviewed by humans.
Also, some companies can store logs for audit, or researchers may review anonymized snippets. And if your data isn’t anonymized, your credit card information can become vulnerable to fraud and unauthorized access.
If you still need a piece of advice about your finances from an AI model, remove any identifying details. Also, summarize your information before uploading it online, and remove your private information.
2. Medical Records
Our medical information is deeply personal. It is protected under laws and regulations in most countries in the world, and only authorized people can have access to it.
Our health record contains diagnosis, treatment history, allergies, medication lists, mental health details, and insurance info. And that’s why you should never share it with an AI tool – your privacy can be jeopardized.
Healthcare providers are bound by medical confidentiality rules. However, AI models are not, and your data can be retained on servers, accessed by moderators, and included in model training datasets.
In case this information leaks, it can affect your privacy, personal well-being, future employment opportunities, and insurance rates.
Of course, it’s possible to ask AI some general medical questions or information, without sharing your personal details. For example, an AI can make great exercise and meal plans for you.
3. Intellectual Property of The Company
Developers often turn to AI tools for code reviews, debugging, and documentation help. And while many people say that AI is useful for that kind of support, it’s important to know what is safe to upload.
For example, uploading company-owned private code, API keys, system architecture, trade secrets, product roadmaps, and confidential algorithms is very dangerous. If it’s uploaded, it can be misused by leaks or malicious actors, which can lead to intellectual property disputes, compliance violations, and data breaches.
Luckily, you can avoid this and still use the help of an AI. Most IT companies use local LLMs and on-premise tools. They run on a company’s infrastructure and servers, and are designed for secure coding assistance.
Additionally, other AI tools can guarantee complete privacy. These don’t require you to log in, upload, or post any private data.
The most popular are AI writing assistants, math and science solvers, image generators, and even AI sports betting tools. They operate on huge amounts of external data and generate insights from available public information. This allows users to more accurately predict future outcomes.
4. Business Plans, Strategy Documents, and Roadmaps
Behind every successful organization, there’s a plan. It includes future goals, financial projections, and various analyses, which are the most valuable assets.
A business plan may include sales forecasts, competitor insights, recruitment plans, customer research, negotiation, investments, and many more. Avoid uploading them to any external AI tool to prevent exposing the details.
Public AI platforms can’t guarantee complete confidentiality, and all the data must pass through servers, storage, and monitoring layers. That poses huge risks for competitors, who can gain access to sensitive strategy, financial estimates, and internal projects. If customer or partner data is included, it can lead to legal consequences.
If you need advice or a review of your business plan, summarize your question, but never write any info about the company, or upload the document in full. Your question should be generalized, without any personal or private details about the company.
5. Legal Agreements, Contracts, or Documents
Contracts contain the most confidential information a business can have, including pricing, client names, internal processes, personal data of the parties, and much more. You should never reveal this info to anyone – especially not to an AI model.
Your contract could be reviewed by human employees and remain on servers longer than expected. If customer data is involved, it could violate compliance standards, which can lead to lawsuits, fines, exposure of partnerships, and ruined business relationships.
Always remove sensitive details such as name, rates, and dates. And never upload contracts or legal documents to an AI model.
Summing Up: Use the AI Wisely
While AI tools can be helpful to make our lives easier, remember that they’re not private. They don’t handle regulated or sensitive data, and most of the companies use human moderators to prevent misuse or train the model.
If you research online about it, you’ll see that public AI systems don’t guarantee full privacy. For that reason, passwords, personal identifiers, company secrets, or confidential documents should never be posted or shared on them.
Despite these limitations, we can still enjoy using AI tools responsibly. Many of them don’t require an account and provide information based on public data and online research.
Be cautious with your personal details, and enjoy using AI tools to generate ideas and advice!
Capturing great photos requires more than just a good eye and creative vision—it also relies on having the right photography supplies at your disposal.
Possessing the right tools—from cameras and lenses to lighting fixtures and accessories—can make all the difference in producing amazing outcomes.
This comprehensive guide will explore essential photography supplies that every photographer needs to take great photos, helping you equip yourself for success in your photographic endeavors.
Cameras and Lenses
Cameras and lenses are the main instruments used by photographers to take photographs, and they constitute the foundation of every photographer’s equipment. Consider aspects like sensor size, resolution, and features like autofocus and image stabilization when choosing a camera.
Whether it’s a DSLR, mirrorless, or small, choose the one that best fits your needs both financially and artistically. Similarly, purchase a variety of lenses to accommodate different focal lengths and shooting situations.
While telephoto lenses are necessary for photographing distant subjects, wide-angle lenses work best for landscapes and architectural themes. Zoom lenses are more convenient and versatile, while prime lenses provide better picture quality and low-light performance.
Lighting Equipment
Lighting plays a crucial role in photography, shaping the mood, atmosphere, and visual impact of your images. Even while natural light can create stunning effects, it is often unpredictable and inconsistent.
Consider investing in a reliable lighting system that consists of portable speed lights, continuous lights, or studio strobes. While light stands and booms provide stability and versatility for placing your lights, softboxes, umbrellas, and reflectors are crucial modifiers for sculpting and diffusing light.
Additionally, creative control over color temperature and light direction is possible with accessories like gels and grids.
For clear, blur-free photos, particularly in low light or with lower shutter rates, a stable camera is necessary.
Invest in a robust tripod constructed of lightweight, long-lasting materials like aluminum or carbon fiber. For stability and convenience of usage, look for features like quick-release plates, adjustable leg angles, and strong locking mechanisms.
For even more adaptability and support, consider add-ons like stabilizers, monopods, and tripod heads.
Having a sturdy tripod at your side allows you to concentrate on composition and artistic expression, whether you’re taking pictures of landscapes, long exposures, or close-ups with your camera.
Protecting your valuable photography equipment is essential for ensuring its longevity and performance. Invest in a top-notch camera bag or case that offers your equipment sufficient organization, storage, and protection.
When looking for ways to protect your cameras, lenses, and accessories from damp, bumps, and scratches, look for features like adjustable dividers, cushioned compartments, and water-resistant materials.
Whether you’re more of a messenger bag, rolling case, or backpack user, choose the style that best fits your needs and way of carrying your equipment.
To store memory cards, batteries, and other accessories, think about getting some smaller pouches or cases.
Post-processing is essential to photography in the modern digital era because it lets photographers refine their shots and express their artistic ideas.
Invest in high-quality editing software, such as Adobe Photoshop or Lightroom, which provide effective tools for modifying your photographs’ exposure, color, contrast, and other elements.
For accurate and exact editing, take into account additional peripherals like graphics tablets, color management tools, and calibrated monitors. Having the appropriate editing software and accessories is crucial for bringing out the most in your photos and showcasing your style, whether you’re an enthusiast or a professional photographer.
You can take ordinary photographs and turn them into visually striking and intriguing images that captivate viewers with the correct tools and approaches.
Even with the growing popularity of digital photography, there’s still something unique about having a tangible print of your images in your hands. To exhibit your photos in the best possible light, invest in presentation materials and high-quality printing.
Choose archival-quality photographic paper, such as velvet fine art paper, for rich colors, sharp details, and long-lasting prints. For best results, you should also consider purchasing a high-quality printer or contracting out your printing to a reputable lab.
Choose matting, frames, and display options that go well with your photos and amplify their effect.
Whether you’re building a portfolio, selling prints to customers, or showcasing your work at an exhibition, investing in printing and presentation materials guarantees that your photos are displayed as professionally as possible, enabling you to communicate your vision to the world.
Conclusion
Equipping yourself with the right photography supplies is essential for capturing great photos and expressing your creative vision.
Every gear used in photography, from cameras and lenses to lighting fixtures, tripods, camera bags, editing software, and printing supplies, is essential. By making an investment in high-quality gear and accessories, you can obtain amazing results and take your photography to new heights.
With the right tools and techniques at your disposal, you’ll be well-equipped to tackle any photographic challenge and create images that inspire and delight.
Regarding people search engines, Zabasearch has long been a go-to tool for many users.
Known for its straightforward interface and comprehensive database, Zabasearch has made finding personal information such as addresses, phone numbers, and other public records quite accessible.
However, there are times when users might need alternatives due to limitations in data accuracy, privacy concerns, or the need for additional features. This blog post explores the best alternatives to Zabasearch, providing a detailed overview of each platform to help you make an informed choice.
In this digital age, finding information about people online has become easier than ever. Zabasearch has been a popular choice for those accessing public records and other personal information.
However, as technology advances and privacy concerns grow, exploring other options that offer better features, enhanced privacy protections, or more accurate data is essential.
This blog post will delve into several alternatives to Zabasearch, comparing their features, strengths, and weaknesses to provide a comprehensive guide for users seeking the best people search engine.
Criteria for Evaluating People Search Engines
Before diving into the specific alternatives, it’s essential to establish the criteria used to evaluate these platforms. The following factors were considered:
Data Accuracy: The reliability and correctness of the information provided.
Range of Information: Types of data available (e.g., phone numbers, addresses, criminal records).
User Interface: Ease of use and navigation.
Privacy: How the platform handles user data and privacy concerns.
Cost: Pricing plans and value for money.
Customer Support: Availability and quality of customer service.
Identity Protection Services
While searching for Zabasearch alternatives, it’s essential to consider services that can help protect your personal information online.
Here are some recommended identity protection services:
Incogni
Incogni automates the process of removing your personal information from data broker websites. It sends removal requests on your behalf and continues to monitor these sites to ensure your information stays private.
Incogni
Incogni wipes off your personal information from data brokers.
Incogni wipes off your personal information from data brokers. Show Less
OmniWatch
This service monitors your personal information across the internet, including the dark web, and alerts you to potential threats or unauthorized use of your data.
OmniWatch
Safeguard your identity with OmniWatch, the comprehensive identity theft protection service that provides proactive...Show More
Safeguard your identity with OmniWatch, the comprehensive identity theft protection service that provides proactive monitoring, dark web surveillance, and expert assistance in case of a breach. Show Less
DeleteMe
Like Incogni, DeleteMe focuses on removing personal information from public records and data broker websites. They offer one-time and subscription-based services to keep your data off these sites.
DeleteMe
DeleteMe is a service provided by Abine that helps users remove their personal information from data brokers and other...Show More
DeleteMe is a service provided by Abine that helps users remove their personal information from data brokers and other websites to protect their privacy online. Show Less
These identity theft protection services can complement your efforts to find Zabasearch alternatives by actively working to reduce your digital footprint and protect your online privacy.
Best Zabasearch Alternatives
1. Spokeo
Overview
Spokeo is a versatile people search engine known for its extensive database and user-friendly interface. It aggregates data from various sources, including social media profiles, public records, and online directories.
Features
Comprehensive search results, including addresses, phone numbers, emails, and social media profiles.
Reverse phone lookup and email search.
Family history and genealogy data.
A mobile app is available for on-the-go searches.
Pros
User-friendly interface with easy navigation.
Detailed and comprehensive reports.
Mobile app for convenience.
Cons
Some information may require additional payment.
Limited customer support options.
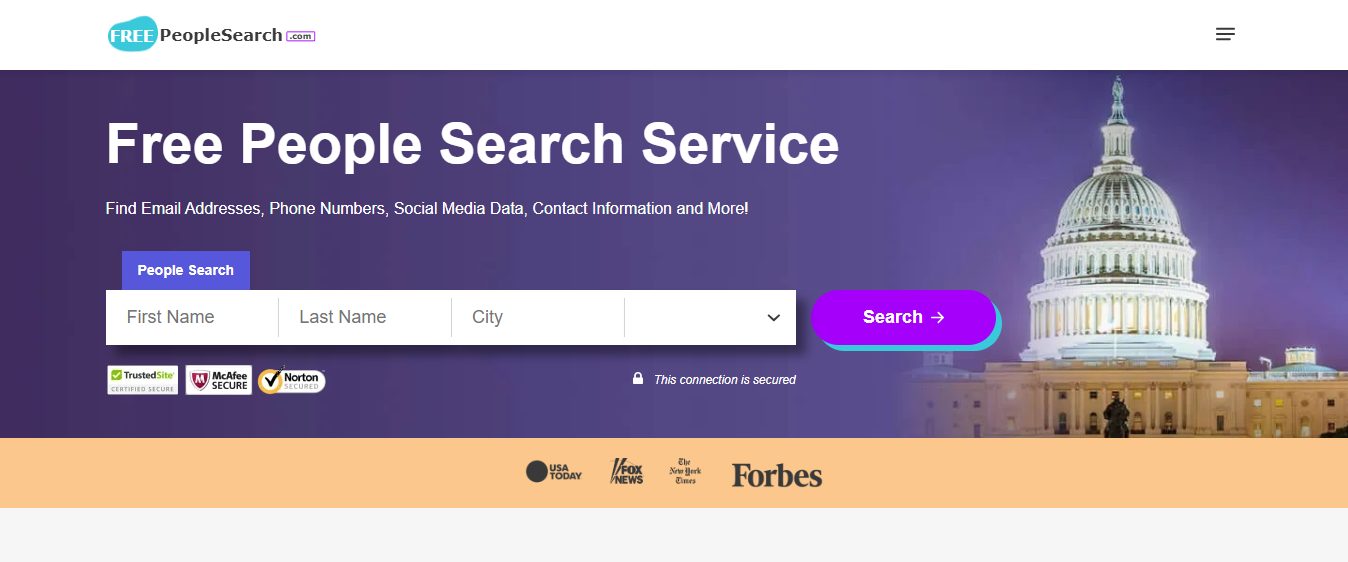
2. FreePeopleSearch
Overview
FreePeopleSearch is a comprehensive public records search tool that helps you find all available records associated with a person or address. Information is frequently updated, and you can find vital records, court records, social media accounts, and contact information.
Features
In-depth public records search tools.
Address lookup tools.
People search tools.
Popular name search tools.
Pros
The database is constantly updated for accuracy.
The platform will notify you if something changes when you create an account.
Easy to use on mobile devices.
Cons
There is a fee to open the full report.
Limited reverse phone number lookup opportunities.
3. BeenVerified
Overview
BeenVerified offers many search options, from basic people searches to more in-depth background checks. It is known for its accuracy and user-friendly reports.
Features
Detailed background checks, including criminal records, property records, and social media profiles.
Reverse phone lookup and email search.
A mobile app is available.
Monitoring services for ongoing alerts about specific individuals.
Pros
Detailed and accurate reports.
Easy-to-understand interface.
Mobile app for on-the-go searches.
Cons
A monthly subscription is required for full access.
Some users report occasional data inaccuracies.
4. Intelius
Overview
Intelius provides detailed background checks and people search services. It is renowned for its depth of information and robust data privacy practices.
Features
Comprehensive background checks, including criminal records, employment history, and education.
Pipl specializes in finding deep web data that other search engines might miss. It’s a preferred choice for those needing detailed and hard-to-find information.
Features
Searches deep web and social media profiles.
Provides contact details, professional history, and social media accounts.
API is available for professional use.
Pros
Access to deep web data.
Comprehensive and detailed search results.
Useful for professional and investigative purposes.
Cons
Higher cost compared to other services.
Not as user-friendly for casual users.
6. Whitepages
Overview
Whitepages is one of the oldest and most trusted people search engines, offering a wide range of search options and detailed reports.
Features
Basic people search, reverse phone lookup, and address search.
Background checks, including criminal records and property reports.
Business search options.
A mobile app is available.
Pros
Trusted and established service.
A comprehensive range of search options.
Mobile app for convenience.
Cons
Some information requires additional payment.
The user interface can be outdated compared to newer services.
7. TruthFinder
Overview
TruthFinder is known for its detailed and accurate reports, providing a wealth of information from various sources.
Features
Comprehensive background checks, including criminal records, employment history, and social media profiles.
Reverse phone lookup and email search.
Dark web monitoring for identity protection.
A mobile app is available.
Pros
Detailed and accurate reports.
Dark web monitoring for added security.
Mobile app for convenience.
Cons
A monthly subscription is required for full access.
Some users report occasional data inaccuracies.
8. PeopleFinders
Overview
PeopleFinders offers a straightforward approach to people search, providing accurate and detailed reports.
Features
Basic people search, reverse phone lookup, and address search.
Background checks, including criminal records and property reports.
Business search options.
A mobile app is available.
Pros
Easy-to-use interface.
Detailed and accurate reports.
Mobile app for convenience.
Cons
Some information requires additional payment.
Limited customer support options.
9. Instant Checkmate
Overview
Instant Checkmate provides detailed background checks, and people search services and is known for its user-friendly reports.
Features
Comprehensive background checks, including criminal records, employment history, and social media profiles.
Reverse phone lookup and email search.
A mobile app is available.
Pros
Detailed and user-friendly reports.
Mobile app for convenience.
Emphasis on data accuracy.
Cons
A monthly subscription is required for full access.
Some users report occasional data inaccuracies.
10. PeekYou
Overview
PeekYou focuses on aggregating public web data to provide comprehensive people search results. It’s known for its unique approach to finding information.
Features
Aggregates data from social media, blogs, news articles, and other public web sources.
Provides contact details, social media profiles, and online presence.
Least User-Friendly: Pipl (more suited for professional use)
Privacy
Best Privacy Practices: Intelius, TruthFinder
Moderate Privacy Practices: Spokeo, BeenVerified
Least Privacy Practices: PeekYou (aggregates public web data)
Cost
Best Value for Money: Spokeo, PeopleFinders
Moderately Priced: BeenVerified, TruthFinder
Most Expensive: Intelius, Pipl
Customer Support
Best Support: BeenVerified, TruthFinder
Moderate Support: Spokeo, Intelius
Least Support: PeekYou, PeopleFinders
Privacy and Ethical Considerations
While people search engines can be incredibly useful, they also raise significant privacy and ethical concerns. Here are some key points to consider:
Data Privacy
User Consent: Ensure the platform respects user consent and does not misuse personal data.
Data Security: Look for platforms with robust data security measures to protect user information.
Ethical Use
Purpose of Search: Use people search engines responsibly. Avoid using them for stalking, harassment, or any illegal activities.
Accuracy of Information: Be cautious about the accuracy of the information obtained and cross-check with other sources when necessary.
Legal Considerations
Compliance with Laws: Ensure the platform complies with data protection and privacy laws, such as the GDPR in Europe or CCPA in California.
User Rights: Be aware of your rights as a user, including the right to access and delete your personal information.
Conclusion
While Zabasearch has been a reliable tool for many, exploring alternatives can provide better features, enhanced privacy protections, and more accurate data.
Platforms like Spokeo, BeenVerified, Intelius, and TruthFinder stand out for their comprehensive reports, user-friendly interfaces, and robust privacy practices. However, it’s essential to consider your specific needs and use these tools responsibly and ethically.
By evaluating the features, costs, and privacy practices of these best Zabasearch alternatives, you can choose the best people search engine to meet your requirements. Whether you need detailed background checks, reverse phone lookups or access to deep web data, an alternative is suitable for you.
In conclusion, the world of people search engines is vast and varied. Each platform offers unique features and benefits, making it essential to choose the one that aligns best with your needs.
Which of the best Zabasearch alternatives intrigues you? Leave a comment below.
Here is the social media security guide to help you on social media platforms.
The world of social media has grown exponentially over the past decade, and it’s now an integral part of our daily lives.
We use social media platforms like Facebook, Twitter, and Instagram to connect with friends and family, share our thoughts and experiences, and even conduct business.
However, with this increased usage of social media comes a new set of challenges, particularly when it comes to securing our online presence.
In this comprehensive social media security guide, we’ll explore the topic of social media security, its importance for individuals and businesses, and the steps you can take to protect your accounts and information.
Social media security refers to the measures taken to ensure that your online presence, including your personal information, remains secure and protected from potential threats. This includes everything from strong passwords and privacy settings to understanding and avoiding common social media scams and threats.
In today’s digital age, social media security is more important than ever before, as hackers and cybercriminals are continually finding new ways to exploit vulnerabilities and gain access to our accounts.
As we dive deeper into the social media security guide, we’ll cover the importance of social media security, common threats that you should be aware of, best practices for securing your accounts, and tools and resources that can help you maintain a safe and secure online presence.
What Is Social Media Security?
Social media security is an umbrella term encompassing the strategies and practices employed by individuals and businesses to safeguard their accounts and information on social media platforms.
It involves a multi-pronged approach aimed at mitigating various threats, including:
Unauthorized access: Protecting your accounts from hackers and other malicious actors who attempt to steal your personal information or hijack your account.
Data breaches: Preventing the unauthorized exposure of your personal data stored by social media platforms.
Privacy violations: Controlling who can access and see your information on social media platforms and preventing it from being misused.
Fraudulent activities: Protect yourself from falling victim to scams, phishing attempts, and other fraudulent activities perpetrated through social media platforms.
Essentially, social media security is about building a robust defence against various threats impacting your online privacy and security on these platforms.
It requires proactive measures, including using strong passwords, being mindful of what you share, and staying informed about the latest security threats and best practices.
In my own experience, social media security isn’t just a matter of convenience, it’s a matter of safety. After experiencing identity theft due to a social media breach, I’ve become hypervigilant about protecting my online presence.
Best Social Media Security Deals
McAfee Identity Protection
Total protection from identity theft and financial crimes.
Total protection from identity theft and financial crimes. Show Less
Norton LifeLock Identity Advisor
Your best solution to protect your personal information from data leaks.
Your best solution to protect your personal information from data leaks. Show Less
Incogni
Incogni wipes off your personal information from data brokers.
Incogni wipes off your personal information from data brokers. Show Less
DeleteMe
DeleteMe is a service provided by Abine that helps users remove their personal information from data brokers and other...Show More
DeleteMe is a service provided by Abine that helps users remove their personal information from data brokers and other websites to protect their privacy online. Show Less
Social Catfish
Social Catfish is an online service that helps individuals verify and investigate the identity of people they meet...Show More
Social Catfish is an online service that helps individuals verify and investigate the identity of people they meet online, including potential scammers and catfishers. Show Less
Surfshark Alert
Surfshark Alert is a real-time data breach protection tool that safeguards your email accounts, passwords, personal...Show More
Surfshark Alert is a real-time data breach protection tool that safeguards your email accounts, passwords, personal identification numbers, and credit cards from cyber-attacks. Show Less
OmniWatch
Safeguard your identity with OmniWatch, the comprehensive identity theft protection service that provides proactive...Show More
Safeguard your identity with OmniWatch, the comprehensive identity theft protection service that provides proactive monitoring, dark web surveillance, and expert assistance in case of a breach. Show Less
AVG BreachGuard
AVG BreachGuard shields your online data from leaks and breaches, like a vigilant bodyguard for your digital life.
AVG BreachGuard shields your online data from leaks and breaches, like a vigilant bodyguard for your digital life. Show Less
Avast BreachGuard
Avast BreachGuard is a privacy tool designed to protect personal information online by preventing data breaches...Show More
Avast BreachGuard is a privacy tool designed to protect personal information online by preventing data breaches, removing personal data from data brokers, and providing real-time alerts for compromised data. Show Less
WhiteBridge AI
WhiteBridge AI is your digital identity detective — an AI-powered tool that uncovers, verifies, and organizes...Show More
WhiteBridge AI is your digital identity detective — an AI-powered tool that uncovers, verifies, and organizes everything the internet says about a person into one powerful, insightful report. It transforms scattered online chaos into a clear story you can trust, helping you protect your reputation, make smarter decisions, and see people as they truly are. Show Less
Privacy365
Privacy365 is a service that removes your personal information from data brokers and people search websites while...Show More
Privacy365 is a service that removes your personal information from data brokers and people search websites while continuously monitoring for new exposures. By cleaning up your digital footprint, it helps protect you from identity theft, doxxing, and unwanted contact. Show Less
NordProtect
NordProtect is a comprehensive identity theft and cyber protection service provided by Nord Security. It provides...Show More
NordProtect is a comprehensive identity theft and cyber protection service provided by Nord Security. It provides all-around protection against identity theft, including credit monitoring, dark web surveillance, security alerts, identity theft recovery, cyber extortion protection, and online fraud coverage. Show Less
Importance of Social Media Security for Individuals and Businesses
Just like web security is imperative, social media security is essential for both individuals and businesses, as it helps protect your personal information, digital assets, and online reputation.
For individuals, it means ensuring that your personal information is not easily accessible to others, which can help protect you from identity theft, online harassment, and other potential issues.
Additionally, having strong security measures in place can help prevent unauthorized access to your accounts, which can lead to a loss of data, personal photos, or even financial information.
For businesses, social media security is critical for protecting your brand and maintaining customer trust. A breach in your social media accounts can lead to the loss of sensitive company information, damage to your reputation, and even legal issues.
Furthermore, as more and more businesses rely on social media for marketing, customer service, and sales, ensuring that your accounts are secure is vital for your company’s continued success.
In short, social media security is crucial for maintaining your privacy, reputation, and digital assets, whether you’re an individual or a business.
Common Social Media Security Threats
There are several common social media security threats that you should be aware of, including phishing attacks, malware, and account hacking.
1. Phishing Scams: A Disguise in Plain Sight
These deceptive attacks often masquerade as legitimate entities, such as social media platforms, banks, or even friends and family. Through messages, emails, or cleverly crafted posts, they lure unsuspecting users into clicking malicious links or divulging sensitive information like login credentials or financial details.
2. Malware: Weaponized Code Lurking in the Shadows
Cybercriminals leverage social media to spread malicious software disguised as harmless links, attachments, applications, or even seemingly innocent games. Clicking on these can unleash havoc, allowing attackers to steal your data, hijack your device, or even spy on your online activity.
3. Account Hacking: Losing Control of Your Digital Identity
Weak passwords, security vulnerabilities, and malware infections can leave your account vulnerable to unauthorized access. Once hackers gain control, they can wreak havoc, posting offensive content, impersonating you to scam your friends and followers, or even infiltrating your other online accounts.
4. Data Breaches: Unintentional Exposure of Your Information
Social media platforms are not immune to data breaches, which can expose your personal information, including your name, contact details, and even private messages, to unauthorized individuals. This can lead to identity theft, spam, and targeted attacks.
5. Fake Profiles and Impersonation
Malicious actors can create fake profiles mimicking your identity or the identities of your friends and family. These profiles can be used to spread misinformation, scam others into sending money or providing personal information, or damage your reputation.
6. Social Engineering: Exploiting Trust and Curiosity
Cybercriminals manipulate human psychology through carefully crafted messages, posts, or comments that evoke feelings of trust, fear, or curiosity. They exploit these emotions to lure you into revealing sensitive information or taking actions that compromise your security.
7. Social Media Addiction and Overexposure
Excessive social media use can lead to addiction and an unhealthy dependence on online validation. This can make you more susceptible to scams, phishing attacks, and other manipulative tactics, as you may be more likely to act impulsively or share sensitive information without due consideration.
8. Unwanted Contact and Harassment
Social media platforms can be breeding grounds for online harassment and stalking. Cyberbullies and predators exploit the anonymity and accessibility of these platforms to target individuals with offensive messages, threats, and even doxing.
9. Algorithmic Bias and Discrimination
Social media algorithms can perpetuate biases and discrimination, leading to unfair treatment and exposure to harmful content. This can negatively impact your mental health and well-being and even limit your access to accurate information and diverse perspectives.
By understanding these common threats, you can take the necessary steps to protect your social media accounts and your online presence.
Best Practices for Securing Your Social Media Accounts
To protect your social media accounts from potential threats, there are several best practices that you should follow:
Use strong, unique passwords for each of your accounts. This means using a combination of upper and lowercase letters, numbers, and symbols to create a password that is difficult to guess. Additionally, avoid using the same password for multiple accounts, as this can make it easier for an attacker to gain access to all of your accounts if one is compromised.
Enable two-factor authentication (2FA) whenever possible. This adds an additional layer of security to your account by requiring a second form of verification, such as a code sent to your phone, in addition to your password. This makes it more difficult for an attacker to gain access to your account, even if they have your password.
Be cautious about the information you share on social media. Avoid posting sensitive information, such as your home address, phone number, or financial information, as this can be used by cybercriminals to target you for scams or identity theft.
Regularly review your privacy settings on each platform. Ensure that your personal information is not easily accessible to others, and limit the visibility of your posts to only those you trust.
Be cautious about the links you click on and the apps you download. Cybercriminals often use malicious links or seemingly innocent apps to distribute malware or gain access to your account.
By following the best practices mentioned in this social media security guide, you can help protect your social media accounts and your online presence from potential threats.
Protecting Your Privacy on Social Media Platforms
Social media offers a vibrant space for connection and sharing, but maintaining privacy in this digital landscape requires vigilance.
Beyond securing your accounts with strong passwords and two-factor authentication, mastering your privacy settings is crucial.
1. Customize Your Visibility
Dive into the privacy settings of each platform you use. Facebook allows you to restrict post visibility to friends, create custom lists for specific content, and even control who can see your tagged photos.
Similarly, Twitter’s “protected” mode ensures only approved followers can see your tweets. By limiting visibility, you safeguard your information and prevent unwanted eyes from viewing your activity.
2. Think Before You Post
Social media’s permanence can be a double-edged sword. Before hitting “share,” ask yourself crucial questions:
Does this post contain sensitive information like your address, phone number, or private conversations?
Could it be used to damage your reputation or negatively impact your personal or professional life?
Would I be comfortable with this information being accessible to everyone on the internet?
Is this information necessary to share on this platform, or can I communicate it privately?
Remember, once something is uploaded, it’s difficult to completely erase, even with deletion.
3. Explore Platform-Specific Features
Platforms like Instagram offer “Close Friends” lists, allowing you to share stories with a select group. Facebook’s “Limited Profile” feature restricts information accessible to non-friends.
Exploring these features empowers you to curate your online presence, tailoring it to specific audiences and safeguarding your privacy.
4. Manage Third-Party Access
Be cautious when granting third-party apps access to your social media accounts. Review the permissions requested and understand how your data will be used. Consider revoking access to apps you no longer use or trust.
5. Prioritize Data Minimization
Share only what you’re comfortable with. Avoid oversharing personal details, location information, or private messages on public platforms. Remember, less is often more when it comes to online privacy.
6. Stay Informed
Social media platforms evolve constantly, so staying updated on their latest privacy features and settings is crucial. Regularly revisit your preferences and adapt them based on your evolving needs and comfort levels.
By implementing these strategies and maintaining a mindful approach to sharing, you can navigate the social media landscape with confidence, enjoying its benefits while safeguarding your privacy and protecting yourself from potential harm.
Social Media Security Tools and Software
There are several social media security tools and software available that can help you protect your accounts and information.
These tools can help you monitor your accounts for potential threats, manage your passwords securely, and even detect and remove malware.
Password managers: Tools like 1Passwordand Dashlaneallow you to securely store and manage your passwords for all of your online accounts, including social media platforms. They can also generate strong, unique passwords for you, making it easier to follow best practices for password security.
Malware detection and removal tools: Software like Malwarebytesor Norton 360 can help you detect and remove malware from your devices, reducing the risk of your social media accounts being compromised.
Two-factor authentication apps: Apps like Google Authenticator or Authy can help you implement two-factor authentication for your accounts, providing an additional layer of security.
Social media monitoring tools: Tools like Hootsuite and Sprout Social allow you to monitor your social media accounts for potential threats, such as suspicious activity, spam, or phishing attempts.
By using these tools and software, you can help protect your social media accounts and your online presence from potential threats.
RECOMMENDED Social Media Security Deals
McAfee Identity Protection
Total protection from identity theft and financial crimes.
Total protection from identity theft and financial crimes. Show Less
Norton LifeLock Identity Advisor
Your best solution to protect your personal information from data leaks.
Your best solution to protect your personal information from data leaks. Show Less
Incogni
Incogni wipes off your personal information from data brokers.
Incogni wipes off your personal information from data brokers. Show Less
DeleteMe
DeleteMe is a service provided by Abine that helps users remove their personal information from data brokers and other...Show More
DeleteMe is a service provided by Abine that helps users remove their personal information from data brokers and other websites to protect their privacy online. Show Less
Social Catfish
Social Catfish is an online service that helps individuals verify and investigate the identity of people they meet...Show More
Social Catfish is an online service that helps individuals verify and investigate the identity of people they meet online, including potential scammers and catfishers. Show Less
Surfshark Alert
Surfshark Alert is a real-time data breach protection tool that safeguards your email accounts, passwords, personal...Show More
Surfshark Alert is a real-time data breach protection tool that safeguards your email accounts, passwords, personal identification numbers, and credit cards from cyber-attacks. Show Less
OmniWatch
Safeguard your identity with OmniWatch, the comprehensive identity theft protection service that provides proactive...Show More
Safeguard your identity with OmniWatch, the comprehensive identity theft protection service that provides proactive monitoring, dark web surveillance, and expert assistance in case of a breach. Show Less
AVG BreachGuard
AVG BreachGuard shields your online data from leaks and breaches, like a vigilant bodyguard for your digital life.
AVG BreachGuard shields your online data from leaks and breaches, like a vigilant bodyguard for your digital life. Show Less
Avast BreachGuard
Avast BreachGuard is a privacy tool designed to protect personal information online by preventing data breaches...Show More
Avast BreachGuard is a privacy tool designed to protect personal information online by preventing data breaches, removing personal data from data brokers, and providing real-time alerts for compromised data. Show Less
WhiteBridge AI
WhiteBridge AI is your digital identity detective — an AI-powered tool that uncovers, verifies, and organizes...Show More
WhiteBridge AI is your digital identity detective — an AI-powered tool that uncovers, verifies, and organizes everything the internet says about a person into one powerful, insightful report. It transforms scattered online chaos into a clear story you can trust, helping you protect your reputation, make smarter decisions, and see people as they truly are. Show Less
Privacy365
Privacy365 is a service that removes your personal information from data brokers and people search websites while...Show More
Privacy365 is a service that removes your personal information from data brokers and people search websites while continuously monitoring for new exposures. By cleaning up your digital footprint, it helps protect you from identity theft, doxxing, and unwanted contact. Show Less
NordProtect
NordProtect is a comprehensive identity theft and cyber protection service provided by Nord Security. It provides...Show More
NordProtect is a comprehensive identity theft and cyber protection service provided by Nord Security. It provides all-around protection against identity theft, including credit monitoring, dark web surveillance, security alerts, identity theft recovery, cyber extortion protection, and online fraud coverage. Show Less
Social Media Security Policies for Businesses
Businesses should implement social media security policies to protect their brand, reputation, and sensitive company information.
These policies should outline the steps employees should take to secure their accounts, as well as guidelines for using social media on behalf of the company.
Some key elements of a social media security policy for businesses include:
Requiring employees to use strong, unique passwords for their accounts and to enable two-factor authentication when possible.
Providing guidelines for the types of information that can be shared on social media, such as avoiding the posting of sensitive company information or financial data.
Establishing a process for monitoring and responding to potential social media threats, such as phishing attempts or account hacking.
Outlining the consequences for violating the social media policy, such as disciplinary action or termination.
Providing regular training and education for employees on social media security best practices and emerging threats.
By implementing a social media security policy, businesses can help protect their brand and sensitive information from potential threats.
Educating Employees on Social Media Security
Educating employees on social media security best practices and emerging threats is critical for maintaining a secure online presence for businesses.
This can include providing regular training sessions, creating educational materials, and encouraging employees to stay up-to-date on the latest social media security news.
Training sessions should cover topics such as password security, two-factor authentication, phishing attacks, and malware. Employees should also be educated on the company’s social media security policy and the potential consequences of violating it.
It’s also important to encourage employees to stay up-to-date on the latest social media security news and trends. This can include subscribing to security blogs and newsletters, attending industry conferences, and participating in online forums.
By educating employees on best practices, businesses can help ensure that their online presence remains secure and protected from potential threats.
Staying Updated with Social Media Security Trends and News
Finally, staying up-to-date with the latest social media security trends and news is critical for maintaining a secure online presence.
Cybercriminals are continually finding new ways to exploit vulnerabilities and gain access to accounts, so it’s essential to stay informed on emerging threats and best practices for protecting your accounts and information.
Some resources for staying updated on social media security news and trends include security blogs and newsletters, industry conferences, and social media platforms themselves.
See how OmniWatch can protect you – read our OmniWatch review on this tool that removes your personal information from the dark web and data broker websites.
Many social media platforms have dedicated security pages or accounts that provide updates on potential threats and how to protect yourself.
By staying informed and vigilant, you can help protect your social media accounts and your online presence from potential threats.
Social Media Security Guide: FAQs
What is social media security, and why is it important?
Social media security refers to protecting your accounts, content, and data from unauthorized access, cyberattacks, and misuse. It is crucial because both individuals and businesses are prime targets for phishing, identity theft, account takeovers, and reputation damage. A single breach can lead to data loss, financial fraud, or irreversible brand trust erosion.
How can I secure my personal social media accounts?
To protect personal accounts, use strong, unique passwords for each platform, enable two-factor authentication (2FA), set strict privacy controls, and avoid logging in on public Wi-Fi without a VPN. Regularly check app permissions and be cautious of quizzes or clickbait posts that harvest personal data.
What are the top threats to social media accounts?
The most common threats include phishing messages, fake friend requests, credential stuffing attacks, malicious links, and impersonation scams. Increasingly, AI-generated deepfakes and social bots are also being used to manipulate users or harvest sensitive information.
How can businesses protect their brand on social media?
Businesses should use social media management tools with user roles and audit trails, implement a clear social media policy, and monitor platforms for fake pages or brand misuse. Registering brand handles across major platforms, even if unused, can help prevent impersonation.
What is two-factor authentication (2FA) and how does it help?
2FA adds a second step to the login process — like a verification code or authenticator app — to protect your account even if your password is stolen. Platforms like Facebook, Instagram, and LinkedIn all support 2FA and recommend activating it for added security.
How can I detect if my social media account has been hacked?
Look for red flags such as login attempts from unknown devices or countries, unusual messages sent from your account, unfamiliar posts, and email alerts about changes you didn’t make. You might also be logged out unexpectedly or receive password reset links you didn’t request.
What should I do if my social media account is compromised?
Act fast: reset your password, revoke suspicious app permissions, and turn on 2FA. Contact the platform’s support immediately to report the breach. Post a notice warning your followers if any scams were sent from your account to prevent further damage.
Are social media scheduling tools safe to use?
Yes — provided you use well-established tools like Buffer, Hootsuite, or Sprout Social with verified security protocols. Always check their privacy policies, revoke unused integrations, and assign limited roles to team members to avoid unnecessary risks.
How can businesses prevent employees from becoming a security risk on social media?
Train employees on recognizing phishing scams, using secure passwords, and handling sensitive information. Implement least-privilege access, monitor activity with audit tools, and reinforce a culture of cybersecurity awareness across departments.
Why should I regularly audit my social media security settings?
Regular audits help you identify potential vulnerabilities like outdated passwords, unused apps with access, or profile visibility issues. Platforms frequently update their privacy features, so periodic reviews ensure you remain protected against new threats.
Wrapping Up The Social Media Security Guide
Before I conclude this social media security guide, I will say that social media security is critical for maintaining a secure online presence, whether you’re an individual or a business.
By understanding the common threats and best practices for securing your accounts, you can help protect your personal information, digital assets, and online reputation.
Remember to use strong, unique passwords for each of your accounts, enable two-factor authentication whenever possible, be cautious about the information you share on social media, and regularly review your privacy settings.
Additionally, consider using social media security tools and software to monitor your accounts for potential threats and to manage your passwords securely.
For businesses, implementing a policy and educating employees on best practices and emerging threats is critical for maintaining the security of sensitive company information and protecting the brand’s reputation.
Finally, remember to stay up-to-date with the latest social media security trends and news to help protect your online presence from potential threats.
By following these best practices mentioned in this social media security guide and staying informed, you can help safeguard your online presence and maintain a secure digital life.

")


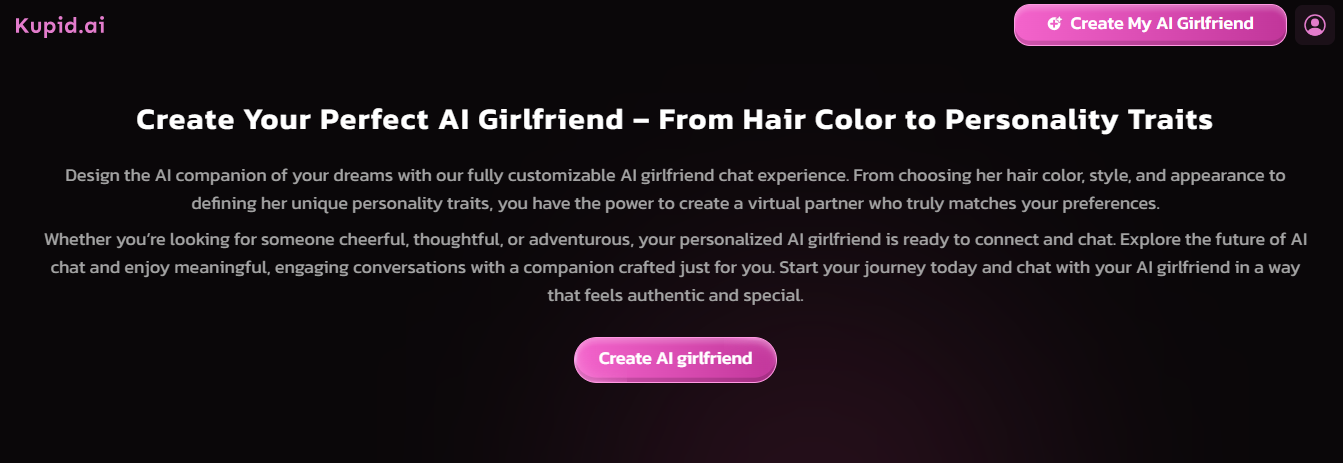


")