In this post, I will show you the pros and cons of outsourcing your cybersecurity audit.
As businesses become increasingly reliant on technology for their operations, the security of their digital infrastructure becomes increasingly important. One way to ensure the security of your business is to outsource a cybersecurity audit.
Outsourcing a cybersecurity audit can provide several advantages, but you should consider some potential disadvantages before deciding. This article will review the pros and cons of outsourcing your cybersecurity audit.
Pros Of Outsourcing Your Cybersecurity Audit
Expertise
Outsourcing your cybersecurity audit to a specialist firm can ensure that your business receives the most comprehensive and up-to-date service.
To ensure that your security audit is performed by qualified professionals who are well-versed in the latest industry trends and standards, hire a company dedicated to developing and providing cutting-edge cybersecurity solutions.
For instance, Cybersecurity by Welsh, offers a broad range of security services, including vulnerability assessments, risk assessment and analysis, penetration testing, and incident response planning. These services are designed to identify potential security risks and provide the necessary mitigation recommendations.
Outsourcing your cybersecurity audit also helps to ensure a consistent level of expertise across all aspects of the audit.
To ensure that the audit is completed by professionals who can provide the most accurate and up-to-date recommendations, it would be best to outsource the work to a specialist rather than depending on in-house workers who may have different knowledge and experience.
It helps ensure that any weaknesses in your security systems are identified and addressed quickly and effectively, thus protecting your business from potential threats.
Cost Savings
Outsourcing a cybersecurity audit can save costs for an organization in several ways. First, many organizations don’t have the resources, expertise, or time to conduct a thorough and comprehensive audit of their security systems.
By outsourcing the audit to a third-party security firm, the organization can leverage the expertise of experienced professionals to ensure that their systems are secure and up-to-date.
In addition, outsourcing the audit can save the organization time and money by allowing it to focus on its core business operations rather than managing the security audit. Second, outsourcing the audit enables the organization to take advantage of economies of scale.
By outsourcing the audit, the organization can benefit from the security firm’s already-established relationships with vendors and other service providers, which can often result in reduced costs.
In addition, outsourcing the audit can also help the organization avoid the costs associated with internal training and hiring specialized personnel. By leveraging the expertise of an outside firm, the organization can benefit from the security firm’s existing knowledge and experience, which can help them avoid costly mistakes.
Outsourcing your cybersecurity audit can increase security by allowing a team of experts to assess your system and identify any vulnerabilities. They can also advise how to improve your security posture and help you implement the necessary changes.
For example, they can help you develop a comprehensive security policy, audit your existing security protocols, and ensure that you have the right tools, processes, and personnel to protect your organization’s data.
Additionally, they can provide ongoing support and monitoring to ensure your security posture remains strong and up to date. Therefore, if you outsource your cybersecurity audit, you can benefit from the expertise of well-versed professionals in the latest security trends and best practices.
Flexibility
Outsourcing your cybersecurity audit increases flexibility because it allows you to access specialized expertise and resources that may not be available in-house. It also allows you to quickly adjust to changing requirements and needs by providing access to a larger pool of experts and resources.
Additionally, outsourcing can help you save on costs by paying only for the services you need. Lastly, outsourcing can help you focus on growing your business functions by relieving you of the burden of managing complex cybersecurity audits.
Cons Of Outsourcing Your Cybersecurity Audit
Loss Of Control
Since the company needs direct oversight of the audit, outsourcing a cybersecurity audit can lead to little or no control over the audit processes and results.
Consequently, companies must rely on a third-party vendor to complete the audit accurately and objectively. It means that the company may need more direct insight into the audit process, including the scope of the audit, the methods used, and the results.
In addition, the audit may not be performed as thoroughly as if it were done internally, which is another potential downside. For this reason, the company may be unable to verify the audit results and ensure that the necessary changes have been made.
Risk Of Data Breach
Outsourcing your cybersecurity audit increases the risks of a data breach because the third-party auditor may have different expertise or access to the same resources as an in-house auditor.
The auditor may be unable to identify as many security vulnerabilities or be as thorough in their analysis as an in-house auditor.
Additionally, the auditor may not be familiar with the company’s security policies and procedures, limiting their ability to identify weaknesses. Also, they’ll be less likely to report any findings due to a lack of familiarity with the company’s operations.
Moreover, the auditor might not be up-to-date on emerging risks and vulnerabilities, leading to overlooked potential risk areas. All these factors can leave the company vulnerable to the most common cyber security threats today.
Hard To Determine The Quality Of the Audit
When you outsource your cybersecurity audit, you’re relying on an outside party to evaluate the safety of your network, which can make it difficult to gauge the audit’s quality. You have to have trust that the external service provider is giving you an honest assessment of your system’s security flaws.
Additionally, it can be hard to verify the accuracy of the audit results since an external party conducted the audit. It’s also essential to consider the qualifications and experience of the auditor, as this can significantly impact the quality of the audit.
Furthermore, the audit process may be subject to the limitations of the external auditor’s time and resources, which could affect the depth and accuracy of the audit.
Conclusion
As you can see, there are both pros and cons to outsourcing your cybersecurity audit. While outsourcing can provide several advantages, such as access to expertise, cost savings, increased security, and flexibility, it also comes with some potential drawbacks.
Before deciding, it’s essential to carefully weigh the pros and cons to determine if outsourcing is the right decision for your business.
In this post, I will talk about the best DEX aggregators in 2026.
DEX aggregators solved a real problem: DeFi liquidity is fragmented across dozens of pools, and hitting a single exchange directly almost always means worse pricing than splitting the order. By 2026, the core aggregation problem is largely solved. The differences that matter now are routing architecture, MEV resistance, chain coverage, and whether the tool you are using is actually doing the routing or delegating it to something beneath the interface.
This comparison covers five aggregators that dominate on-chain volume in 2026: 1inch, Jupiter, Paraswap, Matcha, and Rango. It also covers what happens when aggregator routing gets embedded inside a dedicated trading terminal, because that distinction changes how you should evaluate the tools available to you.
What Is a DEX Aggregator and Why It Matters
A DEX aggregator queries multiple decentralized exchanges simultaneously and routes your swap through whichever combination of liquidity sources produces the best net price. Instead of sending your trade to a single pool, the aggregator splits and routes the order to minimize price impact across dozens of venues. For a large swap, routing 40% through one Uniswap v3 pool, 35% through another, and 25% through a Curve stable pool can produce meaningfully better execution than any single pool would deliver.
For sub-$10,000 swaps on major pairs, the pricing difference between a good aggregator and a direct DEX interaction is often small. The gap widens as order size grows, liquidity thins on newer tokens, and MEV pressure increases. Sandwich attacks remain a consistent drain on traders routing through public mempools; aggregators address this through private routing or order-flow auctions, not just smart path selection.
The Top 5 DEX Aggregators in 2026
1inch is the oldest and most battle-tested aggregator on Ethereum. Its Fusion+ protocol auctions limit orders to professional market makers who compete to fill them with zero slippage and no gas cost to the user. The trade-off is execution time: Fusion+ is not instant, and for traders who need immediate fills on volatile tokens, the auction mechanism can result in partial or delayed fills. The routing engine covers Uniswap v2, v3, and v4, SushiSwap, Balancer, Curve, and over 200 additional liquidity sources on Ethereum, with expansion to several EVM chains. For active on-chain traders moving large amounts, 1inch on Ethereum is still the first benchmark to check before executing elsewhere.
Jupiter is the dominant aggregator on Solana. It routes across Raydium, Orca, Whirlpool, Meteora, and other Solana-native AMMs simultaneously, with dynamic slippage calculation and MEV-aware routing as defaults. The DCA and limit order products have both accumulated meaningful volume since launch. The limitation is scope: Jupiter is Solana-native. Traders operating across Ethereum and Solana manage two separate aggregator interfaces, which introduces friction and execution risk during fast-moving markets.
Paraswap focuses on institutional and protocol-level routing on Ethereum and several EVM chains. Its MultiPath architecture handles complex swaps through intermediary tokens when direct pair liquidity is insufficient, and its API is embedded in a number of DeFi protocols and wallets as the routing backend. Most Paraswap volume runs through integrations rather than direct user interaction; the retail interface is less developed than 1inch on user experience. For developers building DEX routing into applications, Paraswap’s API depth is a genuine asset. As a standalone swap tool, it sits behind 1inch on Ethereum and has no meaningful Solana presence.
Matcha, built on top of the 0x protocol, layers a user interface over 0x’s existing market maker network rather than operating independent liquidity routing. Pricing is competitive on standard pairs. The constraint is that Matcha’s routing is bounded by what 0x’s market maker network covers; on newer tokens or thinner pairs, price discovery can lag behind aggregators that query more sources directly. Chain coverage extends to Ethereum, Polygon, Arbitrum, Base, and BNB Chain, but routing depth varies across those networks. For standard swaps on major pairs, Matcha performs well. For low-cap assets where slippage tolerances are tight, the routing architecture shows its limits.
Rango occupies a distinct position as a cross-chain aggregator. Its primary use case is bridging combined with swapping: moving assets from Ethereum to Solana while converting tokens in the same transaction, without managing a separate bridge interface. Rango connects to dozens of bridges and DEX protocols across more than 60 chains. The trade-off is execution speed; cross-chain swaps take several minutes and involve bridge confirmation steps with their own failure modes. For users who need cross-chain mobility, Rango addresses a gap that same-chain aggregators do not. For active traders making rapid entries and exits on a single chain, it is not the right tool.
The Execution Layer Above Aggregators
There is a category distinction worth understanding: using a DEX aggregator directly versus using a trading terminal that routes through aggregators on your behalf. The practical gap between these two approaches has grown considerably since 2024. Traders who want to understand the engine specifics before relying on a terminal for live execution will find the routing architecture and fee structure substantially different from what standalone aggregators provide.
Banana Pro, the browser-based trading terminal from Banana Gun, operates a custom routing engine per chain rather than routing all trades through a single aggregator API. On Ethereum, the engine covers Uniswap v2, v3, and v4, SushiSwap, and Zora. On Solana, it routes through Raydium, Jupiter, and Orca. PancakeSwap handles BNB Chain. Aerodrome handles Base. The engine applies multi-hop routing through intermediate tokens when the direct path produces worse pricing. A concrete example: a swap from SOL to a low-liquidity target token may route as SOL to USD1, then USD1 to the target, all settled in a single transaction. The user never selects the route; the engine finds it automatically.
MEV protection is active by default across all five chains the platform supports. Ethereum routes through a private mempool that bypasses the public transaction queue entirely. Solana uses Jito infrastructure for optimized block inclusion. MegaETH runs a rebuilt routing engine designed for 100,000 TPS and sub-100ms execution. On Base, Flashblock copy trading executes at 200ms granularity, an industry first when launched in early 2026. A full breakdown of how MEV works and what it costs per DeFi transaction is useful context for understanding why default-on protection matters at the routing layer. None of this requires manual configuration from the user.
The February 2026 Unified Data Engine consolidated Banana Pro‘s data pipeline into a single feed driving all terminal widgets simultaneously. Chart rendering became 40% faster after the update, and price action, holder data, and transaction feeds now update in sync rather than with independent lag. Traders who prefer the mobile-first interface can access the same execution stack directly through the Banana Gun Telegram bot, which runs the full five-chain session from a single chat window.
Banana Pro is not a DEX aggregator and does not compete with 1inch or Jupiter for that category. It is the terminal layer above those aggregators: a unified execution environment covering five chains from a single interface, with zero-fee stablecoin swaps on EVM chains, a pre-flight simulation that blocks trades flagged as honeypots, copy trading mirroring wallets across all chains simultaneously, and an 88% first-block snipe success rate on Ethereum. The platform has processed over $16 billion in cumulative volume across 25.3 million lifetime trades, used by traders who want aggregator-quality routing without managing five separate interfaces.
How to Evaluate Routing Quality in 2026
Routing quality is not a single metric. Four dimensions determine whether an aggregator or execution terminal actually gets you better fills in practice.
Price impact and slippage tolerance interact in ways that are easy to misread. Price impact is what the pool math produces given your trade size; slippage tolerance is the maximum deviation from the quoted price you will accept before the transaction reverts. Setting slippage too low causes failed transactions on volatile assets. Setting it too high opens your transaction to sandwich attacks if it routes through a public mempool. A well-built routing engine manages this balance per trade type, not through a blanket user setting applied equally to stables and low-cap tokens. On Ethereum, gas optimization is part of this calculation: a complex multi-hop route that prices 0.3% better may still lose money if the additional gas legs push total cost above the pricing advantage, particularly during high-activity periods.
MEV resistance is no longer optional for traders moving meaningful size. Private mempool routing, order-flow auctions, and Jito-based submission each address this in different ways. The factor that matters most is whether the protection is on by default; most traders do not enable optional settings consistently, and defaults determine real-world outcomes. Default-on protection is not a nice-to-have but a structural requirement for serious on-chain trading.
Multi-hop support determines how deep the router can go when no direct pair exists. Simple aggregators find the best direct pool. Advanced routing engines chain swaps through intermediate tokens, sometimes three or four hops deep, to find paths a direct lookup would miss. For trading newly launched tokens with thin liquidity, multi-hop support is often the difference between a filled order and a reverted one.
Chain coverage sets the ceiling on where a tool is useful. Single-chain aggregators deliver excellent routing on their home chain but force multi-chain traders into tool fragmentation. By 2026, the meaningful question is not whether an aggregator covers multiple chains, but whether those chains include the specific ecosystems where you actively trade, at routing depth comparable to the chain’s leading native tools. Source count is less important than source quality: an aggregator routing through 300 venues but missing Uniswap v4 or Jupiter’s latest AMMs is less useful than one covering 20 well-maintained, high-liquidity pools with deep integrations.
Frequently Asked Questions
What is a DEX aggregator?
A DEX aggregator is a protocol that queries multiple decentralized exchanges simultaneously and routes a swap through whichever combination of liquidity sources produces the best net price after accounting for slippage, gas, and fees. Instead of submitting your trade to a single exchange, the aggregator splits and routes the order to minimize price impact across Uniswap, Curve, Balancer, Jupiter, Raydium, and dozens of other venues depending on the chain.
Which DEX aggregator has the best routing in 2026?
1inch leads on Ethereum with the most mature Fusion+ routing, which auctions orders to professional market makers and guarantees zero slippage on fills. Jupiter leads on Solana by volume and breadth of liquidity sources. For traders who want aggregator-quality routing across five chains from one terminal, Banana Pro uses a custom routing engine per chain that handles multi-hop paths and MEV protection automatically without the user having to interact with each aggregator directly.
Do I need a DEX aggregator if I use a trading terminal?
Not necessarily. Trading terminals like Banana Pro build aggregator routing into their execution layer. When you place a trade on Banana Pro, the platform routes through Uniswap v2, v3, and v4, SushiSwap, and Zora on Ethereum, or Raydium, Jupiter, and Orca on Solana, depending on where the best price sits at that moment. The aggregator logic runs under the hood; you interact with a single trade interface with MEV protection, pre-flight simulation, and multi-hop support applied automatically.
In this post, I will compare Plixi vs Kicksta and show you which Instagram growth service is better in the end.
Picking between Plixi and Kicksta can get oddly confusing because both promise real Instagram growth, targeted audiences, and analytics that help users track progress. The harder part is figuring out what each one actually does once the account is connected and the first week passes.
That is where the comparison starts to matter, because a growth service becomes much easier to judge when targeting, support, reporting, and day to day usability are looked at side by side.
Targeting is where the split becomes clear
Plixi takes a broader targeting approach. Its pricing and home pages center on AI powered growth, competitor targeting, targeted organic followers, and content optimization features, which gives the service a more layered feel from the start. Early in the process, that can matter for users trying to increase instagram followers without managing every audience input by hand.
Kicksta is more direct about how targeting works. Its growth pages say the system targets based on hashtags, competitor accounts, and other inputs the user controls, and its home page also describes targeted AI growth through follow and unfollow automation. For users who want to understand the targeting logic quickly, that straightforward setup may feel easier to grasp.
That difference shapes the whole comparison. Plixi looks stronger for buyers who want targeting tied to a wider growth framework, while Kicksta looks stronger for buyers who prefer a narrower and more explicit set of audience inputs. Neither approach is random, though Plixi comes across as the more complete option when the goal includes growth plus optimization rather than targeting alone.
Ease of use depends on what kind of help the buyer wants
Plixi has a smoother feel for users who want to see the product before committing. Its home page highlights a live demo dashboard, and its analytics page presents a two minute setup flow, which lowers the usual friction that comes with trying a growth product for the first time. That kind of access can help small brands and solo creators who do not want to spend their first hour decoding the interface.
Kicksta leans into a different sort of usability. It offers a seven day free trial, keeps its targeting language very plain, and separates plans into a Growth tier and an Advanced tier aimed at influencers and businesses. That makes the path easier for buyers who want a simpler decision and do not need a wider menu of managed options at the beginning.
Analytics and visibility go further on Plixi
This is where Plixi opens a bigger gap. Its analytics page describes more than 50 real time metrics, including follower growth, engagement rate, audience reach, growth rate, follower demographics, top sources, estimated post reach, and shareable PDF reports. For users who care about seeing where traction comes from and what needs adjusting, that gives Plixi a fuller reporting layer than many buyers will expect from a growth service.
Kicksta does include real time growth analytics, and that is a meaningful feature. Its pricing and home pages frame analytics as a way to track progress and guide next steps, which keeps the product practical for people who do not need a larger reporting environment. It also adds a weekly Instagram audit, where its AI scans the profile and leaves feedback tied to content and growth strategy.
Still, the two products feel different here. Kicksta gives users a useful read on progress, while Plixi gives users a much wider picture of performance, audience makeup, and reporting outputs. That extra visibility will matter more as the account grows and the questions shift from “is this working” to “what is working, for whom, and what should change next.”
Support is another point in Plixi’s favor
Plixi has the stronger support structure overall. Its plans include LA and London team support, while its Experts add on brings on demand availability, unlimited calls, human account monitoring, personalized goals, weekly reports, content strategy, business insights, and a custom tailored audience. For businesses and agencies, that turns the service into something closer to a managed growth program.
Which one fits best
Plixi fits best for users who want more than a narrow growth tool. It is the better match for brands, founders, agencies, and creators who care about audience targeting, analytics depth, ongoing reporting, and the option to bring in more hands on support later. That broader structure is why it comes out ahead in this comparison.
Kicksta still makes sense for a different kind of buyer. A creator or small business that wants clear account and hashtag targeting, real time analytics, weekly audits, and constant support may prefer its simpler path. Its Advanced plan also adds Close Friends engagement features and preset DMs for new followers, which gives some users a more conversion focused workflow.
The better service depends on how much structure the user wants around growth, though the all around winner here is Plixi. It covers more of the process, shows more of the data, and leaves more room for guidance once growth stops feeling easy. Kicksta remains a solid option for users who want a more direct setup, but Plixi has the stronger overall case when the comparison is made feature by feature.
I will show you how to secure your Instagram page in this post.
Instagram is one of the most popular social media platforms, with over a billion users worldwide. Marketers and Influencers use Instagram to reach out to audiences worldwide and gather free Instagram followers to gain popularity or build a strong brand name for products and services.
As the most-used social media platform worldwide, Instagram has also become the most targeted social media platform by hackers, hence the need to secure your Instagram page. Well, make sure that you buy Instagram views from an authenticated source.
To keep your account secure, attract only real Instagram followers and not pay for bots or ghost followers.
The following steps will guide you on how to secure your Instagram page.
How To Secure Your Instagram Page
Taking the following security measures below will make you worry less about security while you focus your time and effort on how to get 1k followers on Instagram in 5 minutes:
Step 1: Activate 2FA
2FA is two-factor authentication. It adds an extra security layer to your Instagram page by verifying your identity using a one-time sent to your registered phone number via SMS or an authenticator app. Logging into your Instagram page from another device will instantly prompt 2FA to verify the authenticity of such logging activity.
To activate 2FA on your Instagram page,
Click the menu icon on your Instagram page. The menu icon is represented by three horizontal bars.
On the menu page, click the ‘Setting’ icon at the bottom.
In the ‘Settings’ menu, tap on ‘Security.’
Activate 2FA by tapping on ‘Two-factor authentication’ in the ‘Security’ menu.
Tap on ‘Get Started’ in the 2FA settings.
Choose a two-factor authentication method. You can get your 2FA code via an ‘Authentication app’ (Instagram’s recommended choice) or via the ‘Text message.’ toggle on any 2FA method that suits your needs.
Tap on ‘Done’ to confirm your choice of 2FA.
Instagram will advise you to keep your 2FA codes securely to recover your Instagram account ‘if you lose your phone, or you can’t receive a code via text message or an authentication app.’
Step 2: Use a strong password for your Instagram account
A strong password should be over 6 characters long and include alphabets in upper and lower cases, special characters or symbols, and numbers. This makes it difficult for hackers to guess your password using any means. Also, a strong password should be easy to remember.
But to save you the hassles of memorizing dozens of complex passwords, you should use a trusted password manager to generate, manage, and auto-fill your passwords each time you want to log into your Instagram account.
Logging into your Instagram page to engage with your followers by Liking, Commenting on their posts, or even uploading a new post helps you gain more popularity in your Instagram community.
However, you can use Instagram auto-link without logging into your Instagram account to like audiences’ posts and comments. This helps you increase your interaction level with the Instagram community without logging into your account.
Step 3: Secure your email
Your Instagram, Facebook, and other accounts are linked to your email. Hence, a breach of your email account can compromise other accounts linked to your email, including your Instagram account.
Therefore it is essential to secure your email using strong passwords, 2FA verification, and other security measures.
Step 4: Be wary of granting access to third-party apps and accounts
Most accounts or apps will request that you use your Google, Instagram, or Facebook account to sign up; you should be wary of the apps and accounts you grant access to on your Instagram page.
A target at the databases of these apps and accounts can compromise your Instagram account.
Some platforms allow you to buy Instagram followers by requesting access to your Instagram account.
Some of these apps can pose as genuine apps to steal your data. To revoke access granted to third-party apps, you should:
Log in to your Instagram account using a browser on your phone or PC
Click on the person icon at the top-right of your screen
Click on the Settings represented with a gear icon
At the far left side of your screen, under the ‘Authorized Applications’ section, click on ‘Privacy and Security.’
A list of apps and accounts with access to your Instagram details is displayed.
Click on the ‘Revoke Access’ button for any account and ‘Yes’ to revoke access to your Instagram information.
How To Secure Your Instagram Page: Frequently Asked Questions
Instagram is a fantastic platform for connecting and sharing, but security is key. Here are some FAQs to help you keep your Instagram account safe:
Can you secure your Instagram account?
Absolutely! You can significantly improve your Instagram account’s security by taking some proactive steps.
How can I make my Instagram more safe?
Here are some essential measures:
Strong Passwords: Create a strong, unique password for your Instagram account. Don’t reuse passwords from other platforms. Consider using a password manager.
Two-Factor Authentication (2FA): Enable 2FA! This adds an extra layer of security by requiring a code from your phone and your password when logging in.
Private Profile (Optional): Consider making your profile private if you only want to share content with approved followers. This limits the visibility of your posts to strangers.
App Permissions: Review and adjust the permissions granted to third-party apps that connect to your Instagram account. Only grant access to what’s necessary.
Suspicious Activity: Be cautious of suspicious messages or requests. Don’t click on links or download attachments from unknown senders.
Report Phishing: If you encounter phishing attempts (messages imitating Instagram to steal your login), report them to Instagram immediately.
Instagram has no “lock” function, but you can temporarily deactivate your account if you need a break. Deactivated accounts are hidden until you reactivate them.
Should I lock my Instagram account?
Deactivation can be a good option if you’re concerned about privacy or want a break from the platform. However, it’s not a substitute for strong security measures like those mentioned above.
What is a security risk in Instagram?
There are various security risks on Instagram. Here are some common ones:
Phishing Attacks: Scammers might trick you into revealing your login information through fake messages or pages.
Hacking: Weak passwords or clicking malicious links can leave your account vulnerable to hackers.
Unauthorized Access: Sharing your login information or using third-party apps with excessive permissions can compromise your account security.
Bottom Line
As you gather free Instagram followers, discover how to get 1k Instagram followers in 5 minutes, and use the Instagram auto-liker without logging in, you should not neglect the above security measures to ensure that your account remains protected from hackers.
By being mindful of these risks and implementing the security measures mentioned, you can significantly reduce the chances of your Instagram account being compromised. Remember, online safety is an ongoing process. Stay vigilant and enjoy using Instagram securely!
In this post, we will compare the best QuickBooks Enterprise hosting providers by dedicated server support, Advanced Reporting performance, industry edition compatibility, pricing, and compliance.
Your local server feels like control. It is not. One failed hard drive, one corrupted Windows update, one user accidentally locking a company file over a glitchy VPN, and your firm’s entire operation freezes.
For accounting teams running Advanced Reporting against large datasets, managing multi-entity consolidations, or working across multiple office locations, a local machine is just a single point of failure with a power cord.
The skepticism about moving QuickBooks Enterprise to the cloud is real, and it is worth taking seriously. Advanced Reporting depends on Microsoft SQL Server. Industry-specific editions, such as Contractor, Nonprofit, Manufacturing and Wholesale, and Retail, carry configuration data that a careless migration can break.
ODBC (Open Database Connectivity) connections to external tools like Power BI or Excel need to stay intact. These are not concerns a generic file host can handle.
But the best QuickBooks Enterprise hosting providers are not generic file hosts. They build dedicated infrastructure specifically for Desktop Enterprise, preserve every capability from 200 custom fields to 200-plus third-party integrations, and do it inside a compliance framework that satisfies the FTC Safeguards Rule and IRS Publication 4557.
This article covers seven of the top QuickBooks Enterprise cloud hosting providers. Each entry covers server architecture, enterprise-specific support, pricing, compliance credentials, and the exact type of firm it fits best.
What to Know Before You Read
The best hosting for QuickBooks Enterprise runs on dedicated private servers, not shared infrastructure. Server type directly determines Advanced Reporting speed and multi-user stability.
All seven providers in this list support QB Enterprise industry editions (Contractor, Nonprofit, Manufacturing and Wholesale, Retail, and more) and allow third-party add-on connections.
Dedicated QB Enterprise hosting starts at roughly $60 to $70 per user per month. Shared hosting plans start lower, around $30 to $45 per user per month.
Security credentials to look for before signing: SOC 2 Type II certification, AES-256 encryption at rest and in transit, MFA on every login, and demonstrated alignment with the FTC Safeguards Rule and IRS Publication 4557.
The seven providers compared in this article: Verito, Rightworks, Ace Cloud Hosting, Summit Hosting, GoToMyERP, Apps4Rent, and Cloudwalks.
What Separates Enterprise Hosting from Standard QuickBooks Hosting
Most QuickBooks hosting listicles treat Pro, Premier, and Enterprise as interchangeable. They are not. QuickBooks Enterprise is a substantially different product, and hosting it correctly requires infrastructure built to match its demands.
Standard QB cloud hosting focuses on remote file access and basic multi-user functionality. Enterprise hosting providers go further. The five capabilities below separate a capable Enterprise hosting environment from a generic remote access setup.
The Enterprise Hosting Readiness Stack: Five Capabilities Any QB Enterprise Host Must Cover
Not every provider passes all five. Each capability below represents a real gap where shared or generic hosting environments fail Enterprise-specific workflows.
Advanced Reporting Performance
Advanced Reporting in QuickBooks Enterprise is powered by Microsoft SQL Server, not the standard QB file engine. It is resource-intensive by design. On a shared server, where CPU and RAM are distributed across dozens of tenants, concurrent usage from other firms degrades your report generation times.
A dedicated server assigns resources exclusively to your environment. Whether you are running a 5,000-row P&L by class or a multi-department budget variance report, the performance stays consistent.
Full Industry Edition Compatibility
QuickBooks Enterprise ships in six editions: Contractor, Manufacturing and Wholesale, Nonprofit, Retail, Professional Services, and Accountant.
Each carries unique modules. Contractor edition includes job costing and progress invoicing. Nonprofit tracks donors and grants. Manufacturing handles build assemblies and inventory. Your hosted environment must run the full edition you use, including those modules, not just the base Enterprise install. Ask your provider directly before signing.
ODBC Connectivity and Integration Depth
Enterprise supports ODBC for external database access, allowing direct data pulls into Excel, Power BI, and third-party reporting tools. It also connects natively with more than 200 integrations, including Fishbowl, Salesforce, Expensify, and BILL.com.
A hosting environment that restricts outbound connections or blocks third-party installs will break these workflows. Confirm your specific integrations are allowed before committing.
Multi-entity and Concurrent Multi-user Access
QuickBooks Enterprise supports up to 40 simultaneous users. Firms managing multiple company files or serving multiple client entities need stable concurrent access without file-locking conflicts.
Shared virtual desktop infrastructure struggles with this at scale. Dedicated servers with allocated vCPUs handle it without degradation.
Compliance and Data Residency
The FTC Safeguards Rule classifies accounting and tax firms as financial institutions under the Gramm-Leach-Bliley Act (GLBA). IRS Publication 4557 requires a formal Written Information Security Plan (WISP) and specifies technical safeguards for tax preparers.
At minimum, your hosting provider needs SOC 2 Type II certification, MFA enforcement, AES-256 encryption, and a clear compliance posture. This is a federal legal requirement, not a bonus feature.
At a Glance: QuickBooks Enterprise Hosting Providers Compared
The Enterprise Hosting Benchmark below applies six criteria specific to QB Enterprise workloads, not the generic hosting criteria that apply equally to Pro or Premier. Pricing is verified from publicly available sources at the time of writing. Custom-quote providers are noted as such.
Provider
Server Type
Starting Price
Industry Editions
Advanced Reporting
Contract Type
Key Compliance
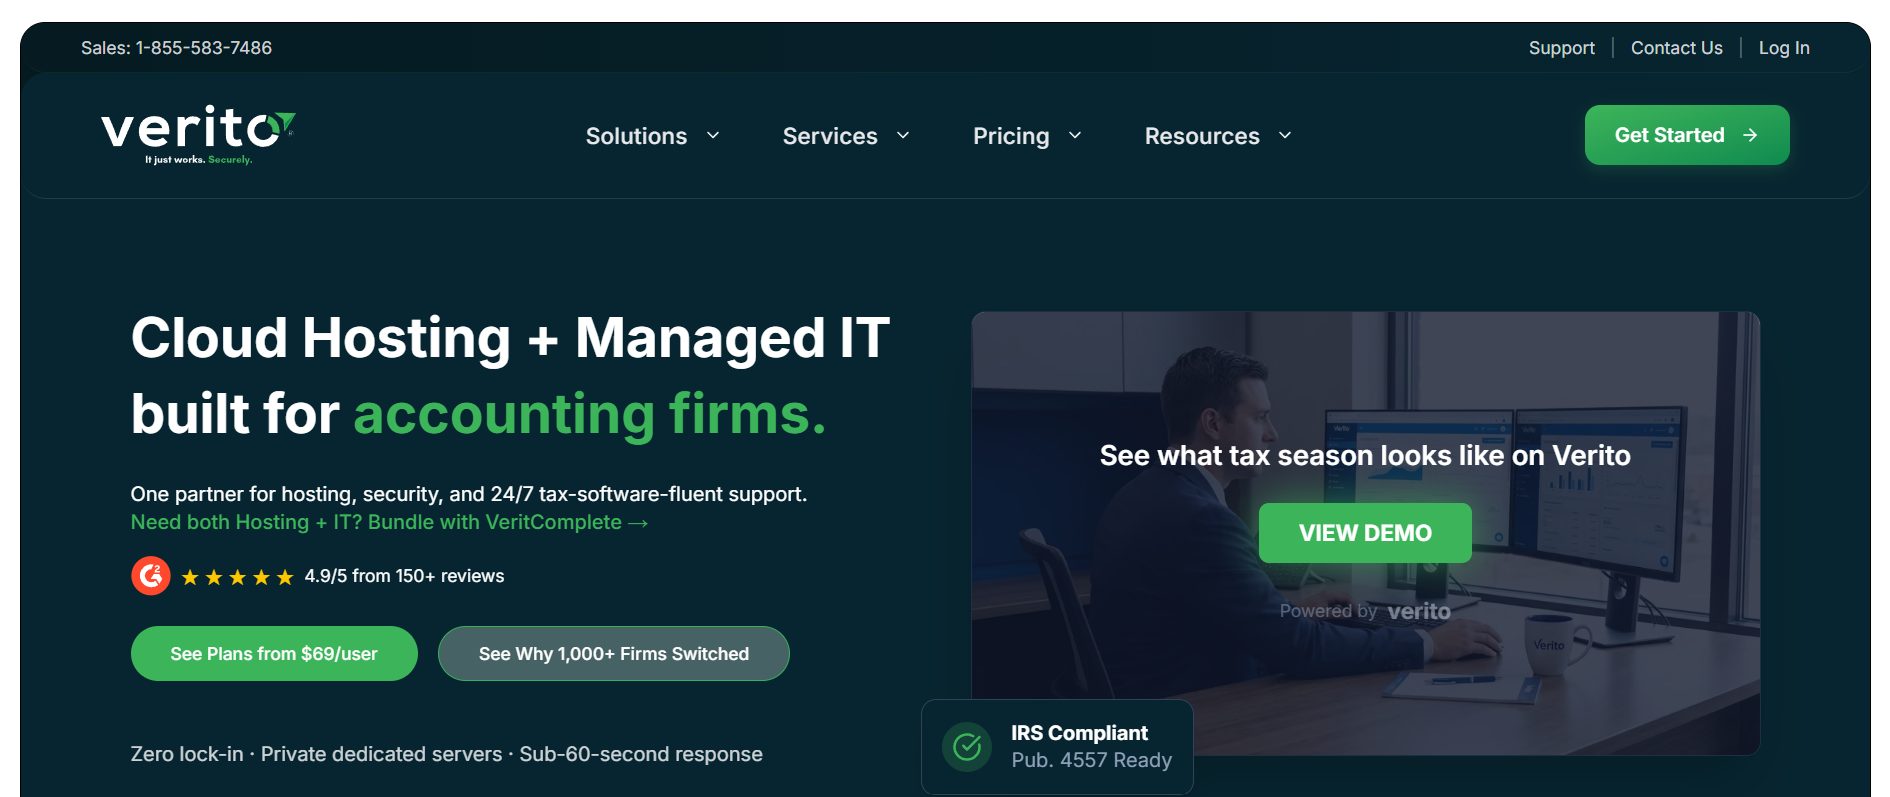
Verito
Dedicated private
$69/user/month
All editions
Yes
Month-to-month
SOC 2, FTC Safeguards Rule, IRS Pub. 4557
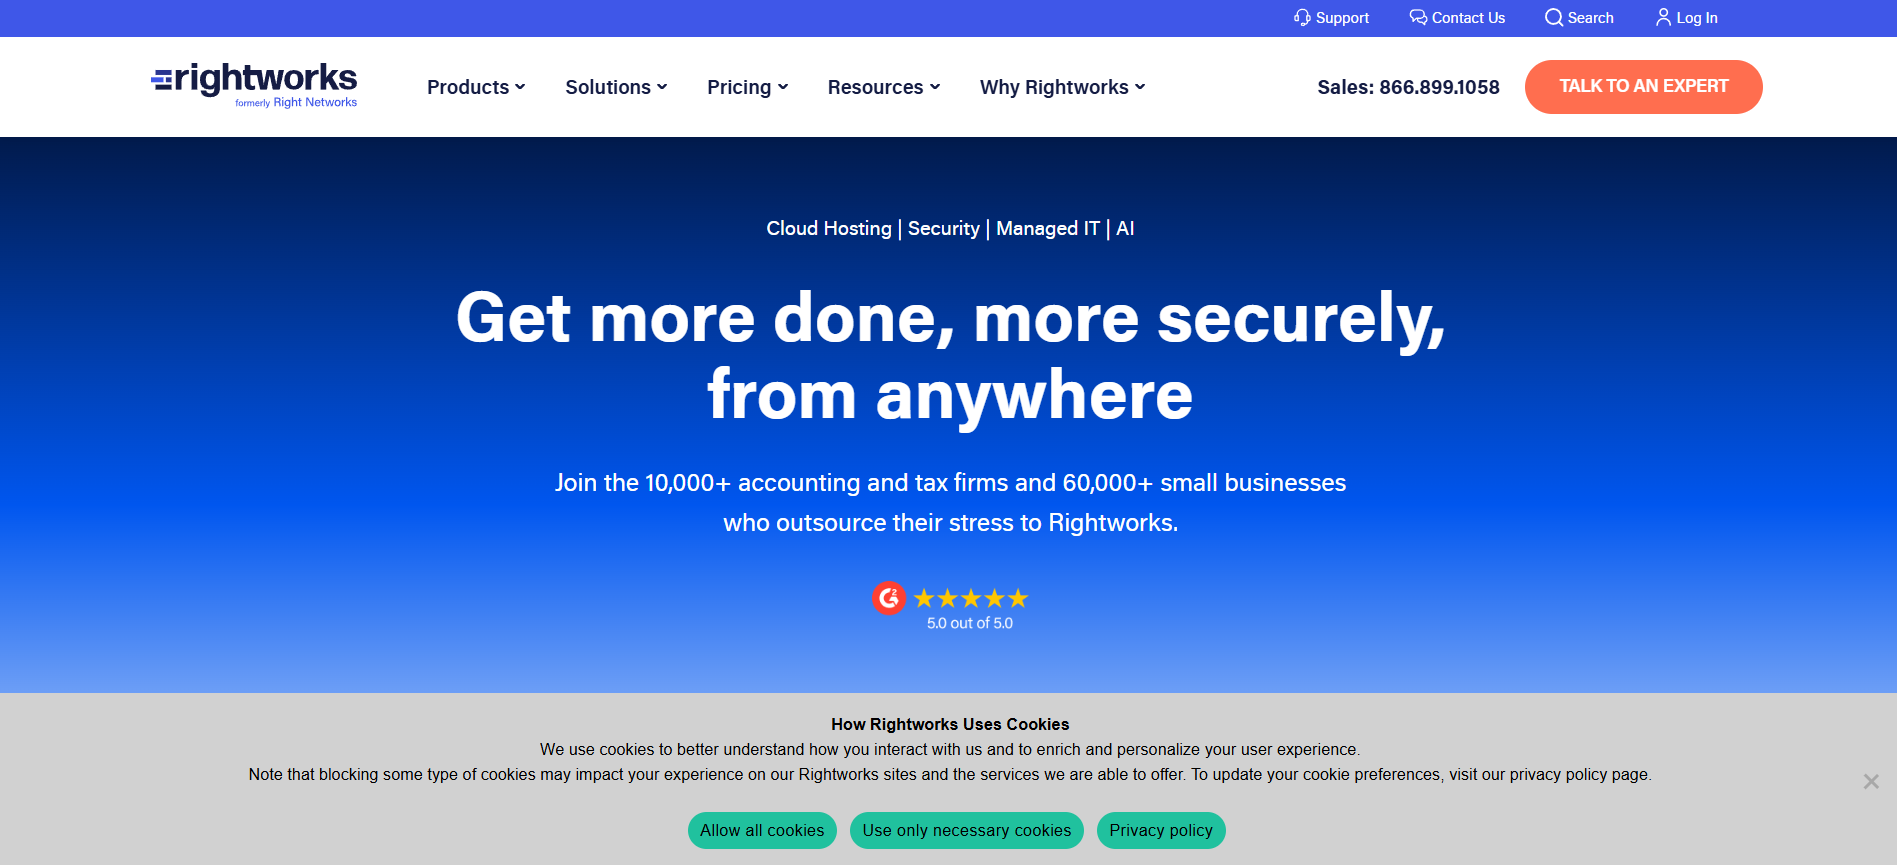
Rightworks
Shared/optimized
$85/user/month
All editions
Yes
Annual contract
SOC 2
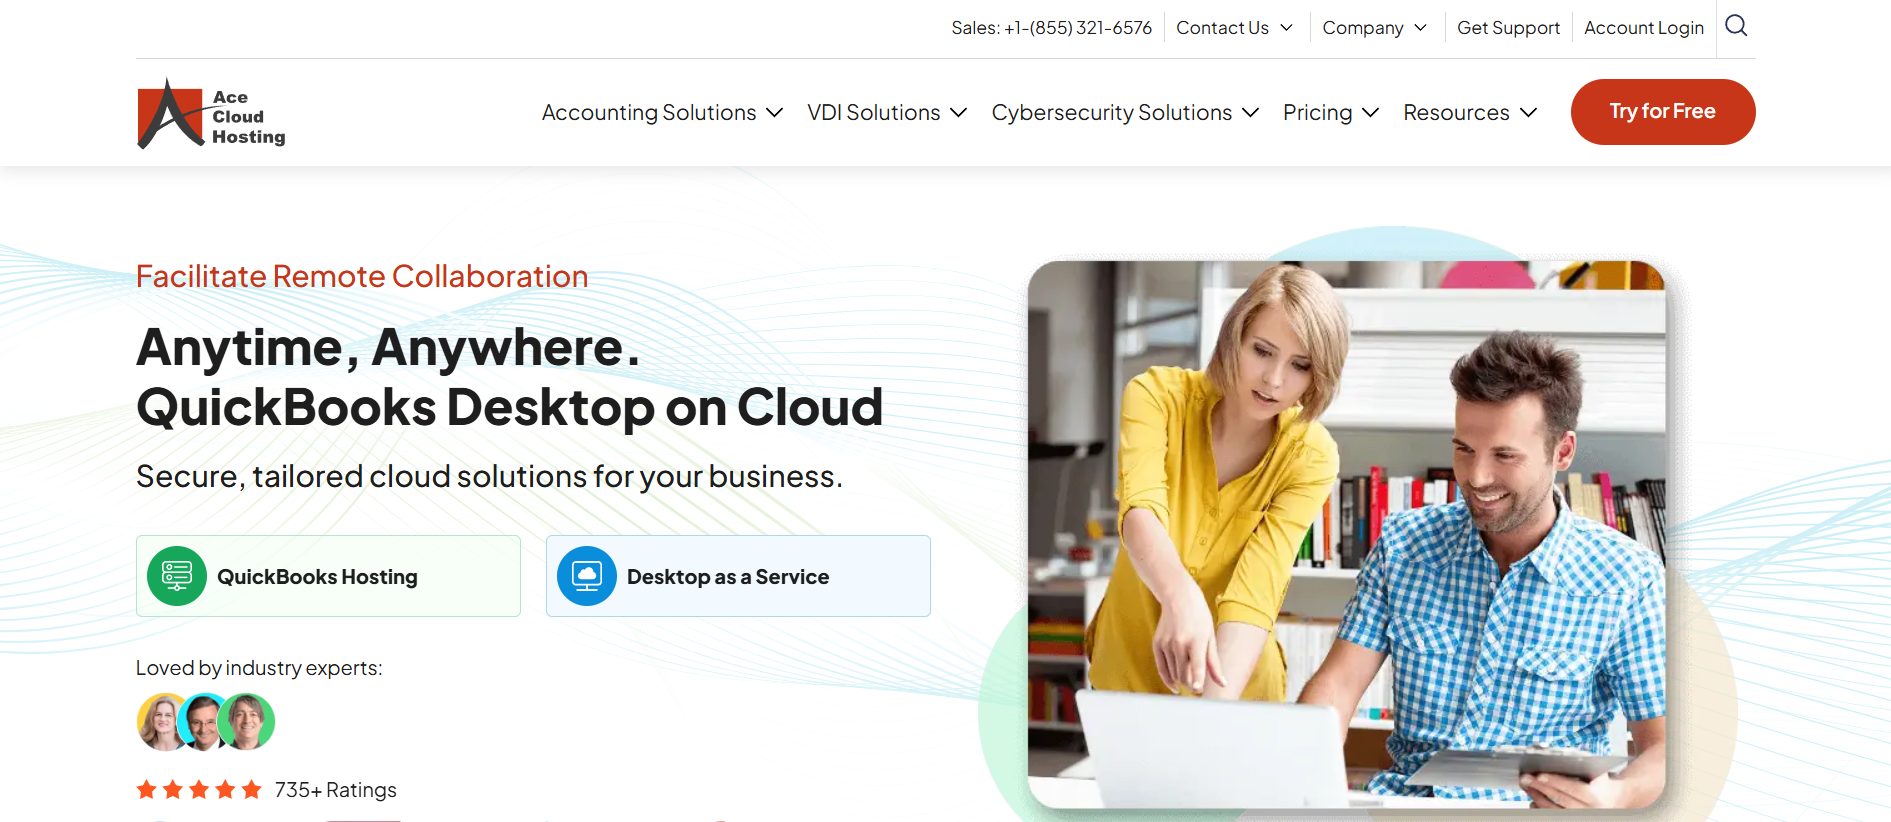
Ace Cloud Hosting
Shared + Dedicated option
$74.69/user/mo
All editions
Yes
Month-to-month
SOC 2
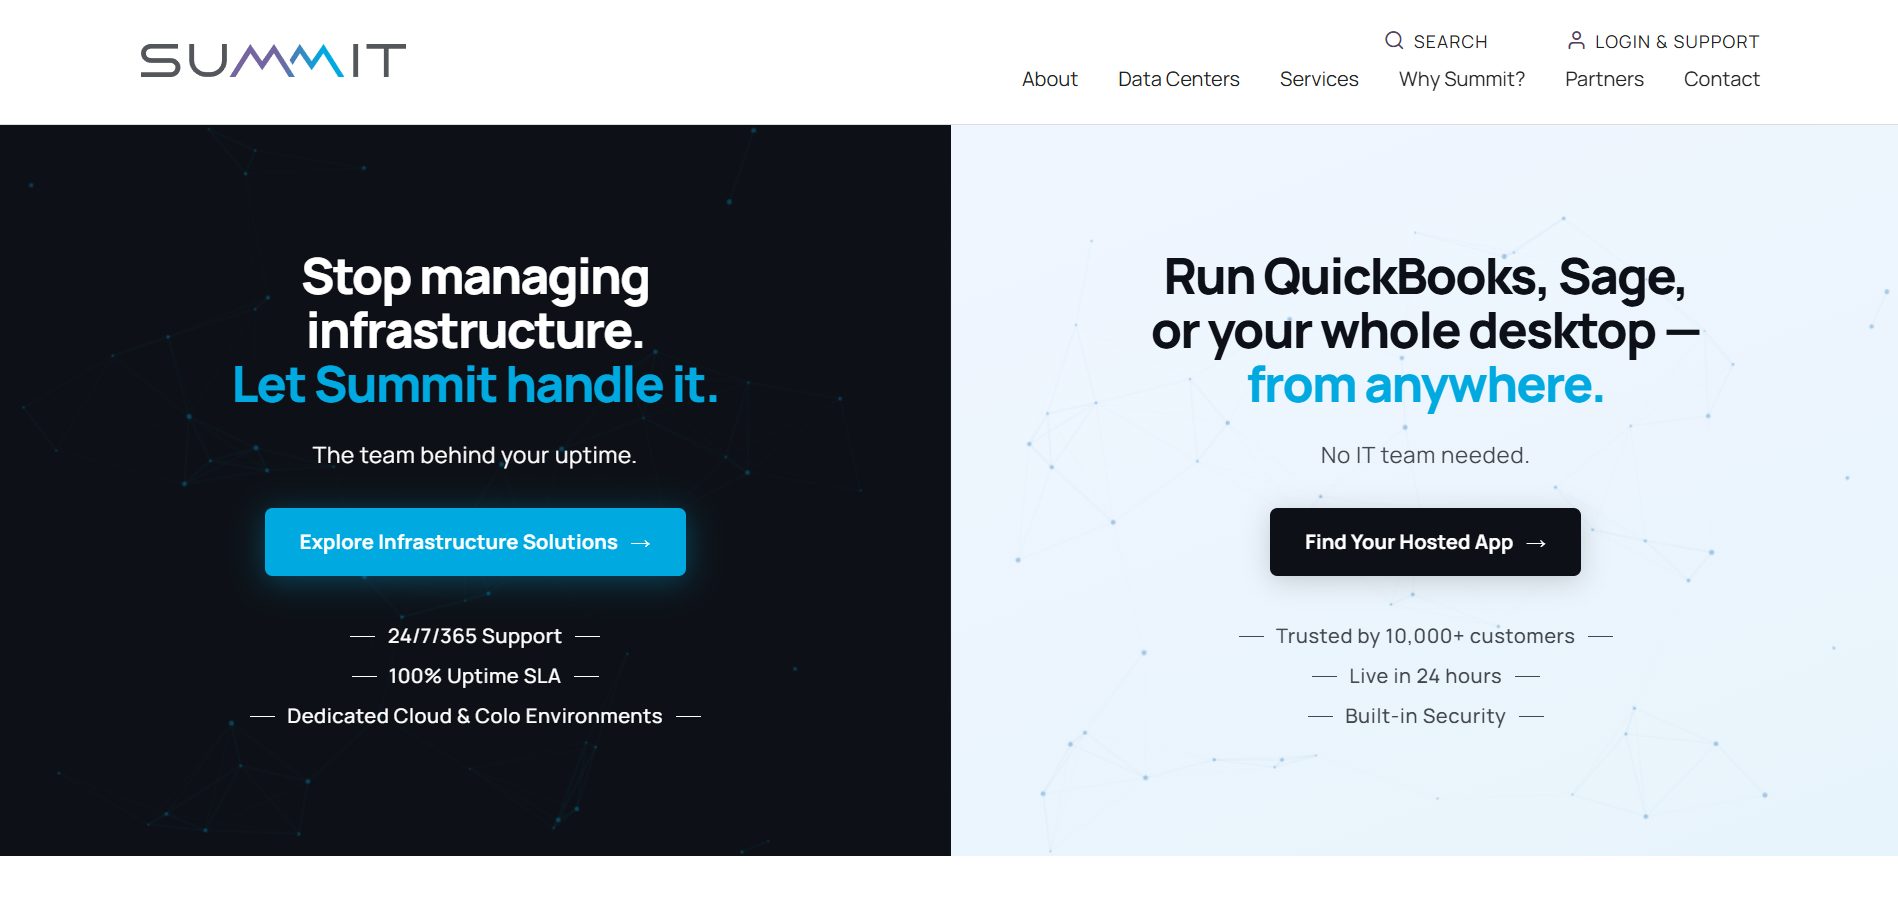
Summit Hosting
Dedicated
Custom quote
All editions
Yes
Custom
SOC 2
GoToMyERP
Dedicated private
Custom quote
All editions
Yes
Custom
SOC 2
Apps4Rent
Shared
$34.95/user/month
All editions
Yes
Month-to-month
SOC 2
Cloudwalks
Shared + Dedicated
$29/user/month
All editions
Yes
Month-to-month
SOC 2
The 7 Best QuickBooks Enterprise Hosting Providers
The providers below were selected specifically for their ability to handle QuickBooks Enterprise’s advanced requirements: dedicated server availability, Advanced Reporting performance under load, full industry edition support, ODBC connectivity, and compliance credentials.
Providers without demonstrated Enterprise-grade infrastructure were excluded. Each entry includes what the provider does well, what it costs, and who it fits best.
1. Verito
Verito is a U.S.-based cloud hosting and managed IT provider built exclusively for tax and accounting firms, serving 1,000-plus firms since 2016.
Unlike multi-industry hosting platforms that added accounting as an afterthought, Verito was designed from day one for the specific demands of CPAs, tax preparers, and enrolled agents, including the complexities of QuickBooks Enterprise.
Every client runs on a dedicated private server with fully isolated resources. There is no shared infrastructure, no noisy-neighbor performance issues during tax season, and no resource contention when Advanced Reporting is running heavy queries.
The firm’s environment is completely separate from every other client on the network, backed by a 100 percent uptime SLA that has held since 2016.
On the support side, every Verito engineer completes VeritCertified™ certification, an internal training program covering QuickBooks Enterprise workflows, industry-specific modules, and compliance fundamentals, before taking a single client call. That is why Verito engineers understand the difference between a file-lock issue in QuickBooks Enterprise versus a server-level problem, without escalating you three tiers before anyone helpful shows up.
Average support response time is under 60 seconds. First Touch Resolution sits at 92 percent, meaning most issues are resolved on the first call without bouncing.
Enterprise-specific capabilities are fully intact. Advanced Reporting performs without degradation. All six industry editions are supported. ODBC connectivity is preserved. The environment supports 200-plus integrations, including Fishbowl, Salesforce, Expensify, and BILL.com.
Compliance is included on every plan, not just premium tiers. All cloud hosting plans align with the FTC Safeguards Rule, IRS Publication 4557, and SOC 2 security standards. MFA is enforced on every login.
Automated nightly backups with up to 90-day retention are included. Migration is fully managed by Verito’s team at no cost, with most firms live in three to five days.
Pricing:
Cloud hosting plans start at $69 per user per month (10GB dedicated RAM, 2 apps), $99 per user per month (15GB dedicated RAM, 6 apps), and $149 per user per month (unlimited RAM and apps). All plans are month-to-month with no contracts. A one-time server setup fee of $200 applies.
Best fit:
Accounting and tax firms that need dedicated Enterprise hosting with compliance built in, deep QB-specific support, and no long-term contracts. For a closer look at plan details, see Verito’sQuickBooks Enterprise hosting plans.
2. Rightworks
Rightworks is Intuit’s designated hosting provider for QuickBooks Enterprise. That designation carries real weight. It means Rightworks can be purchased directly through Intuit’s website when a firm buys or renews their Enterprise license, and it gives Rightworks access to deeper product integration and Intuit’s support escalation channels.
Rightworks holds Elite QuickBooks Solution Provider (QSP) status, placing it among a small group of providers certified by Intuit for both licensing and hosting.
The platform supports all Enterprise editions, handles complex add-on configurations, and offers specialized training and custom integrations beyond basic hosting.
The primary infrastructure consideration is server architecture. Rightworks operates on shared, performance-optimized servers rather than dedicated private environments.
For most standard Enterprise workloads, this performs well. Firms running sustained Advanced Reporting queries or managing more than 15 to 20 concurrent users may notice performance variability during peak periods.
Pricing:
Pricing starts from $85 per user per month (annual contract) for the Cloud Hosting plan. This is apart from the $45 per user per month Rightworks charges for managed security.
Pricing for the enterprise Cloud Premier plan is available on request. License bundling with an existing Enterprise subscription may affect the total cost compared to standalone hosting.
Best fit:
Existing QuickBooks Enterprise users who want a direct relationship with Intuit’s ecosystem and the simplicity of purchasing hosting and licensing from a single source.
3. Ace Cloud Hosting
Ace Cloud Hosting is an Intuit-authorized QuickBooks Solution Provider based in Florida.
As an authorized QSP, Ace can sell and host QuickBooks Desktop licenses, allowing firms to bundle licensing and hosted QuickBooks Desktop access under one provider.
The platform supports all Enterprise editions and versions, including multi-version deployments where a firm runs Enterprise 2023 and 2024 simultaneously.
The integration catalog is broad, with 200-plus supported add-ons including Salesforce, Expensify, Fishbowl, TrueCommerce, and BILL.com. ODBC access is available.
Ace Cloud Hosting offers both shared and dedicated server options. Shared hosting is the default for lower-tier plans and carries a 99.99 percent uptime SLA. Dedicated servers are available at higher price points for Enterprise users who need full resource isolation.
For firms with six or more concurrent users running resource-intensive workflows, a dedicated configuration is the recommended path.
Pricing:
Shared plans start at approximately $74.69 per user per month (Essential), and $79.19 per user per month for the Business Plan. The price of these plans reduce with the number of users. Dedicated pricing is higher and requires a custom quote. License bundles are available at up to 20 percent off standard Intuit pricing.
Best fit:
Firms that need to purchase a QuickBooks Desktop Enterprise license alongside hosting, or those managing multi-version deployments.
4. Summit Hosting
Summit Hosting is built specifically for firms that push QuickBooks Enterprise hard. The platform targets power users running large datasets, heavy batch invoicing, complex inventory workflows, and multi-application environments where QB Enterprise shares a server with tools like Fishbowl, BILL, or ShipRush.
All hosting at Summit runs on dedicated servers. Firms build their own quote based on user count, storage requirements, and applications, which means the plan scales precisely to the workload rather than fitting into a predetermined tier.
This flexibility is particularly valuable for Enterprise users whose server requirements differ significantly from a small Premier firm.
Summit is Intuit-authorized, supports all Enterprise industry editions, and has a documented track record in the Enterprise hosting space. Support is specialized, with staff trained on accounting and business software environments.
Pricing:
Entirely custom. Contact Summit for a quote based on your specific setup. No publicly listed per-user pricing.
Best fit:
Mid-to-large firms with 6-plus concurrent users, complex integration stacks, or workloads that require maximum server configuration flexibility.
5. GoToMyERP
GoToMyERP is a managed cloud hosting provider focused on business and accounting software, supporting QuickBooks, Sage, and SAP environments on dedicated private infrastructure.
The platform does not share server resources across tenants. Every client runs on a fully isolated private network.
That architecture makes GoToMyERP a strong candidate for Enterprise users running QuickBooks alongside other business-critical software.
Accounting teams in distribution, manufacturing, or wholesale industries often run QuickBooks Enterprise in parallel with ERP tools or inventory management systems. GoToMyERP’s multi-application environment supports these configurations without the performance compromises that come from shared hosting.
The platform is Intuit-authorized and supports all Enterprise editions. ODBC connectivity and third-party integrations are preserved within the hosted environment.
Pricing:
Custom quote based on environment specifications. Contact GoToMyERP directly for Enterprise-specific pricing.
Best fit:
Manufacturing, distribution, or wholesale firms running QB Enterprise alongside ERP or Sage tools in a multi-application cloud environment.
6. Apps4Rent
Apps4Rent is an Intuit-authorized hosting provider that differentiates itself through deep Microsoft ecosystem integration.
A hosted QuickBooks Desktop Enterprise plan with Apps4Rent can include Microsoft 365, SharePoint, Exchange, and Teams within the same environment.
For accounting firms whose teams work heavily in Outlook and Word alongside QB Enterprise, this eliminates the friction of managing separate subscriptions or dealing with cross-platform connectivity.
Apps4Rent operates on shared infrastructure with a 99 percent uptime guarantee and a 15-day money-back policy. All Enterprise editions are supported.
The integration catalog covers standard QuickBooks add-ons, though firms running specialized or enterprise-grade third-party tools should confirm compatibility before switching.
Pricing:
Approximately $34.95 per user per month for hosted QuickBooks Desktop, though entry-tier pricing varies by configuration. Verify current rates directly on Apps4Rent’s site before committing. Microsoft 365 bundling adds to the total and varies by plan.
Best fit:
Accounting firms that rely heavily on Microsoft 365 and want a single provider managing both their QB Enterprise hosting and their Microsoft productivity environment.
7. Cloudwalks
Cloudwalks has been in the hosted QuickBooks Desktop space for over a decade, building a client base across North America, Europe, Asia, and Australia.
The platform supports QuickBooks Pro, Premier, and Enterprise alongside Sage hosting, making it an option for firms managing both accounting platforms or serving international clients.
Both shared and dedicated server configurations are available. Cloudwalks supports all Enterprise editions and maintains Intuit-authorized status.
For firms with remote teams spread across time zones or geographies, Cloudwalks’ international data center presence and cross-platform access are notable differentiators.
Pricing:
Approximately $29 per user per month for standard shared plans. Dedicated configurations are available at higher price points on request.
Best fit:
Accounting firms with international access requirements, multi-geography teams, or those running both QuickBooks Enterprise and Sage within the same organization.
How to Choose the Right QuickBooks Enterprise Hosting Provider
The comparison table narrows the field. But the final decision comes down to specifics that only you know about your firm: how many concurrent users you have, which integrations you depend on, whether you are a tax-focused practice (where FTC and IRS compliance is non-negotiable) or a multi-industry accounting team, and how much tolerance you have for performance variability under load.
The Pre-Commitment Vetting Framework: Five Questions to Ask Every Provider
1. Is the server dedicated or shared?
This is the single most important infrastructure question for Enterprise users. Advanced Reporting performance, multi-user stability, and ODBC query speeds are all affected by whether you have guaranteed resource isolation or are sharing compute with other tenants.
2. Does the provider support your specific Enterprise edition?
Do not assume. Contractor edition job costing, Nonprofit donor tracking, and Manufacturing assembly builds require edition-specific configurations. Ask the provider to confirm your exact edition is supported and tested in their environment.
3. What integrations does the environment allow?
Get a list of your add-ons and send it to the provider before signing. ODBC access, Fishbowl, Salesforce, BILL.com, Expensify, and industry-specific tools all need to be confirmed individually.
4. What compliance credentials does the provider hold?
For CPA firms and tax preparers, the minimum standard is SOC 2 Type II certification, AES-256 encryption at rest and in transit, MFA enforcement, and alignment with the FTC Safeguards Rule and IRS Publication 4557. Ask whether compliance is included on all plans or only on premium tiers.
5. What does migration look like, and what does it cost?
Data migration is where most firms encounter unexpected problems. Ask for a step-by-step migration plan, a timeline, and a clear answer on whether migration support is included in the base price or charged separately. Zero-downtime migration with a dedicated migration team is a meaningful differentiator.
Frequently Asked Questions
1. What is the best hosting for QuickBooks Enterprise?
For accounting and tax firms that need dedicated servers, accounting-specific support, and compliance on every plan, Verito is a strong option. It serves 1,000-plus firms on isolated private servers with a 100 percent uptime SLA and a 92 percent First Touch Resolution rate.
For firms that want a direct Intuit relationship and are comfortable with shared infrastructure, Rightworks is the designated Intuit hosting provider for Enterprise. The right choice depends on your server requirements, compliance needs, and budget.
2. Can QuickBooks Enterprise Advanced Reporting work in a hosted cloud environment?
Yes, and it often performs better than on a local server. Advanced Reporting in QuickBooks Enterprise is powered by Microsoft SQL Server.
On a dedicated hosted server with allocated RAM, NVMe SSD storage, and guaranteed CPU resources, Advanced Reporting query times are comparable to a well-maintained local server and faster than a shared VPN setup.
The key variable is server type. Shared hosting environments can throttle Advanced Reporting performance when other tenants spike their resource usage.
3. How much does QuickBooks Enterprise hosting cost per user per month?
Shared hosting for QB Enterprise starts at roughly $30 to $45 per user per month. Dedicated hosting, which is what Enterprise-grade workloads typically require, starts at around $60 to $70 per user per month. Verito’s dedicated plans start at $69 per user per month.
Some providers, including Summit Hosting and GoToMyERP, price by custom quote based on user count and configuration.
4. Does cloud hosting support all QuickBooks Enterprise industry editions?
All seven providers in this comparison support every QB Enterprise industry edition, including Contractor, Manufacturing and Wholesale, Nonprofit, Retail, Professional Services, and Accountant. That said, confirm with your provider before signing.
Some budget-tier shared hosts may not have tested edition-specific modules like job costing or donor management. A written confirmation is worth requesting.
5. Is QuickBooks Enterprise hosting the same as QuickBooks Online?
No. QuickBooks Online (QBO) is a separate, cloud-native application with a different interface, different features, and different limitations. Hosted QuickBooks Desktop Enterprise is the full-featured Desktop version of the software running on a secure remote server.
The entire Enterprise experience, including Advanced Reporting, 200 custom fields, ODBC connectivity, industry editions, and 200-plus integrations, is preserved exactly as it would be on a local machine.
6. What security certifications should I require from a QuickBooks Enterprise hosting provider?
At minimum: SOC 2 Type II certification (independently audited annually), AES-256 encryption at rest and in transit, MFA on every login, and alignment with the FTC Safeguards Rule and IRS Publication 4557.
For professional tax preparers, the FTC Safeguards Rule is a legal requirement under the Gramm-Leach-Bliley Act, and IRS Publication 4557 mandates a Written Information Security Plan (WISP). Your hosting provider’s infrastructure should support WISP implementation, not just recommend you figure it out on your own.
7. Does QuickBooks Enterprise Advanced Reporting run faster on a hosted server or a local server?
On a properly provisioned dedicated hosted server, Advanced Reporting performs comparably to, and in many cases faster than, a well-maintained local server. The reason is controlled resource allocation. Advanced Reporting runs on Microsoft SQL Server, which requires consistent CPU headroom and fast storage I/O.
A dedicated hosted server provides both, with NVMe SSD storage that accelerates SQL query speeds significantly compared to the spinning hard drives in most office servers purchased more than three years ago.
A local server, by contrast, competes with Windows background processes, antivirus scans, OS updates, and other user activity for the same hardware. On a shared hosted server, the same noisy-neighbor resource contention applies. Dedicated hosting removes that variable and gives Advanced Reporting a clean, consistent environment to run in.
Final Thoughts
QuickBooks Enterprise is built for complexity. Its hosting environment should match. Shared infrastructure might work for a two-user Premier setup, but firms running Advanced Reporting, managing multi-entity files, connecting ODBC to external tools, or operating under IRS and FTC compliance requirements need a provider that understands those demands at the infrastructure level.
Of the seven providers covered here, the right choice depends on your priorities. If you want the official Intuit relationship, Rightworks is the designated path. If you need maximum server customization for a large user count, Summit Hosting or GoToMyERP fits better. If Microsoft 365 bundling is a priority, Apps4Rent is worth evaluating.
For accounting and tax firms that need dedicated server infrastructure, accounting-specific support, and compliance alignment without paying for a premium tier to get it, Verito covers all three by default.
Plans start at $69 per user per month, migration is fully managed at no cost, and the month-to-month structure means no long-term commitment. See how the plans break down for Enterprise workloads on Verito’saccounting software hosting page.
This post answers the question – what are the security features on the QuickBooks Desktop?
QuickBooks software from Intuit is businesses and individuals’ most widely used accounting application.
It’s highly convenient to use for payroll management, bill payment, expense management, and business payments.
Traditionally, users installed QuickBooks on their Desktops and could only access their data through them.
QuickBooks Desktop software can now be hosted on an internet server, allowing data to be accessed remotely from any place.
This is ideal for individuals who are frequently on the move or wish to access the same data to many individuals in various locations.
By utilizing the cloud, the service provider strengthens the security of your QuickBooks Desktop and avoids data leaks. They provide a sophisticated Cybersecurity system that uses the most potent capabilities accessible. Also, it is reasonably priced and simple to operate.
The cloud’s significant security aspects illustrate why it is an excellent choice for hosting QuickBooks software and data.
Contents
Role-Based Access
Robust Backups
Hardware Independent
Reliable Data Servers
Data Recovery
Multi-Factor Authentication
IT Infrastructure
Technical Expertise
Cloud Security Features
Role-Based Access
One of the main concerns with QB data security is a lack of control. In a traditional setup, all data is stored locally and is easily retrievable if the system is hacked.
Also, limiting its accessibility is difficult because an employee or a visitor has a greater chance of physically accessing the system. And, even if you secure the hard disk with a password, what if it steels?
Cloud hosting stores all data off-site in a data center; accessing it is significantly more complicated than local storage.
Moreover, it enables you to virtualize data separation and privacy protection. Because a unique authorization controls access to data, you can restrict its accessibility and assign it to different individuals based on their roles.
Robust Backups
While digitizing data eliminates paper’s inherent vulnerabilities and significantly increases its durability, it has drawbacks.
It is easily damaged or lost forever if the store device destroys or malfunctions.
And even if you use backup software and do routine backups, there are many risks.
Your backup software may break without your notice, or your technical team may lack the expertise to back up your data correctly.
With QuickBooks hosting, you can increase the dependability and security of your data-handling tasks.
Cloud service providers use expert IT staff that perform backup scans regularly and monitor the process.
Accounting firms must exercise extreme caution with their data due to their access to sensitive information such as tax returns, credit card information, and Social Security numbers.
For example, consider that you’re traveling for work and find that your laptop has been stolen. If you use QuickBooks Desktop, you expose your data to its risk for illegal purposes.
QuickBooks becomes hardware-independent when it is hosted in the cloud. Thus, even if your office laptop is lost, your data is protected because it is stored on secure cloud servers.
You can reach it from any supporting device and restart work without fear of losing your data. Also, no one can access your data without your login credentials.
Reliable Data Servers
While traditional data storage methods involve storing data in-house, implementing premium security measures for them is extremely expensive and significantly strains your financial resources.
You may be forced to settle for less expensive alternatives, again exposing your data in the long run.
By investing in the cloud, you may obtain high-quality security services at a low cost.
QuickBooks hosts in Tier 3+ or higher data centers.
These are enterprise-grade data servers equipped with various security features such as extensive CCTV surveillance, security guards for physical protection, specialized entrance cards, cutting-edge anti-hacking solutions, firewalls, and biometric verification for added security.
Data Recovery
In a traditional system, data loss results in complete data loss, for which the business is responsible.
Regular and safe data backups on secure data servers are included with QuickBooks hosting. Reputable cloud service providers conduct daily data backups.
This is highly advantageous in human error or natural disaster; the data can quickly be recovered and restored. As a result, you can rapidly resume normal business operations and return to work after retrieving the cloud-based data.
Multi-Factor Authentication
In today’s world, where hackers are constantly developing new methods for breaking into systems and stealing data, an extra layer of security is always helpful.
While implementing password security is critical, an extra layer of protection recommends ensuring that the system is only accessible to verified users.
QuickBooks hosting providers use multi-factor authentication to ensure the protection of your data.
Once the password has been validated, the user must authenticate the login using another mobile device, such as a Smartphone, tablet, or iPad. Thus, the danger of a hacker obtaining access to the system is reduced.
IT Infrastructure
With the number of cyberattacks increasing daily, it is essential to maintain an up-to-date IT architecture to protect your data against current hacking attempts.
However, most QuickBooks accounting data still maintains an out-of-date terrestrial system that is inefficient and sensitive to modern threats.
They are incompatible with modern anti-hacking tools or feature insecure security frameworks that readily exploit.
Cloud hosting encrypts your data and stores it on cutting-edge IT infrastructure that builds to withstand modern hacker efforts.
It includes enterprise-class firewalls, antivirus software, and cutting-edge IDS/IPS software for adequate data protection.
Also, some cloud service providers apply Artificial Intelligence (AI) techniques to monitor the security flow on your server and discover any critical security flaws that could further strengthen the security of your data.
Technical Expertise
When it comes to expanding security solutions, a substantial difference in quality can be made.
For example, while an accounting firm may excel at developing complicated financial strategies and assisting customers in making the most use of their fiscal resources, it may not be the best at addressing Cybersecurity.
It must have an expert IT staff supervising and managing the infrastructure’s security.
QuickBooks cloud hosting makes significant investments to protect the integrity of its cloud services.
They use skilled employees who are conversant with contemporary methodologies and adhere to current security measures.
These professionals do regular security audits, monitor suspicious activity, apply the newest patches, and perform other necessary tasks.
Also, they contribute to developing a multi-tiered security system in which, even if one protection layer breaches, a hacking effort can stop at a successive stage.
Cloud Security Features
QuickBooks is a stand-alone application when running on a local device.
It comes with restricted security features such as firewalls and antivirus. Regularly updating them is a significant effort for the IT team, and any delay puts the data and system at risk.
When QuickBooks is hosted in the cloud, it receives additional security features from the cloud service provider, such as regular automated firewall upgrades, antivirus software, antimalware, and anti-ransomware software, which protects the data cyberattacks.
Moreover, the cloud service provider assures compliance with the government’s security policies, ensuring the security is impenetrable.
Safeguarding Your Financials: QuickBooks Desktop Security FAQs
QuickBooks Desktop offers various features to enhance data security. Here are some FAQs to explore these functionalities and ensure your financial information remains protected:
Does QuickBooks Desktop have security features?
Yes, QuickBooks Desktop offers several security features to safeguard your financial data. Here are some key aspects:
Password Protection: Requires users to create strong passwords to access the company file.
User Roles: You can assign different user roles with varying access levels, restricting unauthorized users from accessing sensitive information.
Data Encryption: QuickBooks Desktop uses encryption to scramble your data, making it unreadable in case of a security breach. (Note: Encryption might vary depending on your QuickBooks Desktop version.)
Audit Trail: Tracks user activity within the QuickBooks file, allowing you to monitor changes and identify any suspicious actions.
What are some additional security measures I can take?
Here are some best practices to strengthen your QuickBooks Desktop security:
Regular Backups: Maintain regular backups of your QuickBooks company file to a secure location in case of data loss due to hardware failure or other unforeseen circumstances.
Strong Passwords: Enforce strong and unique passwords for all QuickBooks user accounts. Consider using a password manager to generate and manage complex passwords.
Firewall and Antivirus Software: Ensure you have a robust firewall and antivirus program running on your computer to protect against malware and cyber threats.
Limit User Access: Only grant authorized users access to QuickBooks, and assign user roles with the least privileges necessary for their tasks.
Software Updates: Keep QuickBooks Desktop and your operating system updated with the latest security patches to address potential vulnerabilities.
Are there any security vulnerabilities with QuickBooks Desktop?
While QuickBooks Desktop offers security features, it’s essential to be aware of potential vulnerabilities:
Physical Security: Ensure your computer and any external storage devices containing QuickBooks backups are physically secure to prevent unauthorized access.
Phishing Attacks: Be wary of phishing emails or scams disguised as legitimate QuickBooks communication. Don’t share your login credentials or click on suspicious links.
Outdated Software: Using an outdated version of QuickBooks Desktop increases your risk of security breaches, as older versions might have known vulnerabilities.
Is QuickBooks Desktop data encrypted?
Some versions of QuickBooks Desktop offer data encryption to protect your financial data. However, encryption capabilities might vary depending on your specific version. It’s recommended that you consult QuickBooks documentation for your version to confirm data encryption specifics.
Conclusion
With its always-up-to-date solutions, the cloud has been a game-changer in terms of securing your QuickBooks Desktop data.
Data backup, role-based access, and the most recent security advancements ensure that you can focus on other business processes rather than worrying about data security.
In today’s digital age, the protection of our identities has assumed a critical role in our daily lives.
As we traverse the boundless realms of the internet, our personal information is increasingly at risk. The omnipresent threats of identity theft, fraud, and cybercrime underscore the necessity of understanding identity protection.
This comprehensive article aims to elucidate what identity protection is, the advantages of employing identity protection services, and addresses concerns about identity protection.
The Digital Age: A Double-Edged Sword
The digital age, with its marvels and conveniences, has introduced a double-edged sword into our lives.
It has granted us unprecedented access to information, facilitated seamless transactions, and connected us with people globally. However, this technological revolution has a dark side – one that exposes us to cybercriminals intent on exploiting the chinks in our digital armor.
Identity Protection Deals
McAfee Identity Protection
Total protection from identity theft and financial crimes.
Total protection from identity theft and financial crimes. Show Less
Norton LifeLock Identity Advisor
Your best solution to protect your personal information from data leaks.
Your best solution to protect your personal information from data leaks. Show Less
Incogni
Incogni wipes off your personal information from data brokers.
Incogni wipes off your personal information from data brokers. Show Less
DeleteMe
DeleteMe is a service provided by Abine that helps users remove their personal information from data brokers and other...Show More
DeleteMe is a service provided by Abine that helps users remove their personal information from data brokers and other websites to protect their privacy online. Show Less
Social Catfish
Social Catfish is an online service that helps individuals verify and investigate the identity of people they meet...Show More
Social Catfish is an online service that helps individuals verify and investigate the identity of people they meet online, including potential scammers and catfishers. Show Less
Surfshark Alert
Surfshark Alert is a real-time data breach protection tool that safeguards your email accounts, passwords, personal...Show More
Surfshark Alert is a real-time data breach protection tool that safeguards your email accounts, passwords, personal identification numbers, and credit cards from cyber-attacks. Show Less
OmniWatch
Safeguard your identity with OmniWatch, the comprehensive identity theft protection service that provides proactive...Show More
Safeguard your identity with OmniWatch, the comprehensive identity theft protection service that provides proactive monitoring, dark web surveillance, and expert assistance in case of a breach. Show Less
AVG BreachGuard
AVG BreachGuard shields your online data from leaks and breaches, like a vigilant bodyguard for your digital life.
AVG BreachGuard shields your online data from leaks and breaches, like a vigilant bodyguard for your digital life. Show Less
Avast BreachGuard
Avast BreachGuard is a privacy tool designed to protect personal information online by preventing data breaches...Show More
Avast BreachGuard is a privacy tool designed to protect personal information online by preventing data breaches, removing personal data from data brokers, and providing real-time alerts for compromised data. Show Less
WhiteBridge AI
WhiteBridge AI is your digital identity detective — an AI-powered tool that uncovers, verifies, and organizes...Show More
WhiteBridge AI is your digital identity detective — an AI-powered tool that uncovers, verifies, and organizes everything the internet says about a person into one powerful, insightful report. It transforms scattered online chaos into a clear story you can trust, helping you protect your reputation, make smarter decisions, and see people as they truly are. Show Less
Privacy365
Privacy365 is a service that removes your personal information from data brokers and people search websites while...Show More
Privacy365 is a service that removes your personal information from data brokers and people search websites while continuously monitoring for new exposures. By cleaning up your digital footprint, it helps protect you from identity theft, doxxing, and unwanted contact. Show Less
NordProtect
NordProtect is a comprehensive identity theft and cyber protection service provided by Nord Security. It provides...Show More
NordProtect is a comprehensive identity theft and cyber protection service provided by Nord Security. It provides all-around protection against identity theft, including credit monitoring, dark web surveillance, security alerts, identity theft recovery, cyber extortion protection, and online fraud coverage. Show Less
Identity Theft: A Growing Threat
Identity theft, the unlawful appropriation of an individual’s personal information for fraudulent purposes, has evolved into a pervasive menace in the digital era.
Our sensitive data is now stored and shared across various online platforms, making us vulnerable to malicious actors who exploit these digital openings.
The consequences of identity theft can be financially devastating, emotionally distressing, and detrimental to one’s reputation.
Identity protection is a proactive, multifaceted strategy to secure personal information and mitigate the risks associated with identity theft.
This holistic approach encompasses several practices and measures aimed at fortifying your digital persona, ensuring its integrity, and safeguarding your personal information and digital privacy.
— SecureBlitz Cybersecurity Blog (@secureblitz) April 26, 2020
Components Of Identity Protection
Here are the key components of identity protection:
Strong Passwords and Two-Factor Authentication (2FA)
One of the first lines of defense in identity protection is the creation of robust, unique passwords for your online accounts. Strong passwords often incorporate a combination of uppercase and lowercase letters, numbers, and special characters.
Password managers can help generate and securely store these complex passwords. Adding an extra layer of security is as simple as enabling two-factor authentication (2FA), which requires secondary verification methods, such as a text message or biometric scan, during login.
Regular Software Updates
Cybercriminals often exploit vulnerabilities in outdated software to gain unauthorized access to your devices and accounts. To thwart such attempts, it’s vital to keep your operating systems, applications, and antivirus software up to date.
Software updates usually include patches that rectify security flaws, thus enhancing your protection against cyber threats.
Phishing Awareness
Phishing, a prevalent tactic employed by cybercriminals, involves fraudulent emails or websites that mimic trusted organizations. These deceptive communications attempt to lure recipients into clicking on malicious links or sharing sensitive data.
Familiarizing yourself with the telltale signs of phishing attempts is fundamental to identity protection.
Secure Wi-Fi and Network Practices
Public Wi-Fi networks can be insecure and vulnerable to cyberattacks. To ensure your safety while connecting to public Wi-Fi, consider using a Virtual Private Network (VPN).
Furthermore, safeguard your home network by implementing a strong, unique password and encryption, creating a secure online environment.
Data Encryption
Encryption, a process of encoding information to restrict access to authorized individuals, is widely used in modern communication services like messaging apps and online banking.
Ensuring that your online interactions are encrypted provides a protective shield against eavesdropping and data interception.
Regularly monitoring your financial accounts and credit reports is essential for early detection of unauthorized or suspicious activity.
Identity protection services often include credit monitoring as part of their offerings, alerting you to any unusual changes in your financial history.
Identity Protection Services
Identity protection services have emerged as a comprehensive solution for safeguarding personal information. These services typically encompass credit monitoring, identity theft insurance, and expert assistance for identity theft recovery.
Opting for a reputable service can provide peace of mind and professional support in the event of an identity theft incident.
Best Identity Protection Services
McAfee Identity Protection
Total protection from identity theft and financial crimes.
Total protection from identity theft and financial crimes. Show Less
Norton LifeLock Identity Advisor
Your best solution to protect your personal information from data leaks.
Your best solution to protect your personal information from data leaks. Show Less
Incogni
Incogni wipes off your personal information from data brokers.
Incogni wipes off your personal information from data brokers. Show Less
DeleteMe
DeleteMe is a service provided by Abine that helps users remove their personal information from data brokers and other...Show More
DeleteMe is a service provided by Abine that helps users remove their personal information from data brokers and other websites to protect their privacy online. Show Less
Social Catfish
Social Catfish is an online service that helps individuals verify and investigate the identity of people they meet...Show More
Social Catfish is an online service that helps individuals verify and investigate the identity of people they meet online, including potential scammers and catfishers. Show Less
Surfshark Alert
Surfshark Alert is a real-time data breach protection tool that safeguards your email accounts, passwords, personal...Show More
Surfshark Alert is a real-time data breach protection tool that safeguards your email accounts, passwords, personal identification numbers, and credit cards from cyber-attacks. Show Less
OmniWatch
Safeguard your identity with OmniWatch, the comprehensive identity theft protection service that provides proactive...Show More
Safeguard your identity with OmniWatch, the comprehensive identity theft protection service that provides proactive monitoring, dark web surveillance, and expert assistance in case of a breach. Show Less
AVG BreachGuard
AVG BreachGuard shields your online data from leaks and breaches, like a vigilant bodyguard for your digital life.
AVG BreachGuard shields your online data from leaks and breaches, like a vigilant bodyguard for your digital life. Show Less
Avast BreachGuard
Avast BreachGuard is a privacy tool designed to protect personal information online by preventing data breaches...Show More
Avast BreachGuard is a privacy tool designed to protect personal information online by preventing data breaches, removing personal data from data brokers, and providing real-time alerts for compromised data. Show Less
WhiteBridge AI
WhiteBridge AI is your digital identity detective — an AI-powered tool that uncovers, verifies, and organizes...Show More
WhiteBridge AI is your digital identity detective — an AI-powered tool that uncovers, verifies, and organizes everything the internet says about a person into one powerful, insightful report. It transforms scattered online chaos into a clear story you can trust, helping you protect your reputation, make smarter decisions, and see people as they truly are. Show Less
Privacy365
Privacy365 is a service that removes your personal information from data brokers and people search websites while...Show More
Privacy365 is a service that removes your personal information from data brokers and people search websites while continuously monitoring for new exposures. By cleaning up your digital footprint, it helps protect you from identity theft, doxxing, and unwanted contact. Show Less
NordProtect
NordProtect is a comprehensive identity theft and cyber protection service provided by Nord Security. It provides...Show More
NordProtect is a comprehensive identity theft and cyber protection service provided by Nord Security. It provides all-around protection against identity theft, including credit monitoring, dark web surveillance, security alerts, identity theft recovery, cyber extortion protection, and online fraud coverage. Show Less
Comprehensive Monitoring: Identity protection services continuously monitor your personal information, credit reports, and online presence to detect any irregular activity promptly.
Expert Guidance: In the unfortunate event of identity theft, these services offer expert assistance in the recovery process, guiding you through the necessary steps to reclaim your identity.
Identity Theft Insurance: Many identity protection services provide insurance coverage to mitigate the financial repercussions of identity theft, offering compensation for losses incurred during the recovery process.
Peace of Mind: Knowing that professionals are actively safeguarding your identity allows you to navigate the digital world with increased confidence and peace of mind.
Time Savings: Identity protection services save you the time and effort required for continuous monitoring and handling the aftermath of identity theft.
What is identity protection, and why do I need it?
Identity protection involves proactive measures to secure your personal information and mitigate the risks of identity theft. You need it to safeguard your digital persona and protect yourself from financial loss and emotional distress.
How do I create strong passwords, and why are they important?
Strong passwords consist of a mix of uppercase and lowercase letters, numbers, and special characters. They are crucial because they make it difficult for cybercriminals to crack your accounts, enhancing your overall security.
What is two-factor authentication (2FA), and why should I use it?
2FA adds an extra layer of security to your accounts by requiring a secondary verification method, such as a text message or biometric scan. It significantly reduces the risk of unauthorized access, even if someone knows your password.
What are identity protection services, and how do they work?
Identity protection services offer comprehensive monitoring of your personal information and credit reports, providing expert guidance and identity theft insurance in case of a security breach.
Are identity protection services worth the cost?
The value of identity protection services lies in the peace of mind and expert assistance they provide. The cost is often justified by the time and financial savings in the event of an identity theft incident.
Conclusion
In the digital age, identity protection is not merely an option but a necessity. It demands a combination of prudent practices, security measures, and vigilance to mitigate the omnipresent threat of identity theft.
The consequences of a successful identity theft can be life-altering, underscoring the importance of understanding and implementing identity protection measures.
As our digital world continues to evolve, identity protection remains at the forefront of personal security. The choice is ours: to be passive victims of cybercrime or active guardians of our digital personas.
By grasping the significance of identity protection and taking proactive steps to secure our personal information, we can navigate the digital age with confidence, peace of mind, and an unwavering sense of security.
Looking for the best site to buy Genshin Impact account? Learn how to buy safely, avoid scams, and choose the right Genshin Impact starter account with confidence.
At some point, almost every Genshin Impact player hits the same wall. Progress slows down, Primogems run dry, and the characters you actually want stay locked behind bad luck. That’s usually when the thought first appears — maybe it’s easier to justbuy Genshin Impact account and skip the grind altogether.
It’s not a rare idea. In fact, the search for the best site to buy Genshin Impact account has become pretty common, especially among players who either missed key banners or don’t want to spend months catching up. A ready-made account can offer what feels like a clean shortcut: strong characters, progress already done, and access to content that would otherwise take weeks or even months.
But there’s a flip side to that convenience. Buying an account isn’t like purchasing a skin or a battle pass. You’re stepping into a grey market where trust matters more than anything else. Some deals are legitimate, others… not so much.
This guide isn’t here to scare you off or push you in. The goal is simple — help you understand how this whole thing works, what to watch out for, and how to make smarter decisions if you decide to go down this route.
Why Players Look to Buy Genshin Impact Accounts
Genshin Impact is designed to reward patience. The longer you play, the more you unlock. But let’s be honest — not everyone has the time or energy to log in daily, farm materials, and save for banners that may or may not pay off.
That’s one of the main reasons people start considering a Genshin Impact starter account buy. Instead of starting from zero, you jump straight into an account that already has a solid foundation. Maybe it includes a couple of limited 5-star characters, maybe it’s just a well-leveled profile — either way, it saves time.
There are a few common situations where buying an account starts to make sense for players:
They missed a limited banner and don’t want to wait for a rerun
They’re switching servers and don’t want to restart from scratch
They tried rerolling and gave up after too many failed attempts
They simply want to experience late-game content without the early grind
What’s interesting is that many buyers aren’t new players at all. Quite often, they already know the game — they just don’t want to repeat the slow part again.
Still, it’s not purely about convenience. For some, it’s also about control. Gacha systems are unpredictable by design. Buying an account, on the other hand, gives you something fixed — you see exactly what you’re getting.
Is It Legal and Safe to Buy a Genshin Impact Account?
Here’s where things get a bit more complicated.
Officially, HoYoverse does not allow account trading. It’s clearly stated in their terms of service, which means any transaction happens outside the game’s rules. That alone doesn’t mean you’ll instantly get banned — but it does mean you’re not protected if something goes wrong.
And things do go wrong sometimes.
The most common issue isn’t even bans — it’s account recovery. The original owner might still have access to old credentials or recovery data. In some cases, buyers lose accounts days or even weeks after the purchase.
Then there’s the platform itself. Not every buy Genshin Impact account site is built with security in mind. Some act more like open marketplaces where anyone can list anything, which increases the chances of running into dishonest sellers.
There’s also a broader context worth mentioning. The reason these markets exist at all is partly tied to how modern games handle monetization. Randomized rewards can be frustrating, especially when real money is involved. Regulators have pointed this out before.
“players spent ‘hundreds of dollars on prizes they stood little chance of winning’” — Samuel Levine, Director of the FTC Bureau of Consumer Protection (source: Wikipedia, Genshin Impact page)
That kind of system naturally pushes some players to look for alternatives — including buying accounts that already have what they want.
So, is it safe? It can be, but only if you understand the risks and take them seriously. There’s no safety net here, so every decision matters more.
Pros and Cons of Buying Genshin Accounts
Buying an account can feel like a smart shortcut — until it isn’t. The only way to approach it realistically is to weigh both sides without ignoring the uncomfortable parts.
What makes it appealing:
You get instant access to characters that are otherwise locked behind luck
No need to replay early quests or grind basic materials
You can jump straight into higher-level domains and events
Sometimes it’s cheaper than spending on multiple banners
What should make you pause:
The account can be taken back if the seller is not trustworthy
There’s always a chance of restrictions or bans
You won’t get any official help if something breaks
Not every listing is as good as it looks
One detail people often overlook is emotional attachment. When you build an account yourself, every character and item has a story behind it. Bought accounts don’t have that same connection — and for some players, that matters more than they expect.
What Makes the Best Site to Buy Genshin Impact Account
If you decide to go ahead with a purchase, the platform you choose matters just as much as the account itself.
The best site to buy Genshin Impact account isn’t necessarily the one with the lowest prices. In fact, extremely cheap offers are usually the first red flag. A good platform focuses on reducing risk, not just making quick sales.
One of the first things to look for is how payments are handled. Marketplaces that use escrow systems give you a layer of protection — your money isn’t released until you confirm that everything is as promised.
Seller transparency is another big factor. Reliable platforms show seller ratings, past transactions, and sometimes even verification badges. That kind of information makes it easier to separate experienced sellers from random listings.
It’s also worth checking how disputes are handled. Even in unofficial markets, some sites offer basic refund policies or mediation if something goes wrong. It’s not perfect, but it’s better than having no options at all.
And finally, think about what happens after the purchase. A good platform will guide you through securing the account — changing login details, unlinking previous connections, and making sure the original owner can’t easily take it back.
In the end, choosing where to buy is less about finding the perfect deal and more about avoiding the worst-case scenario.
Top Features to Look for in a Genshin Impact Account
When you start browsing accounts, they can all blur together pretty quickly. Same characters, similar screenshots, almost identical descriptions. But once you slow down and actually compare them, differences show up — and some of them matter more than others.
If you’re considering a Genshin Impact starter account buy, it helps to look past the surface and focus on what you’ll actually use after logging in.
A few things are worth checking every time:
Adventure Rank — high rank sounds great, but it can also mean most of the easy rewards are already gone. Mid-level accounts often feel more flexible.
Main characters — not just how many 5-stars are there, but which ones. A couple of strong, well-built units can carry you further than a long, random list.
Weapons — people underestimate this part. A good weapon can change how a character performs completely.
Server — sounds obvious, but it’s easy to overlook. Playing on the wrong region can mean higher ping and a worse experience overall.
Account access — this one is critical. You want full control, with the ability to change email and passwords without any complications.
Leftover resources — some accounts come with a decent amount of Primogems or materials, which gives you room to keep progressing.
One small but important detail: don’t get distracted by quantity. More characters doesn’t automatically mean better. Sometimes a cleaner, more focused account is actually easier to enjoy.
Choosing the Right Platform
At first glance, most marketplaces look the same. Same promises, same type of listings, same general idea. But once you spend a bit of time comparing them, you start noticing patterns.
Here’s a simple way to look at how different platforms usually differ:
Feature
Platform A
Platform B
Platform C
Buyer Protection
Yes, with escrow
Minimal
Yes
Seller Verification
Present
Rare
Present
Refund Options
Available in some cases
None
Limited
Prices
Average
Lower
Higher
Overall Risk
Medium
Higher
Lower
There’s no perfect choice here. Cheaper platforms can look tempting, but they often come with more uncertainty. More secure ones tend to cost a bit more, but you’re paying for fewer unexpected surprises later.
How to Safely Buy a Genshin Impact Account
This is the part where rushing usually leads to regret.
Using a buy Genshin Impact account site isn’t complicated, but it does require a bit of patience. Most problems happen when people skip basic checks or trust listings too quickly.
A few simple habits can save you a lot of trouble:
Take a minute to look at the seller, not just the account. If there’s a history, reviews, or ratings — read them. If there’s nothing at all, that’s already something to think about.
Be careful with prices that feel unusually low. In most cases, there’s a reason for that, and it’s not a good one.
If the platform offers some kind of payment protection, use it. It gives you time to log in, check the account, and make sure everything matches the description.
And once you get access — don’t wait. Change everything you can: email, password, linked services. The faster you lock it down, the better.
Conclusion: Is It Worth Buying a Genshin Account in 2026?
It really depends on what you want from the game.
If your goal is to skip the early grind and jump straight into stronger content, buying an account can feel like a practical shortcut. For some players, that’s enough reason.
But it’s not a perfect solution. There’s always a bit of uncertainty involved, no matter how careful you are. And for some people, that alone makes it not worth it.
If you do decide to go this way, it’s better to focus on reliability rather than chasing the lowest price. Choosing the best site to buy Genshin Impact account won’t remove all risks, but it can reduce them to a level most players are comfortable with.
At the end of the day, it’s less about whether it’s right or wrong — and more about whether it fits the way you want to play.
FAQ
Is it safe to use a buy Genshin Impact account site? It can be relatively safe if you stick to platforms with buyer protection and experienced sellers. Still, there’s no full guarantee. Since these transactions are unofficial, you’re always relying on the platform’s internal rules rather than game support.
Can you get banned after buying an account? There is always a chance. The game’s rules don’t allow account transfers, so unusual activity can sometimes trigger restrictions. It doesn’t happen in every case, but it’s a risk you shouldn’t ignore.
What is the best Genshin Impact starter account buy option? Usually, it’s something balanced — not an overpacked account, but also not empty, but also not empty. A couple of strong characters, decent progress, and room to grow tends to be the most practical setup.
How do I avoid scams when buying an account? Look at the seller’s reputation, avoid deals outside trusted platforms, and don’t rush. If something looks too cheap compared to similar listings, it’s better to skip it than to take the risk.
Are cheap accounts worth it? Sometimes, but often they come with hidden issues. Lower price usually means higher risk, whether it’s account recovery or inaccurate details. Saving money upfront can cost more later.
Can the original owner recover the account? Yes, especially if the account wasn’t fully secured after purchase. That’s why changing all access details immediately is not optional — it’s necessary.
Is buying an account better than starting from scratch? It depends on your priorities. Buying saves time, but starting fresh gives you full control and a more natural progression. Different players value different things.
In this post, I will talk about – business for sale in Greater Toronto Area, Canada as I give you a complete guide for buyers and investors.
The Greater Toronto Area (GTA) is one of Canada’s most dynamic economic regions, offering a wide range of opportunities for entrepreneurs, investors, and aspiring business owners. With its diverse population, strong infrastructure, and thriving industries, the GTA has become a hotspot for individuals looking to purchase an established business rather than starting from scratch.
If you’re exploring opportunities for a business for sale in the Greater Toronto Area, Canada, this guide will help you understand the market, identify opportunities, and make informed decisions.
Why Buy a Business in the GTA?
Purchasing an existing business offers several advantages over launching a new one. In a region like the GTA, where competition is high and startup costs can be high, buying an established business can reduce risk and accelerate your path to profitability.
One of the biggest benefits is immediate cash flow. Unlike startups that often take months or years to generate revenue, an existing business typically has an established customer base, operational systems, and supplier relationships. This allows you to step into a functioning operation with predictable income.
The GTA also provides access to a large and diverse market. With a population of over six million people, the region supports a wide variety of industries, from retail and hospitality to technology and manufacturing. This diversity makes it easier to find a business that matches your interests, skills, and investment capacity.
Additionally, the GTA is known for its strong economic stability. Even during uncertain times, the region tends to remain resilient due to its diversified economy and global connections.
Popular Types of Businesses for Sale
The GTA offers a broad spectrum of businesses for sale, catering to different budgets and expertise levels. Some of the most common categories include:
Retail Businesses
Convenience stores, clothing shops, specialty stores, and franchise outlets are widely available. These businesses often benefit from high foot traffic in urban areas like Toronto, Mississauga, and Brampton.
Restaurants and Cafés
The food industry is thriving in the GTA, thanks to its multicultural population. From fast food franchises to fine dining establishments, there are numerous opportunities for buyers interested in hospitality.
Service-Based Businesses
Cleaning services, salons, repair shops, and consulting firms are popular due to their relatively low overhead and steady demand.
Manufacturing and Industrial Businesses
For investors with larger budgets, manufacturing and logistics companies in areas like Vaughan and Markham offer significant growth potential.
Online and E-commerce Businesses
With the rise of digital commerce, many online businesses based in the GTA are available for purchase. These often come with established websites, customer lists, and marketing systems.
Key Factors to Consider Before Buying
Buying a business is a major investment, so it’s essential to conduct thorough due diligence. Here are some critical factors to evaluate:
Financial Performance
Review financial statements, including profit and loss statements, balance sheets, and cash flow reports. Look for consistent revenue and profitability trends over at least the past two to three years.
Location
In the GTA, location can significantly impact a business’s success. High-traffic areas may command higher rent but often generate greater sales. Consider accessibility, visibility, and local competition.
Industry Trends
Analyze whether the industry is growing, stable, or declining. For example, the tech and e-commerce sectors are expanding rapidly, while some traditional retail businesses may face challenges.
Reason for Sale
Understanding why the current owner is selling can provide valuable insights. Retirement, relocation, or pursuing new ventures are common reasons, but it’s important to ensure there are no hidden issues.
Legal and Regulatory Requirements
Different industries in Ontario have specific licensing and regulatory requirements. Ensure that all permits, licenses, and zoning regulations comply.
Steps to Buying a Business in the GTA
Navigating the process of purchasing a business can seem complex, but breaking it down into steps makes it manageable.
Define Your Goals
Determine your budget, preferred industry, and level of involvement. Are you looking for a hands-on role or a passive investment?
Search for Opportunities
Browse business listings through online marketplaces, brokers, and local networks. The GTA has a robust market with new listings appearing regularly.
Evaluate Options
Shortlist businesses that meet your criteria and request detailed information from sellers or brokers.
Conduct Due Diligence
This includes financial analysis, operational review, and legal checks. Hiring professionals such as accountants and lawyers is highly recommended.
Negotiate the Deal
Discuss pricing, payment terms, and transition support. Many sellers are open to negotiation, especially if you demonstrate serious interest.
Secure Financing
Financing options include personal savings, bank loans, investor partnerships, or seller financing.
Close the Transaction
Finalize legal agreements, transfer ownership, and ensure all documentation is properly completed.
Financing Options for Buyers
Buying a business in the GTA often requires significant capital, but there are several financing options available:
Bank Loans: Traditional financing through Canadian banks is common, especially for established businesses with strong financials.
Seller Financing: Some sellers agree to finance part of the purchase price, reducing upfront costs.
Government Programs: Canada offers small business support programs and loans that may be available to qualified buyers.
Private Investors: Partnering with investors can help you acquire larger or more profitable businesses.
Challenges to Be Aware Of
While the GTA offers excellent opportunities, there are also challenges to consider.
Competition is one of the biggest factors. The region is highly competitive, and standing out requires strong management and marketing strategies. Additionally, operating costs, including rent and wages, can be higher than in other parts of Canada.
Another challenge is adapting to changing market conditions. Consumer preferences, technology, and economic factors can shift quickly, so flexibility and innovation are key.
Finally, cultural diversity in the GTA is both an advantage and a challenge. Understanding different customer segments and tailoring your offerings accordingly can significantly impact your success.
Tips for Success After Purchase
Buying a business is just the beginning. To ensure long-term success, focus on smooth transition and growth strategies.
Build relationships with existing employees, customers, and suppliers. Their support can make the transition easier and maintain continuity.
Look for opportunities to improve efficiency and profitability. This might include updating marketing strategies, adopting new technologies, or expanding product offerings.
Pay close attention to customer feedback. In a competitive market like the GTA, customer satisfaction is crucial for retention and growth.
Finally, stay informed about local market trends and economic developments. The GTA evolves rapidly, and staying ahead of changes can give you a competitive edge.
Final Thoughts
The market for a business for sale in the Greater Toronto Area, Canada, is vibrant and full of potential. Whether you’re a first-time buyer or an experienced investor, the GTA offers opportunities across a wide range of industries and price points.
By conducting thorough research, understanding the local market, and approaching the process strategically, you can find a business that aligns with your goals and sets you up for long-term success. With the right mindset and preparation, owning a business in one of Canada’s most prosperous regions can be both rewarding and profitable.