In this post, I will talk about the signs that you might be needing a RAM upgrade.
Upgrading your device is necessary from time to time, because years down the line your Mac might not have great performance. It’s easy to see why, new devices appear and software evolves, which leads to more resources being required. With that in mind, a RAM upgrade is something all of us might need for our Mac. But when should you upgrade your RAM? Here are some of the signs to look out for.
Apps have very high memory usage
If you check and see that the apps are constantly eating up more than half or 2/3 of your RAM, that’s an issue. It clearly shows you don’t have enough RAM, and you need to find a way to circumvent that. Doing so will help quite a lot, so try to take that into consideration and watch the Activity Monitor!
You have lag when typing
That’s not going to happen if your computer has plenty of resources. But if the Mac is constantly lagging while you type, that’s not good. You need to figure out what method you can use to avoid lag while typing. Thankfully, upgrading your RAM can be very useful in this situation.
The Mac reboots often
If your Mac is rebooting very often, chances are that you don’t have enough RAM and that can be an issue. An upgrade is necessary, since it will help deliver smoother performance and better results as a whole. That being said, reboots can also be caused by other problems too. That means you have to investigate and see what works for you.
Files take a lot of time to load
There are situations when files can take a lot of time to load, and that’s due to a lack of resources. It’s a great idea to upgrade your RAM when you see that files take a huge amount of time to access and load properly. Of course, optimizing your storage and system as a whole might come in handy too.
It’s difficult to run more than one app at a time
Normally that should not be an issue. But if you find it hard to run multiple apps at once, that might be a sign you need an upgrade for your RAM. That being said, you can also look into other components too, as those might also need an upgrade as well.
Your Mac is randomly freezing
Those random freezes might appear due to a lack of resources, more specifically RAM. Sure, it might not be only RAM, but that’s usually one of the major culprits. Try to keep that in mind, and if you see these freezes combined with other issues shown above, you should consider doing a RAM upgrade.
It’s a good idea to check all these issues and see whether you really need more RAM for your device. The truth is that a RAM upgrade can help quite a bit, and it will help boost your Mac’s performance. That, combined with an SSD upgrade can make a huge difference when it comes to device performance!
In this post, I will talk about cybersecurity essentials for International travelers and protecting your digital life on the move.
Traveling internationally has never been easier, but staying digitally secure has become increasingly challenging. Whether you’re a business traveler, digital nomad, remote worker, or vacationer, your devices contain valuable personal and financial information that cybercriminals actively target. Public Wi-Fi networks, unfamiliar charging stations, and phishing scams are just a few of the risks travelers face.
This guide explores the most effective cybersecurity practices for protecting your digital identity while traveling, ensuring you can enjoy your journey without compromising your online security.
Why Travelers Are Prime Targets for Cybercriminals
Travelers often operate outside their normal routines, making them more vulnerable to cyber threats. They frequently rely on hotel networks, airport Wi-Fi, shared workspaces, and public charging stations—all environments where attackers may attempt to intercept sensitive information.
Common threats include:
Man-in-the-middle attacks on unsecured Wi-Fi
Fake public hotspots
Device theft
Credential phishing
Malicious USB charging stations (juice jacking)
SIM swapping attacks
Malware infections from compromised networks
Understanding these risks is the first step toward preventing them.
Secure Your Devices Before You Leave
Preparation begins long before boarding your flight.
Update Everything
Install the latest operating system and software updates on:
Smartphones
Tablets
Laptops
Smartwatches
Password managers
Security software
Updates often contain critical security patches that close newly discovered vulnerabilities.
Enable Full Device Encryption
Modern operating systems offer built-in encryption that protects your data if your device is lost or stolen.
Ensure encryption is enabled on:
Windows (BitLocker)
macOS (FileVault)
Android
iPhone
Without encryption, anyone with physical access could potentially recover your files.
Back Up Your Data
Create both:
Cloud backups
Offline encrypted backups
If your device is damaged, stolen, or infected with ransomware, you’ll still have access to your important documents and photos.
Strengthen Your Authentication
Passwords alone are no longer sufficient.
Use Strong Unique Passwords
Never reuse passwords across multiple accounts.
Instead:
Use long passphrases
Store credentials in a trusted password manager
Generate unique passwords for every service
Enable Multi-Factor Authentication (MFA)
MFA significantly reduces the likelihood of unauthorized access.
Authenticator apps are generally safer than SMS verification because text messages may be intercepted through SIM-related attacks.
Be Careful with Public Wi-Fi
Public internet is convenient but rarely secure.
Avoid accessing:
Banking portals
Corporate dashboards
Medical records
Government services
while connected to unsecured networks.
If you must use public Wi-Fi:
Verify the official network name
Disable automatic connection
Turn off file sharing
Forget the network after use
Consider Safer Mobile Connectivity
Instead of relying exclusively on public wireless networks, many travelers prefer mobile data solutions that reduce exposure to unknown hotspots. During your trip, I recommend to always stay connected with Holafly so you can access secure mobile connectivity options that help minimize dependence on public Wi-Fi.
Protect Against Charging Station Attacks
Public USB charging stations may expose devices to data theft if compromised.
A safer approach includes:
Carrying your own charger
Using a wall outlet whenever possible
Bringing a portable battery pack
Using a USB data blocker when necessary
Power-only connections eliminate many potential attack vectors.
Disable Unnecessary Wireless Features
When not actively using them, disable:
Bluetooth
NFC
AirDrop
Nearby Sharing
Wi-Fi auto-discovery
Reducing your device’s discoverability limits opportunities for nearby attackers.
Protect Sensitive Work Data
Business travelers often carry confidential information.
Consider:
Separating work and personal devices
Using encrypted cloud storage
Avoiding local storage of highly sensitive files
Locking screens immediately when unattended
Many organizations also require secure VPN connections and endpoint protection policies for remote work.
Watch for Phishing Attempts
Cybercriminals frequently impersonate:
Airlines
Hotels
Booking platforms
Customs agencies
Delivery companies
Before clicking any link:
Verify the sender
Inspect the domain
Avoid opening unexpected attachments
Visit websites directly instead of using emailed links
Travel-related phishing campaigns often increase during holiday seasons.
Secure Your Online Accounts
Review account security before traveling.
Recommended steps include:
Checking recent login history
Removing old devices
Updating recovery information
Confirming backup email addresses
Reviewing connected third-party applications
These precautions make account recovery easier if something goes wrong abroad.
Be Cautious with Public Computers
Avoid logging into important accounts from:
Hotel business centers
Internet cafés
Shared workstations
If unavoidable:
Use private browsing
Never save passwords
Log out completely
Clear browser history afterward
Public systems may contain malware or keyloggers.
Prepare for Device Theft
Losing a device while traveling can be stressful.
Before departure:
Enable remote location tracking
Activate remote wipe capabilities
Record device serial numbers
Store emergency recovery codes securely
Quick action greatly improves the chances of protecting your information.
Monitor Financial Activity
Travel often involves increased payment activity.
Monitor:
Credit card transactions
Bank notifications
Mobile payment accounts
Enable real-time transaction alerts so suspicious purchases can be identified immediately.
Practice Safe Social Media Sharing
Posting your location in real time may unintentionally reveal:
Your current whereabouts
Hotel location
Travel schedule
Empty home
Consider waiting until after returning home before sharing detailed travel updates.
Build a Personal Cybersecurity Travel Checklist
A simple checklist helps ensure nothing is overlooked.
Include reminders to:
Update all devices
Charge backup batteries
Pack chargers
Verify MFA access
Download offline maps
Secure important documents
Review emergency contacts
Enable device tracking
Confirm backups
Test password manager access
Having a repeatable routine reduces mistakes during busy travel days.
Final Thoughts
International travel offers incredible opportunities, but it also expands your digital attack surface. Cybersecurity should be considered just as essential as your passport and travel insurance. By preparing your devices, strengthening authentication, avoiding risky networks, and practicing smart online habits, you can significantly reduce the chances of becoming a victim of cybercrime.
A proactive approach to digital security allows you to focus on your trip with greater confidence, knowing your personal information, financial accounts, and sensitive data remain well protected wherever your travels take you.
Learn how to share eBooks with Family and Friends.
E-books have transformed the way people read making it easier than ever to share favorite titles with others. Whether you’re introducing your family to a new series or helping friends discover their next great read, sharing digital books is a wonderful way to connect. Explore fresh reading horizons with Z lib by your side opening up a vast world of reading opportunities for all kinds of readers.
Choosing the Right Platform for Sharing
When sharing e-books with family or friends the options are plentiful. Some platforms offer built-in features that allow you to share books easily while others require a little extra effort to make your collection accessible. Understanding the advantages of each platform will help you make the best choice for your needs.
For instance, sharing can be as simple as logging into the same account if you’re using a platform that supports multiple devices across one account. This approach works well for families or close-knit friend groups that frequently read together.
However, some may prefer more privacy or flexibility in their reading experience. In that case, transferring individual e-books through email or file-sharing services may be the better option.
While it’s convenient to share digital books it’s important to do so in a way that respects copyright laws and ensures the security of your personal library. Here’s how to share e-books responsibly while keeping things secure:
Verify sharing permissions: Make sure the platform or e-book allows sharing without violating its terms of use.
Use authorized methods: Always opt for sharing through the platform’s official features to avoid legal trouble.
Protect your account: If you’re sharing access to your account ensure you use strong passwords and limit the number of users.
Respect personal boundaries: Not everyone enjoys the same types of books. Always check if your friend or family member is open to your recommendation before sharing.
Be mindful of device compatibility: Some e-books may not work on all devices so double-check compatibility before sharing.
Sharing e-books can be a seamless process with a little thought. Whether you prefer sharing through direct file transfers or logging into the same account it’s worth exploring the options to find what works best for you.
Benefits of Using ZLibrary
For readers who love exploring new books z library provides a massive collection ready for sharing with friends or family. The beauty of digital libraries like zlibrary lies in their accessibility and ease of use for readers of all levels. It allows readers to access top titles at no cost, offering everyone a chance to explore books they might never have found otherwise.
Sharing ebooks through such platforms brings the joy of reading closer and makes sure that readers from different corners of the world can connect over their love for stories. With platforms like these, sharing multiple titles and broadening each other’s horizons is easy. Enjoying books together builds lasting bonds especially when everyone finds something they love in the vast sea of literature available at their fingertips.
Sharing e-books with family and friends offers a rewarding way to connect over shared interests and new discoveries. Whether you’re sharing through an e-library or sending a book directly choosing the right platform and approach will make it easy and enjoyable. Happy reading!
In this post, I will show you what to do when a broken Android phone becomes a data security risk and give you a safe photo recovery checklist.
A broken Android phone is more than a hardware inconvenience. It can also become a serious data security and privacy problem.
Modern smartphones contain personal photographs, identity documents, screenshots, financial information, authentication messages, work files, and saved account credentials. When a phone is dropped, exposed to water, or left with an unusable screen, the owner may focus entirely on recovering the device. However, rushed recovery attempts can expose private information, overwrite recoverable files, or give an untrusted third party unnecessary access to the phone.
The safest response must balance two goals: recovering important photographs and protecting the personal information stored on the device.
This checklist explains how to evaluate a damaged Android phone, preserve recoverable data, and reduce privacy risks throughout the recovery process.
1. Identify the Type of Damage
Before attempting recovery, determine whether the problem affects the screen, touchscreen, battery, charging port, operating system, internal storage, or motherboard.
Check whether the phone:
Vibrates when the power button is pressed
Produces notification sounds
Displays a charging indicator
Rings when someone calls it
Is recognized by a trusted computer
Shows a partial or distorted image
Restarts repeatedly
Becomes unusually warm
Contains a removable microSD card
If the phone still vibrates, rings, or produces notifications, its operating system may be functioning normally. The damaged component could be limited to the screen or touch layer.
A phone that is completely unresponsive may have a battery, charging, circuit board, or storage problem. In this situation, repeated power-on attempts can cause additional damage, especially if the device was exposed to water.
2. Stop Unnecessary Use Immediately
If the phone still operates, avoid using it for anything unrelated to recovery.
Do not:
Take new photos or videos
Install recovery applications
Download files
Update Android
Clear application caches
Perform a factory reset
Unlock the bootloader
Flash new firmware
Repeatedly restart the device
When a photograph is deleted, its data may remain on the storage device until new information overwrites it. New downloads, application installations, system updates, and camera activity can reduce the chance of recovering deleted files.
If the phone is unstable, power it off and leave it off until a safe recovery plan has been selected.
3. Check Existing Backups First
The safest recovery method is often retrieving an existing backup rather than accessing damaged hardware.
From another trusted device, sign in to the accounts previously used on the phone. Check:
Google Photos
Google Drive
Microsoft OneDrive
Dropbox
Manufacturer backup services
Messaging applications
Social media accounts
Email attachments
Shared family albums
Remember to inspect the Trash, Bin, Archive, and Locked Folder areas. Recently deleted photographs may remain available for a limited period.
Also verify that the correct account is being checked. Many people use multiple Google accounts or separate personal and work profiles. A missing photograph may have been synchronized to a different account.
If the required photos are already backed up, download them to a secure device and verify that the files open correctly before attempting hardware repair.
4. Protect the Accounts Connected to the Phone
A lost or damaged phone may still receive authentication codes, email messages, password-reset links, and financial notifications.
If the device is missing, was handled by an unknown person, or will be sent to a repair provider, review the security of important accounts.
Consider:
Changing passwords for sensitive accounts
Reviewing recent login activity
Removing unknown devices from account sessions
Enabling multifactor authentication
Contacting the mobile carrier if the SIM card is missing
Remotely locking the phone when appropriate
Removing payment cards stored in mobile wallets
Checking email forwarding and recovery settings
Remote erasure should be treated as a final security measure. It may protect private information when a phone has been stolen, but it can also permanently prevent photo recovery. Evaluate the value and sensitivity of the data before issuing an erase command.
5. Use a Trusted USB Connection Carefully
If the phone turns on, connect it to a trusted computer with a known USB data cable. Avoid public computers and unfamiliar charging stations.
A charging-only cable will not transfer files, so try another cable if the computer does not recognize the device.
If the phone appears in Windows File Explorer, check folders such as:
DCIM/Camera
Pictures
Screenshots
Download
WhatsApp/Media
Telegram
Application-specific folders
Copy the complete folders to the computer instead of moving the files. Moving creates unnecessary write operations, while copying preserves the originals.
After copying, open a selection of photographs to make sure they are readable. Keep at least two verified copies before deleting or modifying anything on the phone.
For users managing several inaccessible storage devices, thesedata recovery resources and planning tools can help clarify which recovery approach is appropriate before changes are made to the original device.
6. Avoid Unsafe Lock-Screen Bypass Claims
Modern Android devices normally encrypt internal storage. The correct PIN, password, or pattern is often required before stored files can be decrypted.
Be cautious of websites or programs claiming they can instantly bypass any Android lock screen without credentials. Such tools may:
Install untrusted software
Collect account credentials
Introduce malware
Erase the phone
Require disabling important security controls
Provide access only after a factory reset
USB debugging does not automatically solve the problem. Android Debug Bridge generally works only if debugging was enabled before the phone was damaged and the computer had already been authorized.
Legitimate recovery should use the owner’s credentials and established access methods. Avoid instructions designed to defeat device security.
7. Recover Data from a Broken Screen Safely
If the display is damaged but the phone still works, there are several possible access methods.
Use an OTG mouse
When the screen is visible but touch input has failed, a compatible OTG adapter and USB mouse may allow the owner to unlock the phone and approve file-transfer access.
Connect an external display
Some Android phones support video output through USB-C. A compatible adapter may display the phone interface on a monitor. A mouse or keyboard can then be used to navigate the device.
Not all USB-C phones support video output, so check the model specifications first.
Arrange a temporary screen repair
For encrypted phones, replacing the broken display may be safer than attempting complicated software workarounds. Tell the repair provider that preserving the data is the priority.
The technician should not:
Factory-reset the phone
Flash its firmware
Replace the motherboard
Update the operating system
Erase storage without approval
A motherboard replacement may make the phone functional, but the original encrypted data usually remains associated with the original hardware.
If the phone stores photographs on a microSD card, power the phone off before removing it.
Insert the card into a trusted computer with a reliable card reader. If the card opens normally, immediately copy its complete contents to another storage device.
If the operating system asks to format the card, cancel the request. Formatting changes the file system and may make recovery more difficult.
Also stop using the card if it:
Appears as RAW
Shows an incorrect capacity
Disconnects repeatedly
Becomes unusually warm
Produces read errors
Contains folders that cannot be opened
Whenever practical, create a sector-by-sector image of an unstable card and perform recovery attempts on the image instead of repeatedly scanning the original media.
9. Treat Water Damage as a Security and Hardware Emergency
A water-damaged phone should not be repeatedly powered on or charged. Electricity combined with moisture can create short circuits and accelerate corrosion.
Do not:
Place the phone in rice
Heat it with a hair dryer
Connect it to a charger
Shake it to remove water
Open it without appropriate tools
Continue testing it throughout the day
Rice cannot remove mineral residue or corrosion from the circuit board. Heat can damage adhesives, batteries, and other components.
Power the device off if this can be done safely and consult a technician experienced in board-level repair and data preservation.
10. Evaluate a Repair Provider’s Privacy Practices
Giving a phone to a repair shop may provide technicians with access to photographs, messages, saved accounts, and personal documents.
Before handing over the device, ask:
Will you need my PIN or account password?
Can the repair be performed while I am present?
Will you reset, update, or flash the phone?
Will any data be copied to your systems?
How long will copied data be retained?
Who can access the device?
What happens if recovery is unsuccessful?
Can you sign a confidentiality agreement?
How will recovered files be delivered?
Do not provide more credentials than necessary. A technician repairing a charging port may not need access to email, banking, cloud storage, or social media accounts.
After recovery, change any password that was shared and review the account’s recent activity.
11. Scan Recovered Files Before Opening Them
Recovered files should be treated carefully, especially if the phone was infected with malware or connected to an untrusted computer.
Store the recovered data in a separate folder and scan it with updated security software. Pay particular attention to:
APK installation files
Executable files
Unexpected archives
Documents with macros
Files with misleading extensions
Unknown downloads
Suspicious shortcuts
Photographs are generally lower risk than executable files, but file names and extensions can be disguised. Avoid opening unfamiliar programs included with recovered data.
12. Build a More Resilient Backup Plan
Once the photographs have been recovered, store them in more than one location.
A practical backup arrangement includes:
The original copy on the phone
An encrypted cloud backup
A separate copy on a computer or external drive
Periodically test the backups. Confirm that recent photographs are present, open several files, and check whether the cloud account still has enough storage.
Backups should also be protected with strong passwords and multifactor authentication. A backup that anyone can access is not a secure backup.
Final Thoughts
Recovering photographs from a broken Android phone requires more than finding a program that can scan the device. The process must also protect account credentials, personal images, authentication messages, and other sensitive information.
Begin with the least invasive options: check cloud backups, determine which component is damaged, use trusted equipment, and preserve the original storage. Avoid factory resets, firmware flashing, unverified bypass tools, and unnecessary write operations.
When professional assistance is required, choose a provider that can explain both its technical process and its privacy protections. Successful recovery should restore the photographs without creating a new cybersecurity problem.
In this post, we will compare Robinhood Chain vs Solana and I will show you where Memecoin traders are placing orders now.
Robinhood Chain is barely out of the gate. Solana has years of memecoin trading behind it. If you are deciding where to route your next order, that gap in maturity matters more than any headline.
Two Very Different Starting Points
Robinhood Chain is the Layer 2 network Robinhood built. That name carries weight, but weight is not the same as trading history.
Keep the two Robinhoods separate. Robinhood Chain is a blockchain network for on-chain trading. It is not the Robinhood brokerage app, and it is not stock trading in any form.
Solana, by contrast, has been the default venue for new token launches through multiple market cycles. Traders already route liquidity there without thinking twice.
Robinhood Chain does not have that kind of track record yet. It has a launch date and a brand name, not years of memecoin cycles to point back to.
Banana Gun watches both sides of that gap, from brand-new networks to the ones traders already trust.
Honeypot detection and anti-MEV protection run by default on every trade Banana Gun executes. That matters more on a chain still building its reputation than on one with years of contracts already vetted by the market.
What You Can Trade on Robinhood Chain Today
Robinhood Chain support currently lives in the Banana Gun Telegram bot, not in Banana Pro. If you want to trade there today, that bot is your entry point.
Banana Pro, the web terminal, currently covers Solana, Ethereum, BNB Chain and Base. Robinhood Chain has not landed there yet.
The Telegram bot brings the same core toolset to Robinhood Chain that it brings everywhere else. Limit orders and Copy Trade work the same way there as on any other supported chain.
Anti-Rug and Anti-Rug GWEI checks still run before a transaction clears, regardless of which chain you picked that day. The safety layer does not change just because the chain is new.
Fees on Ethereum sit at 0.5% for manual buys and limit orders. Other supported chains run 1%. Robinhood Chain has no published fee figure yet, so treat any number you see elsewhere as unconfirmed.
Why Solana Still Pulls the Memecoin Crowd
Solana’s pull is not about one single feature. It comes down to depth: Raydium, Pump.fun, Orca and Meteora all sit on the same chain, feeding the same pool of liquidity.
That depth means a new memecoin can find buyers within minutes of launch, something a chain with less history struggles to match early on.
On Solana, anti-MEV protection routes your orders through Jito by default. That is a direct answer to the front-running problem that older, less protected setups still deal with.
Copy Trade adds another layer here. Simple, Advanced and Advanced Presets modes let you mirror wallets you already track, with Buy Fixed and Buy Only Once options to keep your exposure in check.
Traders who have run through a few cycles on Solana already know which venues to check first and which wallets to watch. That kind of habit takes time to build on any new chain.
Raw activity numbers move week to week, and stale figures mislead more than they inform. Banana Gun publishes the current picture in its weekly volume breakdown, chain by chain.
Choosing Between Them Without Picking Sides
If you already trade Solana memecoins, nothing here changes that. The venues, the liquidity and the habits are already built.
If you are curious about Robinhood Chain, go in knowing it is early. Early can mean opportunity, or it can mean thin order books and few tested patterns.
That does not make Robinhood Chain a bad bet. It makes it an unproven one, and unproven is not the same as unsafe.
If you move funds between chains to test the waters, the integrated bridge and reorg protection are built for exactly that kind of transition.
Trailing Stop Loss and limit orders travel with you either way, so the risk controls you rely on do not reset when you switch chains.
The honest verdict: Solana is where the memecoin crowd already lives. Robinhood Chain is a name with a chain behind it, still writing its own track record.
Trade where the liquidity already exists, or trade where the story is still being written. Just do not confuse the two Robinhoods when you decide.
In this post, I will discuss why longer passwords are better and other online banking security tips.
According to the 2025 Global Digital Report, the Philippines now ranks first globally in the regular use of online financial services, with the vast majority of internet users actively managing money through digital platforms each month.
That level of adoption reflects how deeply online banking, investing, and payments have become part of daily life. Whether you rely on a traditional institution or a BSP digital bank like Maya Bank, chances are you access your finances through a mobile app or website more often than you visit a physical branch.
This widespread digital engagement brings speed and convenience, but it also increases exposure to cyber risks. As more financial activity moves online, your everyday security decisions matter more than ever. Let’s explore some of the most practical ways you can safeguard your finances in a highly connected environment.
1) Make Passwords Longer for Stronger Protection
Imagine two doors: one with a flimsy lock, the other with a complex, reinforced system. Which one would you trust to protect your valuables? Passwords work the same way. Short, simple ones are easy targets for attackers using automated tools, while longer, more complex passwords dramatically raise the barrier to entry.
For example, a six-character password might fall in minutes, but a twelve-character password could take years to crack even with current technology, making length your ally. However, adding length doesn’t mean memorizing nonsense strings that are almost impossible to recall. You can use passphrases, like “BlueSkyRunsFast!2026”, which are made of unrelated words, combined with numbers or symbols, to keep them secure yet memorable.
Think of your password as the first line of defense. The stronger and longer it is, the less chance intruders have of breaking through. A well-crafted password becomes your silent guardian, standing firm against digital threats.
2) Add Two-Factor Authentication for Extra Safety
Strong passwords go a long way, but they’re not foolproof. What if someone manages to obtain yours? Without additional safeguards, they’re inside your account. That’s where two-factor authentication (2FA) adds a crucial layer. By requiring a second action, such as a code sent to your phone or generated by an app, you make unauthorized access far less likely. Even if your password is compromised, the intruder still needs that extra piece of information.
Many banks now offer biometric options like fingerprint or facial recognition, adding convenience without reducing security. While it may feel like an extra step, 2FA remains one of the most effective ways to protect your finances. It’s a small effort that pays off in peace of mind, ensuring that your account isn’t left vulnerable to a single point of failure.
3) Spot Phishing Attempts Before They Trap You
Not every threat comes from breaking into your password. Sometimes, cybercriminals try to trick you into handing over information yourself. This tactic, called phishing, uses fake emails or messages that mimic legitimate bank communications, complete with logos and urgent language, to pressure you into acting quickly.
The best defense is to slow down and scrutinize. Check the sender’s address, hover over links before clicking, and never share personal details through email. Banks rarely request confidential information this way, so treat such messages with caution. If something feels off, reach out to your bank directly through official channels.
Phishing thrives on haste and fear. Resist the urge to respond immediately, and you’ll block scammers from turning your trust into their opportunity.
4) Keep Your Devices Secure and Updated
Beyond spotting scams, protecting the device you use for banking is essential, as it serves as your gateway to financial control. When it’s compromised, your accounts are likely at risk. To patch vulnerabilities that hackers exploit, install regular software updates promptly. Pairing those updates with reputable antivirus software gives you stronger, ongoing protection.
Public Wi-Fi, while convenient, is risky for banking transactions because it can expose your data to interception. Instead, use secure networks or a virtual private network (VPN) when accessing sensitive accounts. Remember, your device is not only a tool but also an integral part of your security system. Treat it with care, and it will safeguard your digital life in return.
5) Monitor Account Activity to Catch Issues Early
A small, unfamiliar charge on your account may not seem alarming at first, yet it can be the earliest sign of fraud. Cybercriminals often test accounts with minor transactions before attempting larger thefts, which makes regular reviews of your account activity essential. To make tracking hassle-free, most banking apps now provide real-time alerts, giving you immediate visibility into how your account is being used. Setting up notifications for withdrawals, transfers, or unusual activity keeps you informed and allows you to respond quickly when something looks wrong.
That vigilance makes a real difference, as early detection limits potential losses and makes dispute resolution far simpler. With consistent monitoring, you’ll be able to maintain control over your finances and strengthen your overall security.
In the end, strong digital security is built through deliberate daily habits. Longer passwords, careful connection choices, and consistent monitoring all work together to protect your financial access. Now that online banking just continues to evolve, your vigilance remains a critical line of defense. Make security a routine part of how you manage money, and you’ll reduce risks before they have a chance to disrupt your financial stability. Start with one change today to build momentum toward lasting security.
In this post, I will talk about the top benefits of cybersecurity services for strengthening business network security.
Modern businesses depend on connected systems, cloud tools, mobile devices, and shared data to operate efficiently each day. As networks grow more complex, security risks also increase, making it essential for companies to protect digital assets, communication channels, and customer information.
Cybersecurity services help businesses reduce threats, improve resilience, and maintain daily operations without costly interruptions. With the right protection strategy, companies can strengthen network security, build trust, and respond quickly to changing cyber risks.
Why Cybersecurity Services Matter for Every Business
Reliable protection starts with expert support that helps organizations identify risks, secure systems, and monitor threats before damage occurs. Businesses that invest in trusted cybersecurity solutions in Greater New Orleanssolutions togain stronger visibility, better control, and long term confidence.
Protects sensitive customer and company data
Reduces downtime caused by cyber incidents
Improves compliance with security standards
Supports secure remote and hybrid work
Strengthens firewall and endpoint defenses
Builds customer trust and brand credibility
Enhances recovery after security events
Core Benefits of Cybersecurity Services for Network Security
Every business network faces constant pressure from phishing attempts, malware, ransomware, weak passwords, and unauthorized access. Professional cybersecurity services create multiple layers of defense that help businesses stay protected while operating efficiently.
Stronger Threat Detection
Continuous monitoring tools can detect suspicious behavior before it turns into a serious problem. Early alerts allow teams to act quickly and contain potential threats before systems are affected.
Fast detection also reduces the time attackers remain hidden inside a network. This lowers the chance of data theft, service disruption, and expensive recovery efforts.
Improved Data Protection
Sensitive records such as customer files, payroll details, and internal documents require strong safeguards. Security services use encryption, access controls, and backups to protect critical data from misuse.
These protections also help businesses maintain trust with clients and partners. Secure data handling demonstrates responsibility and professionalism in every transaction.
Reduced Risk of Downtime
Cyber incidents can shut down operations, delay services, and impact revenue. Proactive security management helps prevent attacks that lead to costly interruptions and lost productivity.
When networks stay available, employees can continue working without delays. This creates smoother workflows and stronger customer satisfaction.
Better Access Control
Not every employee needs access to every system or file. Cybersecurity planning applies permissions that limit entry to only approved users, reducing internal exposure across the network.
Multi factor authentication adds another layer of security. Even if passwords are stolen, unauthorized users still face barriers to entry.
Safer Remote Work Environments
Many businesses now rely on remote teams and mobile access. Secure connections, device monitoring, and user policies help protect distributed staff working outside the office.
This support allows employees to stay productive from any location while reducing risks tied to public networks or unmanaged devices.
Faster Incident Response
No system is immune from every threat, which is why response planning matters. Security experts can isolate problems quickly and restore normal operations with less disruption.
Prepared response steps also reduce confusion during stressful events. Teams know what to do, who to contact, and how to recover efficiently.
Stronger Customer Confidence
Customers prefer companies that take privacy and security seriously. Visible commitment to cybersecurity builds business credibility and reassures clients that their information is protected.
Trust can influence buying decisions, referrals, and long term loyalty. Strong security often becomes a competitive advantage.
Cybersecurity services do more than block attacks. They also improve planning, support growth, and help businesses create stable systems that can adapt to future needs.
Supports Regulatory Compliance
Many industries must follow privacy and security standards. Professional guidance helps businesses meet compliance requirements through better controls, documentation, and reporting.
Meeting standards can reduce penalties and improve readiness for audits. It also shows accountability to customers and regulators.
Scalable Protection for Growth
As businesses add staff, devices, and locations, networks become more complex. Security services scale with changing needs and maintain consistent protection during expansion.
This makes growth easier because systems stay organized and defended. Companies can move forward without creating unnecessary risk.
Better Employee Awareness
Human error remains a common cause of breaches. Security training teaches staff how to recognize phishing emails, unsafe links, and suspicious behavior through practical awareness programs.
Well informed employees become a stronger first line of defense. Small habits often prevent major incidents.
Improved Backup Readiness
Reliable backups are essential when systems fail or ransomware strikes. Security planning ensures backup processes are tested and aligned with recovery goals for faster restoration.
Businesses with dependable backups recover quicker and lose less data. This reduces operational stress during emergencies.
Clear Security Visibility
Many organizations do not know where their weak points exist. Assessments and monitoring provide network visibility so leaders can make informed decisions.
Understanding risks helps prioritize upgrades, policies, and investments. Better visibility leads to stronger long term protection.
Expert Guidance on Emerging Threats
Cyber risks evolve constantly as attackers change methods. Working with professionals gives businesses access to managed cybersecurity solutions for growing organizations that address new threats before they spread.
This expert insight saves time and reduces guesswork. Businesses can focus on operations while specialists track risks.
Stronger Disaster Recovery Planning
Storms, outages, hardware failure, and attacks can all impact systems. Cybersecurity strategies from experts like networktactics.com often include recovery planning for business continuity when disruptions occur.
Prepared organizations return to service faster and protect customer relationships. Recovery readiness is a major operational advantage.
Common Security Areas Businesses Should Review
Strong network security depends on reviewing both technology and daily processes. Businesses should regularly assess these areas to reduce vulnerabilities.
Firewall settings and network segmentation
Password policies and multi factor authentication
Endpoint security for laptops and mobile devices
Email filtering and phishing protection
Software patching and update schedules
Backup systems and restoration testing
User access permissions and role management
Vendor and third party security risks
Cybersecurity Priority Comparison Table
Security Area
Business Benefit
Risk If Ignored
Email Protection
Stops phishing and fraud attempts
Account compromise
Endpoint Security
Protects devices and users
Malware infections
Backups
Faster recovery after incidents
Data loss
Access Control
Limits unauthorized entry
Insider misuse
Monitoring
Early threat detection
Hidden breaches
Training
Fewer user mistakes
Human error incidents
Conclusion
Cybersecurity services are no longer optional for businesses that rely on digital systems and customer trust. Professional protection helps prevent threats, reduce downtime, and strengthen daily operations with confidence.
Companies that invest in layered security today create a stronger foundation for future growth. By improving visibility and reducing risk, businesses can protect their people, data, and reputation.
Today, we will answer the question – when is hacking illegal and legal?
Before we jump into the topic of when hacking is considered illegal and when it is considered legal, let’s try to understand what hacking is.
What Is Hacking?
There are several ways to explain the process of hacking. It could be described as a breach of the system or unauthorized access.
Still, hacking is an unwarranted attempt to infiltrate a computer or any other electronic system to attain information about something or someone.
Whenever we hear or read about someone’s computer or network being hacked, we instantly picture an individual sitting in a dark room full of tangled wires, computer screens, and multiple keyboards, rapidly typing a programming language on one of the computer screens.
While hacking is portrayed as quite intriguing in movies, it is entirely different. Websites like SecureBlitz and other cybersecurity blogs can educate you on the measures you should take if your device is hacked.
The hacking scenes in movies and TV shows are full of action, suspense, and drama, making them enjoyable and entertaining.
But in reality, hacking is quite dull. The hacker types a series of commands, instructing the computer system via a programming language like Python, Perl, or LISP, and waits for the results, which may take hours. However, the computer performs the actual hacking tasks.
Along with being tedious and time-consuming, piracy is also complicated and sometimes dangerous.
Hackers use many different types of tools to hack into a software system. A few of these tools are:
Sn1per is a vulnerability scanner used by hackers to detect weak spots in a system or network.
John The Ripper (JTR) – This is a favorite tool amongst hackers. It is used for cracking even the most complicated passwords as a dictionary attack. A dictionary attack is a form of brute-force attack where the hacker enters numerous passwords, hoping to guess the correct one.
Metasploit – This is a Penetration Testing Software. It is a hacking framework used to deploy payloads into vulnerabilities. It provides information about software weaknesses.
Wireshark is a network traffic analyzer used for troubleshooting and analyzing network traffic.
There Are Three Types Of Hackers –
The Black Hat Hackers,
The White Hat Hackers and
The Grey Hat Hackers.
The difference between each will be discussed below.
1. Black hat hackers
Black Hat hackers are cybercriminals who illegally gain unauthorized or illegal access to individual or group computers (devices and networks) to steal personal and financial information like names, addresses, passwords, credit card details, etc.
A Black Hat hacker may also use malicious tools, such as viruses, Trojans, worms, and ransomware, to steal or destroy files and folders, and take control of a computer or network of computers, demanding money for release.
In essence, Black Hat hackers can work alone as individuals or belong to organized crime organizations as partners or employees, and are responsible for more than 2,244 daily computer breaches.
2. White Hat Hackers
White-hat hackers, also known as ethical hackers, are computer security professionals who utilize their hacking knowledge to protect the computer networks of businesses and organizations.
They aim to detect and reinforce security loopholes, weaknesses, or flaws in systems and networks that cybercriminals can explore.
For this reason, White hat hackers think and act like black hat hackers and also use a whole lot of testing tools and techniques deployed by black hat hackers in exploiting systems and network weaknesses.
Some of the best white-hat hackers were previously black-hat hackers who, for various reasons, have decided to use their hacking knowledge and skills to fight against cybercrimes.
3. Grey Hat Hackers
Grey hat hackers fall in between the divide; they are neither black hat nor white hat hackers, but their activities are termed ‘illegal.’
This is because they gain unauthorized access to individual or group networks to steal data and identify security flaws or loopholes in systems, networks, or programs.
Unlike black-hat hackers, grey-hat hackers do not seek to make immediate money or benefit from their activities.
Grey hat hackers can be beginner hackers who hack into systems and networks to test and develop their hacking skills before deciding which side of the divide to join.
However, most Grey hat hackers are lone-range hackers who work as bug bounty hunters, finding and reporting security flaws in corporate networks or extracting and exposing confidential information for all to see, as in the case of WikiLeaks, which represents the most significant information leak.
Best Antivirus With Ironclad Protection Against Hackers
Surfshark Antivirus
A 360-degree solution for all threat categories.
A 360-degree solution for all threat categories. Show Less
Heimdal Security
Heimdal Security protects its users from advanced malware attacks by making use of next-generation technology. Your best...Show More
Heimdal Security protects its users from advanced malware attacks by making use of next-generation technology. Your best intelligent threat prevention tool. Show Less
Malwarebytes
Your everyday protection against malware like ransomware, spyware, viruses, and more.
Your everyday protection against malware like ransomware, spyware, viruses, and more. Show Less
Norton Antivirus Plus
Your award-winning cybersecurity solution for complete device protection.
Your award-winning cybersecurity solution for complete device protection. Show Less
Trend Micro Maximum Security
Maximum security for households and office use.
Maximum security for households and office use. Show Less
When Is Hacking Illegal And Legal?
Hacking has always been portrayed as a felony, an unauthorized entry into a network. However, it began when MIT introduced the first computer hackers, whose job was to modify software to improve its performance and efficiency. However, some people started using this software for felonious activities.
Hacking is gaining unauthorized access to a computer system or network. It can be used for various purposes, including stealing data, installing malware, or disrupting operations. Hacking can be illegal or legal, depending on the circumstances.
Legal Hacking
There are several situations in which hacking is legal. For example, security researchers may hack into a system to test its security or to find vulnerabilities. Law enforcement officials may also fall into a system to investigate a crime. In these cases, hacking is done with the system owner’s permission or with a court warrant.
Illegal Hacking
Hacking is illegal when it is done without permission from the system owner. This includes hacking into a system to steal data, install malware, or disrupt operations. Illegal hacking can also involve gaining unauthorized access to a system to obtain information that is not publicly available.
Determining Whether Hacking Is Legal
The legality of hacking can be a complex issue. Several factors are considered by courts when determining whether hacking is legal, including the hacker’s intent, the method used to gain access, and the resulting damage.
In general, hacking is considered illegal if it is done without permission from the system owner and if it causes damage to the system or its users.
However, there are some exceptions to this rule. For example, hacking may be legal if it is done with the system owner’s permission or if it is done to test security or investigate a crime.
Here is a table summarizing the legality of hacking:
Type of Hacking
Legality
Examples
Legal Hacking
With permission from the system owner or with a warrant from a court.
Security researchers hack into a system to test its security. Law enforcement officials hack into a system to investigate a crime. System administrators use hacking techniques to troubleshoot a problem within a system.
Illegal Hacking
Without permission from the system owner.
Hackers gain unauthorized access to a system to steal data. Hackers install malware on a system. Hackers disrupt the operations of a system.
The answer to the question – when is hacking illegal? – is simple! When a hacker tries to breach a system without authorization, it is considered unlawful. These kinds of hackers are called Black Hat Hackers.
They are the type of hackers known for their malicious and notorious hacking activities. Initially, hackers used to hack systems to demonstrate their ability to breach them. They used to cut just for fun.
Then, a hack is used to expose someone or leak information. For example, a group of hackers called themselves “Anonymous,” who claimed to have personal information about Donald Trump and were threatening to expose them. They are also threatening to reveal the “crimes” committed by the Minneapolis Police Department (MPD) following the murder of George Floyd.
Another example is when thousands of messages from hacked emails were leaked from Clinton campaign chairman John Podesta’s Gmail account. The list goes on and on, as hackers don’t cut to prove a point or to expose someone. They hack for political reasons, for money, or are driven by some purpose or motive.
These actions are deemed illegal and felonious under the Computer Misuse Act (1990) and other legislative acts such as the Data Protection Act (2018) and the Cybercrime Prevention Act of 2012.
Legal hacking refers to a situation where a hacker is granted permission to access a system or network. This type of hacking is also known as Ethical Hacking.
In a technological era, it has become easier for radical organizations to finance hackers to infiltrate security systems. This has led to a steady increase in cybercrime.
It has become imperative, now more than ever, for companies and governments to legally hack into their operations to discover and fix vulnerabilities and prevent malicious and unlawful hacking from compromising the safety of classified information. This type of hacking is typically performed by either White Hat Hackers or Grey Hat Hackers.
The White Hat Hackers are those hackers who look for backdoors in software when they are legally permitted to do so.
The Grey Hat Hackers are those hackers who are like Black Hat hackers, but do not hack to cause any damage to any organization or people’s personal information or data. Companies or organizations hire them to hack into their computer systems and notify the administration if any vulnerabilities are found. This is done so that these organizations can further secure their networks.
Software companies utilize such hackers and hacking processes.
There are many types of ethical hacking. A few of them are
Disclosing findings to the owner, seeking remediation
Concealing activities, benefitting from stolen information
Examples
Penetration testing, bug bounty programs, security research
Data breaches, identity theft, ransomware attacks
Laws
It may be governed by specific industry regulations (e.g., HIPAA)
Computer Fraud and Abuse Act (CFAA), Digital Millennium Copyright Act (DMCA)
Penalties
May vary depending on the severity of the offense, civil lawsuits
Fines, imprisonment, probation
Types Of Legal Hacking
Penetration testing is a security assessment that simulates an attack on a computer system or network to evaluate its security. The goal of penetration testing is to identify and exploit vulnerabilities in the system so that they can be fixed before malicious actors use them.
Penetration testing can be done in several ways, but it is typically divided into three types:
1. White box testing
White box testing is the most comprehensive penetration testing because the tester has complete information about the system. This allows the tester to simulate a realistic attack and identify the most severe vulnerabilities. However, white box testing can also be the most expensive type of penetration testing because it requires the tester to have a deep understanding of the system.
2. Black box testing
Black box testing is the least comprehensive type of penetration testing because the tester has no prior knowledge of the system. This type of testing is often used to identify vulnerabilities that inexperienced attackers are likely to exploit. However, black box testing can also be the least effective type of penetration testing, as it may not identify the most severe vulnerabilities.
3. Gray box testing
Gray box testing is a combination of white box and black box testing. The tester has limited information about the system, but they have more information than in a black box test.
This type of testing is often used to identify vulnerabilities that attackers with some experience would exploit. Gray box testing is often seen as a good compromise between the comprehensiveness of white box testing and the cost-effectiveness of black box testing.
Types Of Illegal Hacking
Black hat or illegal hackers gain unauthorized access to computers and networks to steal sensitive data and information, hold computers hostage, destroy files, or blackmail their victims using various tools and techniques, not limited to the standard types listed below.
1. Phishing
Phishing techniques trick unsuspecting victims into believing they are interacting with legitimate companies or organizations. It usually comes in the form of email or SMS messages, where victims are convinced to click on a link or download malicious file attachments.
2. Ransomware
Black hat hackers take computer hostages by blocking legal access and demanding ransom from the victims before unblocking access to their computers.
3. Keylogger
Keyloggers are used to log and collect information from unsuspecting victims by remotely recording and transmitting every keystroke they make on their devices, often through the use of keyloggers or spyware.
4. Fake WAP
Hackers use fake Wireless Access Point software to trick their victims into believing they are connecting to a wireless network.
5. Bait and switch
The hacker tricks unsuspecting victims into believing they are clicking on advertisements by purchasing a web space and placing malicious links that download malware to the victims’ computers when they are connected.
Here is a table summarizing the types of illegal hacking:
Type of Hacking
Description
Examples
Phishing
A type of social engineering attack that uses fraudulent emails or text messages to trick victims into clicking on a malicious link or downloading a malicious file.
An email that appears to be from a legitimate bank but is actually from a hacker may request that you click on a link to update your account information.
Ransomware
A type of malware that encrypts a victim’s files and demands a ransom payment to decrypt them.
A hacker may infect your computer with ransomware and then demand a payment of $1,000 to decrypt your files.
Keylogger
A type of software that records every keystroke you make on your keyboard.
A keylogger can be installed on your computer without your knowledge and then used to steal your passwords, credit card numbers, and other sensitive information.
Fake WAP
A fake wireless access point that is configured to appear as a legitimate wireless network.
A hacker may set up a fake WAP in a public place and then use it to steal the login credentials of unsuspecting victims who connect to it.
Bait and switch
It is an attack that tricks victims into clicking on a malicious link by disguising it as an advertisement.
A hacker may purchase a web space and then place a malicious link that appears to be an advertisement for a legitimate product or service. When a victim clicks on the link, they are taken to a malicious website that downloads malware to their computer.
Commonly Used Hacking Techniques
Here are the most common hacking techniques used by hackers:
SQL Injection Attack – SQL stands for Structured Query Language. It is a programming language originally invented to manipulate and manage data in software or databases.
Distributed Denial-of-Service (DDoS) – This technique targets websites to flood them with more traffic than the server can handle.
A keylogger is software that documents the key sequence in a log file on a computer that may contain personal email IDs and passwords. The hacker targets this log to get access to such personal information. That is why the banks allow their customers to use their virtual keyboards.
Yes, hacking is a crime in the United States. Accessing individual PCs and networks without authorization or using illegal means is prohibited by the Computer Fraud and Abuse Act (CFAA). This act makes it unlawful to access someone else’s computer or network without their permission.
Hacking can be accomplished in various ways. It could involve using malicious software, such as viruses or spyware, to access a system or network. It could also include exploiting security flaws or vulnerabilities in the system.
Additionally, it may involve stealing passwords or other login credentials to gain unauthorized access to a system or network.
Since you get the answer to the question – when is hacking illegal? You could face prosecution and severe penalties if caught hacking in the U.S. This could include fines, jail time, and a permanent criminal record.
So, if you’re considering hacking into someone’s system or network, think twice before doing so. It could have severe consequences for you and your future.
Why Is Hacking Considered A Crime?
Hacking is considered a crime if you:
Delete or damage data from the computers of individuals or organizations
You send or aid in sending spam messages
Buy or sell passwords or licenses that can be used to illegally access computers or programs for the purpose of impersonation.
You access data or information from devices and networks without due permission.
You defraud victims using computer and ICT skills.
Access national security information from a government website or networks
Extort computer users
And so much more.
How To Prevent Hackers
Take the following steps to protect yourself from falling victim to black hat hackers
Connecting only to secured WiFi networks. If you have to connect to a public WiFi network, do so using a VPN.
Downloading files and programs from authenticated websites
Not sharing too much information about yourself on social media platforms
Avoiding file-sharing services, including torrenting
Shopping only on verified eCommerce websites
Best Antivirus With Ironclad Protection Against Hackers
Surfshark Antivirus
A 360-degree solution for all threat categories.
A 360-degree solution for all threat categories. Show Less
Heimdal Security
Heimdal Security protects its users from advanced malware attacks by making use of next-generation technology. Your best...Show More
Heimdal Security protects its users from advanced malware attacks by making use of next-generation technology. Your best intelligent threat prevention tool. Show Less
Malwarebytes
Your everyday protection against malware like ransomware, spyware, viruses, and more.
Your everyday protection against malware like ransomware, spyware, viruses, and more. Show Less
Norton Antivirus Plus
Your award-winning cybersecurity solution for complete device protection.
Your award-winning cybersecurity solution for complete device protection. Show Less
Trend Micro Maximum Security
Maximum security for households and office use.
Maximum security for households and office use. Show Less
Conclusion
In this post, we answered the question – when is hacking illegal? And when is hacking legal?
Also, we hope that you have learned that the white hat hackers are ‘the good guys,’ and the black hat ones are the ‘bad guys,’ and what to do to protect yourself from the bad guys online.
Now that you know when hacking is legal or illegal, you should endeavor to take the steps recommended in this article to keep your devices and networks protected from ‘the bad guys who could cost you a lot if your devices or networks eventually get compromised.
In this post, I will show you the role of artificial intelligence in cybersecurity.
In an increasingly interconnected world where our lives are intricately woven with digital threads, the importance of cybersecurity cannot be overstated.
As technology advances, so do the threats posed by cybercriminals, who constantly seek new ways to exploit vulnerabilities and infiltrate networks.
In this relentless battle, a formidable ally has emerged: Artificial Intelligence (AI). With its ability to analyze massive amounts of data, detect patterns, and make intelligent decisions, AI is revolutionizing the field of cybersecurity.
In this comprehensive article, we explore the multifaceted role of AI in fortifying the digital frontier and examine how it empowers defenders to protect against evolving threats proactively.
Overview Of Artificial Intelligence (AI)
Artificial Intelligence (AI) encompasses computer systems and algorithms that simulate human intelligence, enabling them to learn, reason, solve problems, and make decisions.
It involves techniques like Machine Learning, Deep Learning, Natural Language Processing, and Computer Vision. AI finds applications in healthcare, finance, autonomous vehicles, virtual assistants, cybersecurity, and more.
While AI offers tremendous potential to enhance productivity and transform industries, ethical considerations and challenges related to bias, privacy, and workforce impact must be addressed.
The responsible development and deployment of AI will shape the future as intelligent systems become an integral part of our lives and decision-making processes.
Cybersecurity Overview
Cybersecurity is a critical discipline that safeguards digital systems, networks, and sensitive information from unauthorized access, damage, and exploitation.
In an increasingly interconnected world, where cyber threats continue to increase in sophistication and scale, cybersecurity plays a pivotal role in ensuring data and systems’ confidentiality, integrity, and availability. This has led to the uprising of several AI consulting services.
It encompasses a comprehensive range of strategies, technologies, and practices designed to detect, prevent, and respond to cyber attacks, including malware, phishing, data breaches, and insider threats.
With the potential for significant financial, reputational, and operational consequences, organizations across industries must prioritize robust cybersecurity measures to mitigate risks, establish resilient defenses, and protect against ever-evolving threats in the dynamic digital landscape.
AI Security Software
Kaspersky Lab
Kaspersky Antivirus is an antivirus protection solution that protects your computers from virus attacks and other...Show More
Kaspersky Antivirus is an antivirus protection solution that protects your computers from virus attacks and other threats that may result from internet usage or other forms of usage. Show Less
60% OFF
Panda Dome Security Suite
Your advanced protection suite for home and business needs.
Your advanced protection suite for home and business needs. Show Less
66% OFF
Norton 360
Norton 360 is a security suite that utilizes advanced machine learning technology in dealing with all types of malware...Show More
Norton 360 is a security suite that utilizes advanced machine learning technology in dealing with all types of malware including Trojans, ransomware, etc. 100% guaranteed protection against all types of malware and your best bet for privacy protection. Show Less
Avira Prime
Avira Prime is the ultimate security suite for data safety and protection from online threats that gives you full access...Show More
Avira Prime is the ultimate security suite for data safety and protection from online threats that gives you full access to Avira products like antivirus, Phantom VPN, software updater, system optimization tool, and a password manager. Show Less
25% OFF
ESET HOME Security Premium
ESET HOME Security Premium is a fully-fledged security software with amazing features and even a password manager. Smart...Show More
ESET HOME Security Premium is a fully-fledged security software with amazing features and even a password manager. Smart protection for Windows, Mac, and Android devices. Show Less
G DATA Total Security
G DATA Total Security is a complete protection suite that offers total security online and offline. The suite includes...Show More
G DATA Total Security is a complete protection suite that offers total security online and offline. The suite includes an antivirus engine, a password manager, firewall protection, device control, and internet security tools. Intelligent security suite for all device types. Show Less
38% OFF
AVG Ultimate
A combined antivirus plus VPN for total protection.
A combined antivirus plus VPN for total protection. Show Less
50% OFF
McAfee Total Protection
An easy-to-use security suite for data safety and device protection.
An easy-to-use security suite for data safety and device protection. Show Less
53% OFF
Trend Micro Premium Security Suite
Premium security suite for device protection and identity safety.
Premium security suite for device protection and identity safety. Show Less
VIPRE Advanced Security
Best security solution for emerging threats and data safety.
Best security solution for emerging threats and data safety. Show Less
Total AV
Protects your devices and online activities in real-time.
Protects your devices and online activities in real-time. Show Less
PC Matic Security
PC Matic Security is a security software that protects against malware, viruses, and ransomware.
PC Matic Security is a security software that protects against malware, viruses, and ransomware. Show Less
K7 Total Security
K7 Total Security is a comprehensive security software suite that provides protection against malware, viruses, and...Show More
K7 Total Security is a comprehensive security software suite that provides protection against malware, viruses, and other cyber threats, as well as features such as parental controls, data encryption, and a personal firewall. Show Less
F-Secure Total
F-Secure Total is a security suite that provides protection for your devices against malware, viruses, and online...Show More
F-Secure Total is a security suite that provides protection for your devices against malware, viruses, and online threats with features like antivirus, firewall, VPN, and parental control. Show Less
Sophos
Sophos Antivirus is a security software that helps protect computer systems from various malware and online threats.
Sophos Antivirus is a security software that helps protect computer systems from various malware and online threats. Show Less
Surfshark One
Surfshark One is a cybersecurity bundle that provides users with Surfshark VPN, Alert, Search, and Antivirus that...Show More
Surfshark One is a cybersecurity bundle that provides users with Surfshark VPN, Alert, Search, and Antivirus that combines security, privacy, and convenience into one powerful package. Surfshark is an award-winning VPN service for keeping your digital life secure. Show Less
Avast One
Avast One is an all-in-one security suite offering antivirus protection, VPN, performance optimization, and privacy...Show More
Avast One is an all-in-one security suite offering antivirus protection, VPN, performance optimization, and privacy tools for comprehensive digital security. Show Less
The Role of Artificial Intelligence in Cybersecurity
Intelligent Threat Detection and Prevention
One of the primary roles of AI in cybersecurity lies in its capability to identify and neutralize threats. Traditional security measures often rely on known patterns and signatures, making them susceptible to novel and sophisticated attacks.
Conversely, AI excels at recognizing patterns and anomalies within vast datasets, enabling it to detect emerging threats and zero-day vulnerabilities. Machine Learning (ML) algorithms, a subset of AI, can analyze network traffic, user behavior, and system logs to identify malicious activities in real time.
By continuously learning from new data, AI-based systems adapt and enhance their detection capabilities, providing organizations with proactive defense mechanisms.
To identify potential threats, AI-powered threat intelligence platforms can monitor multiple data sources, including public forums, social media, and dark web marketplaces. By analyzing conversations and indicators of compromise, AI can provide early warnings about possible attacks, enabling organizations to take preemptive action.
In the face of cyber threats, time is of the essence. Human analysts often struggle to keep pace with the volume and speed at which attacks occur. Here, AI-driven automated incident response systems play a vital role.
These systems leverage AI’s decision-making capabilities to swiftly identify, contain, and mitigate potential breaches.
By integrating AI into incident response workflows, organizations can reduce response times, minimize damage, and free up human analysts to focus on complex tasks that require their expertise.
AI can also assist in generating real-time alerts, performing forensic analysis, and providing recommendations for remediation.
Furthermore, AI can analyze historical incident data to identify patterns and develop response strategies. This proactive approach allows organizations to anticipate potential attacks and improve their incident response readiness.
Enhanced User Authentication and Access Control
Securing access to sensitive information and systems is critical in preventing unauthorized access and data breaches. Traditional authentication methods like passwords are increasingly vulnerable to sophisticated attacks.
AI offers robust alternatives, including biometric authentication and behavior-based authentication. Facial recognition, fingerprint scanning, and voice recognition systems utilize AI algorithms to accurately authenticate users, making it significantly harder for cybercriminals to impersonate legitimate users.
Additionally, AI-powered systems can continuously monitor user behavior patterns to detect anomalies and potential insider threats, strengthening access control measures.
By analyzing user activities, AI can identify suspicious behavior deviations from standard patterns, such as unusual login locations or access attempts outside regular working hours.
This proactive monitoring helps organizations prevent unauthorized access and identify potentially compromised accounts promptly.
AI’s predictive capabilities are invaluable in identifying potential vulnerabilities and proactively addressing them before they can be exploited.
AI can identify trends and predict future attack vectors by analyzing historical data. This enables organizations to allocate resources effectively, prioritize security measures, and stay one step ahead of cybercriminals.
Moreover, AI can simulate various attack scenarios, allowing defenders to assess their system’s resilience and devise robust defense strategies.
By analyzing attack patterns, AI can generate insights that help organizations strengthen their defenses by identifying weak points and implementing targeted security measures.
While the potential of AI in cybersecurity is immense, it is crucial to address ethical considerations and limitations. Transparency, accountability, and data privacy must be carefully managed to ensure AI is used responsibly.
Bias in AI algorithms, false positives/negatives, and adversarial attacks are among the challenges that must be mitigated. Human oversight and intervention remain vital to ensure AI-driven decisions align with ethical standards.
Frequently Asked Questions About Artificial Intelligence in Cybersecurity
What is the role of AI in cybersecurity?
Artificial Intelligence (AI) strengthens cybersecurity by analyzing massive amounts of data, detecting patterns, and identifying anomalies that may indicate cyber threats. AI helps organizations proactively detect and prevent attacks, including zero-day vulnerabilities, malware, phishing, and other sophisticated exploits. By continuously learning from new data, AI improves threat detection and response over time.
How does AI detect and prevent cyber threats?
AI-powered systems analyze network traffic, user behavior, and system logs to recognize suspicious patterns. Machine Learning (ML) algorithms can identify anomalies in real time, alerting organizations to potential breaches. AI can also monitor external data sources, such as forums and dark web marketplaces, to provide early warnings about emerging threats, enabling proactive security measures.
What is automated incident response and how does AI help?
Automated incident response leverages AI to quickly identify, contain, and mitigate cyberattacks. Unlike traditional responses, which rely solely on human analysts, AI can generate real-time alerts, perform forensic analysis, and recommend remediation steps. This reduces response times, minimizes damage, and frees human analysts to focus on complex decision-making tasks.
How does AI enhance user authentication and access control?
AI improves access security through advanced methods like biometric authentication (facial recognition, fingerprint, and voice scanning) and behavior-based authentication. AI systems can continuously monitor user activity to detect unusual behavior, such as logins from unexpected locations or unusual access patterns, preventing unauthorized access and insider threats.
Can AI predict and prevent future cyberattacks?
Yes. AI’s predictive capabilities allow it to analyze historical attack data, identify trends, and forecast potential vulnerabilities. Organizations can use these insights to proactively strengthen defenses, allocate resources effectively, and simulate attack scenarios to test system resilience. This predictive approach helps prevent attacks before they occur.
Are there ethical concerns with using AI in cybersecurity?
While AI provides powerful security benefits, it raises ethical considerations. Challenges include algorithmic bias, false positives/negatives, data privacy issues, and potential adversarial attacks. Responsible AI deployment requires human oversight, transparency, and accountability to ensure decisions align with ethical standards.
Why is AI important for organizations in the modern digital landscape?
AI enhances cybersecurity efficiency and effectiveness by providing real-time threat detection, automated response, and predictive insights. Organizations leveraging AI can better protect sensitive data, minimize operational disruptions, and stay ahead of evolving cyber threats. Combining AI with human expertise ensures a robust, ethical, and proactive cybersecurity strategy.
Conclusion
Artificial Intelligence has emerged as a transformative force in the realm of cybersecurity. Its ability to detect, prevent, and respond to threats in real time, coupled with predictive capabilities, empowers defenders to safeguard their digital assets with unprecedented efficiency.
By embracing AI as a powerful ally, we can confidently navigate the complex and dynamic world of cybersecurity, knowing that our defenses are fortified by cutting-edge technology and human ingenuity.
However, a balanced approach that combines AI’s strengths with human expertise and ethical considerations is crucial for realizing its full potential and ensuring a secure digital future.
By leveraging AI’s intelligence and augmenting it with human judgment, we can stay one step ahead in the ongoing battle against cyber threats, fortifying the digital frontier for the benefit of individuals, organizations, and society.


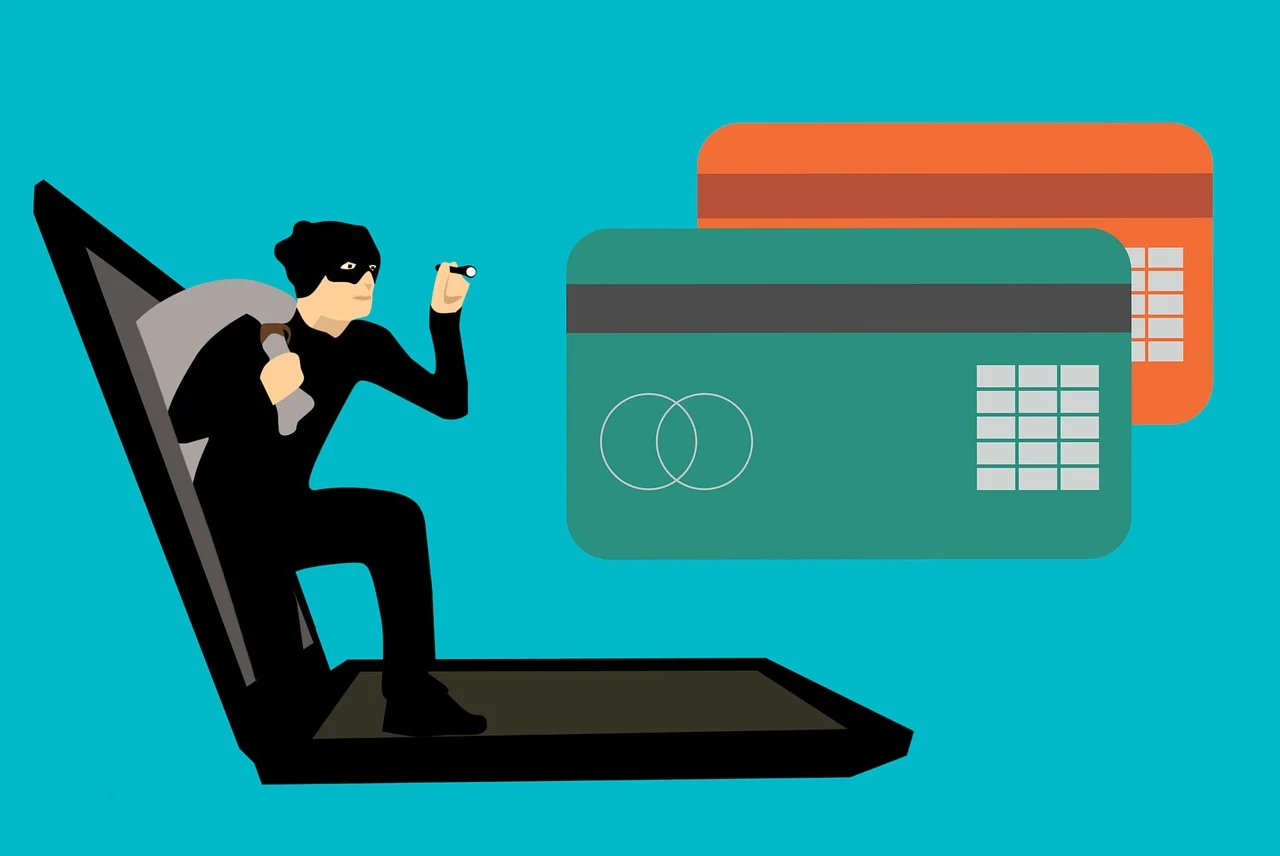

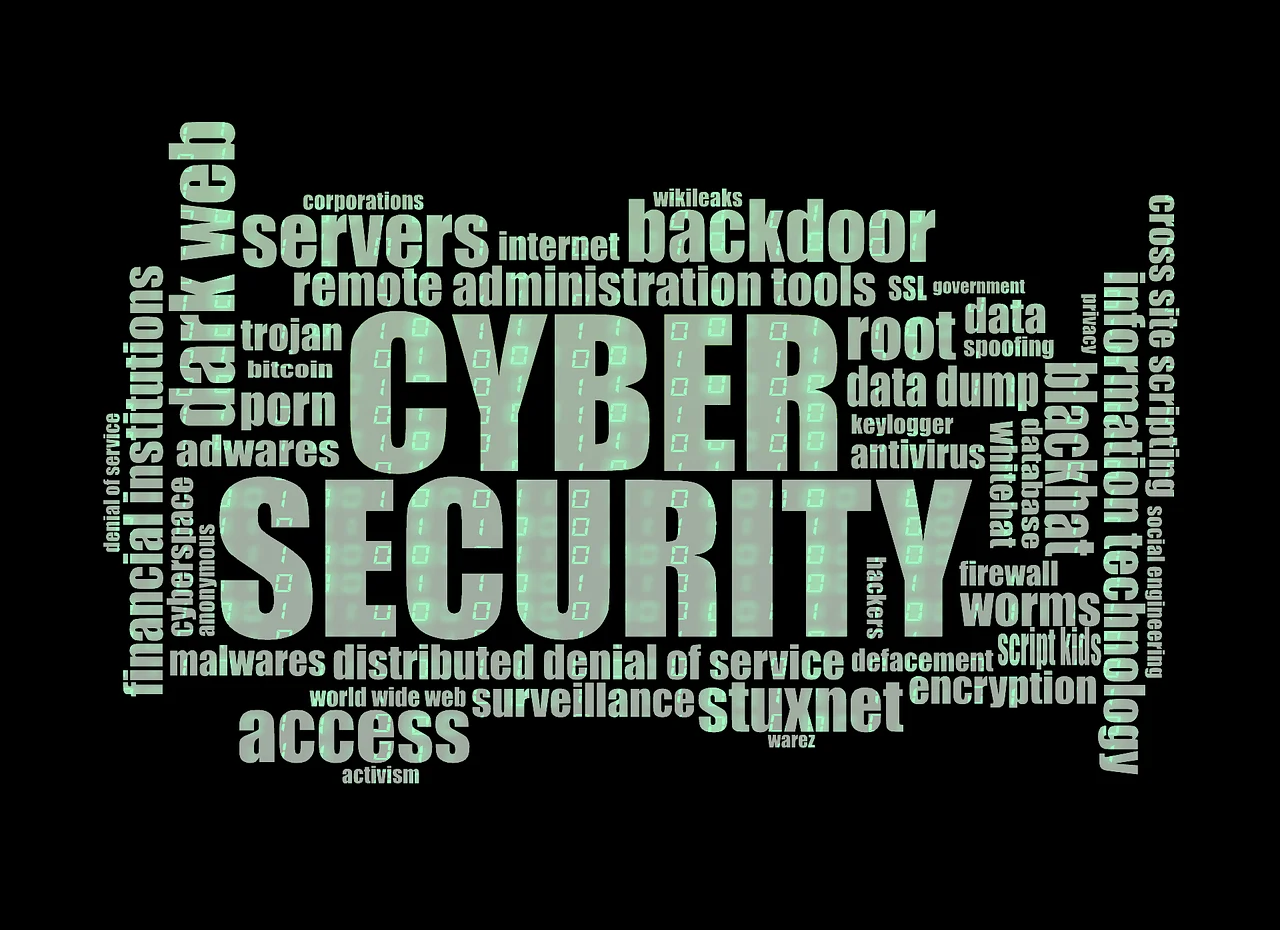


")