

This post will guide you through calibrating your monitor for optimal photo editing.
Photoshop and photo editing are a newfangled trend that is becoming everybody’s favorite. If you are a photography enthusiast, you will notice every detail in the shots, and if you spot any inaccuracy in that shot, it will disappoint you greatly.
Similarly, the pictures you capture and see on your monitor may vary in color saturation, quality, or monochrome tonality because your monitor is not readily photo-calibrated. If you calibrate your monitor, all these blemishes will be gone, and the prints will appear exactly how you captured them.
In simple terms, calibration ensures the accuracy of vibrance, color, contrast, and brightness, making them true and original. However, calibration is not compulsory; you don’t have to do it if you don’t want to.
But, if you are a professional photographer or a beginner, I highly recommend the best monitors for video color grading, which is beneficial for you.
Table of Contents
How To Calibrate Your Monitor For Photo Editing
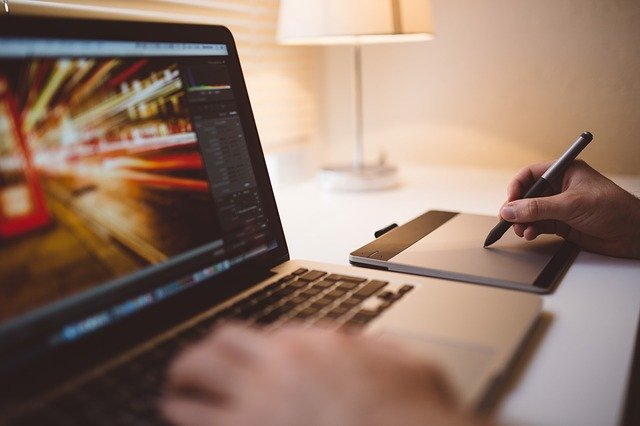
Now that you have understood the purpose of calibration, the question arises: How do you calibrate your monitor? Here’s a step-by-step guide on calibrating a monitor for photo editing.
This will help you understand the process quickly and easily, so you can conduct it on any system and teach your friends as well.
There are three major methods by which you can calibrate your monitor:
- Built-in calibration
- Online source calibration
- Calibration kit
Mac and Windows systems have built-in calibration tools; you can use the free online calibration software to adjust color accuracy and contrast. However, if you want to opt for more high-end settings, a calibration kit is available, and it’s not free.
For Windows Operating System:
Step I– In Windows 10, select Display settings. Once the window opens, scroll into the Related Settings menu and select Color Calibration.
Step II – Once the tool opens, go through each step first, adjusting the gamma, and then adjust brightness, contrast, and color.
Step III – Once all steps are calibrated, click on the current calibration and then Finish. The settings will be saved as an International Color Consortium (ICC) profile. If you still want to make changes, select Cancel and repeat the process.
For Mac Operating System:
Step I– Mac has a calibration tool named Display Calibrator Assistant. Go to Apple Menu, then System Preferences.
Step II: Find the Display option and then select Color Calibration.
Step III – First, adjust the white point using the Native White Point feature, and then perform other calibrations, such as gamma and contrast. Once everything is set up, Apple creates a new profile based on your new settings.
This is how you can perform calibration on your Mac and Windows monitor.
If you want to know which online calibration tool or software is good, check out below:
Online Monitor Test
This website helps you run multiple tests to fix your screen contrast or color. There are various tests, such as the Color Range test (which checks whether your monitor can produce different color gradients), the Trailing test (helps create ghost effects or trial images), and the Homogeneity test (which enhances damaged pixels and fixes faulty backlight bleeding). This is a good tool for all your color calibration settings.
The Lagom LCD Monitor Tool
This is a comprehensive calibration tool. The website includes a series of tests, from correcting contrast to checking the response time of your monitor. Black level, inversion, and color gradient tests are also included.
I would suggest running the tests in the same order they were placed. This way, you can calibrate with ease. Many professional shutterbugs love this calibration tool.
Calibrize Tool
This is the best tool you can find with free online calibration options. It allows you to adjust all color parameters to bring your screen up to an acceptable standard. Starting from contrast, gradient, white point, gamma, and brightness, among other settings, everything can be controlled and adjusted promptly with the Calibrize tool.
This was all about the free tools available online that you can use to calibrate your monitor. Still, if you wish to upgrade your customization or doubt your interpretation of colors and contrast, then you can go for a more professional method, i.e., use a Calibration kit.
If you are a professional photographer, consider investing in calibration kits, as their level of adjustability is truly impressive. X-Rite and Datacolor are the leading brands in this area for accurate upshots. Hence, choose intelligently.
READ ALSO: Phone Photography: Photography Tips On The Phone
How To Calibrate Your Monitor For Photo Editing: Frequently Asked Questions
Why calibrate my monitor for photo editing?
Monitors display colors differently due to variations in manufacturing and settings. Calibration ensures your monitor displays colors as accurately as possible, allowing you to edit photos with confidence that the colors on your screen reflect reality.
How often should I calibrate my monitor?
Monitor calibration ideally should be done regularly, at least every few months. Brightness and color can drift over time, and recalibration helps maintain accuracy.
READ ALSO: Clear VPN Review – The Pros And Cons Of Using VPN Services
What do I need to calibrate my monitor?
There are two main approaches:
- Hardware Calibration: A hardware calibrator is a physical device that appears on your screen, measuring its color output. The software then profiles your monitor for optimal color accuracy. This is generally considered the most accurate method.
- Software Calibration: Some operating systems and graphics card software offer built-in calibration tools. While not as precise as hardware calibration, they can provide a basic level of adjustment.
What are the steps involved in hardware calibration?
The exact steps might vary depending on your calibration device and software, but here’s a general guideline:
- Warm Up Your Monitor: Turn on your monitor and let it run for at least 30 minutes to ensure stable color output.
- Adjust Basic Settings: Manually adjust your monitor’s brightness and contrast to recommended levels (often 100% brightness and 50% contrast for photo editing).
- Software Setup: Follow the instructions for your calibration software to connect the calibrator and initiate the calibration process.
- Calibration Process: The software will guide you through a series of on-screen prompts. The calibrator will measure your monitor’s color output, and the software will create a profile that fine-tunes your monitor’s color settings for accuracy.
Are there any additional tips for monitor calibration?
- Ambient Lighting: Maintain consistent ambient lighting in your editing space. Avoid editing in environments with bright or dim lighting, as this can affect how you perceive colors on your screen.
- Calibrate for Your Workflow: Some calibrators offer different calibration presets tailored to specific editing needs (e.g., photography, design, printing). Select a preset that matches your workflow.
- Regular Maintenance: Dust and grime on your monitor screen can affect color accuracy. Regularly clean your screen with a soft microfiber cloth for optimal performance.
By calibrating your monitor and maintaining a consistent editing environment, you can ensure your photos appear as intended across different displays and when printed.
READ ALSO: Image to Video AI: What It Is and How to Use It Effectively
What color temperature should a monitor be for photo-editing?
A standard color temperature of 6500 Kelvin (K) is ideal for photo editing. This approximates natural daylight, providing a neutral color reference point. Some editing software adjusts’s white point to match, which can be adjusted during calibration.
How do I know if my screen is calibrated correctly?
There are a few ways to get a sense of your monitor’s calibration:
- Visual Inspection: Compare identical images across different devices (calibrated printer, another calibrated monitor). Look for consistency in color reproduction.
- Online Tests: Several websites offer online calibration tests with sample images. While not a substitute for professional calibration, these tests can indicate if your monitor has significant color casts.
How do I manually calibrate your screen?
Most operating systems have built-in display calibration tools, but their effectiveness can be limited. Here’s a breakdown of manual calibration (consult your monitor’s manual for specific instructions):
- Warm-Up Time: Allow your monitor to run for at least 30 minutes to ensure consistent color output.
- Access Display Settings: Locate your display settings menu through your operating system or graphics card control panel.
- Adjust Brightness and Contrast: Adjust the brightness and contrast settings to comfortable levels without losing detail in highlights or shadows.
- Color Settings: Look for options to adjust color temperature (target 6500K) and possibly RGB (Red, Green, Blue) gain settings. Make small adjustments and compare the display to reference images or a calibrated screen.
Important Note: Manual calibration can be time-consuming and requires a good eye for color accuracy.
For professional-grade color accuracy, consider investing in:
- Hardware Calibration Tools: Dedicated calibration devices with software can create detailed color profiles for your specific monitor, achieving a more precise calibration than manual methods.
- Professional Calibration Services: Some monitor manufacturers or color specialists offer professional calibration services for the most accurate results.
By calibrating your monitor, you can ensure that the colors displayed on your screen accurately represent the original photos, allowing you to make informed editing decisions and achieve faithful color reproduction in your final edits.
Conclusion
Monitor calibration makes a significant difference in the quality of photos displayed on the screen. So, if you have calibrated your monitor properly, stay untroubled about your printouts and screen display! They will be good and crisp, just as you envisioned.
If you don’t feel like doing all the tweaks on your own, you can rely on outsourced retouching services and have your photos quickly improved by professionals.
Interesting Posts
- Oh Boy! Stellar Black Friday Deal
- How To Edit Videos Like A Pro
- How IT Professionals Can Monitor Remote Employees’ PCs Without Violating Privacy Laws
- iMyFone Video Editor Review
- The Ultimate Revelation Of Best Apps For Parental Control
- 10 Most Secure Operating Systems (#8 Is Our Favourite)
- How To Get Into Video Editing
- Image Sharpening: Best Tools For Enhancing Your Pictures
About the Author:
Marie Beaujolie is a computer network engineer and content writer from Paris. She is passionate about technology and exploring new ways to make people’s lives easier. Marie has been working in the IT industry for many years and has a wealth of knowledge about computer security and best practices. She is a regular contributor for SecureBlitz.com, where she writes about the latest trends and news in the cyber security industry. Marie is committed to helping people stay safe online and encouraging them to take the necessary steps to protect their data.
Chandra Palan is an Indian-born content writer, currently based in Australia with her husband and two kids. She is a passionate writer and has been writing for the past decade, covering topics ranging from technology, cybersecurity, data privacy and more. She currently works as a content writer for SecureBlitz.com, covering the latest cyber threats and trends. With her in-depth knowledge of the industry, she strives to deliver accurate and helpful advice to her readers.


